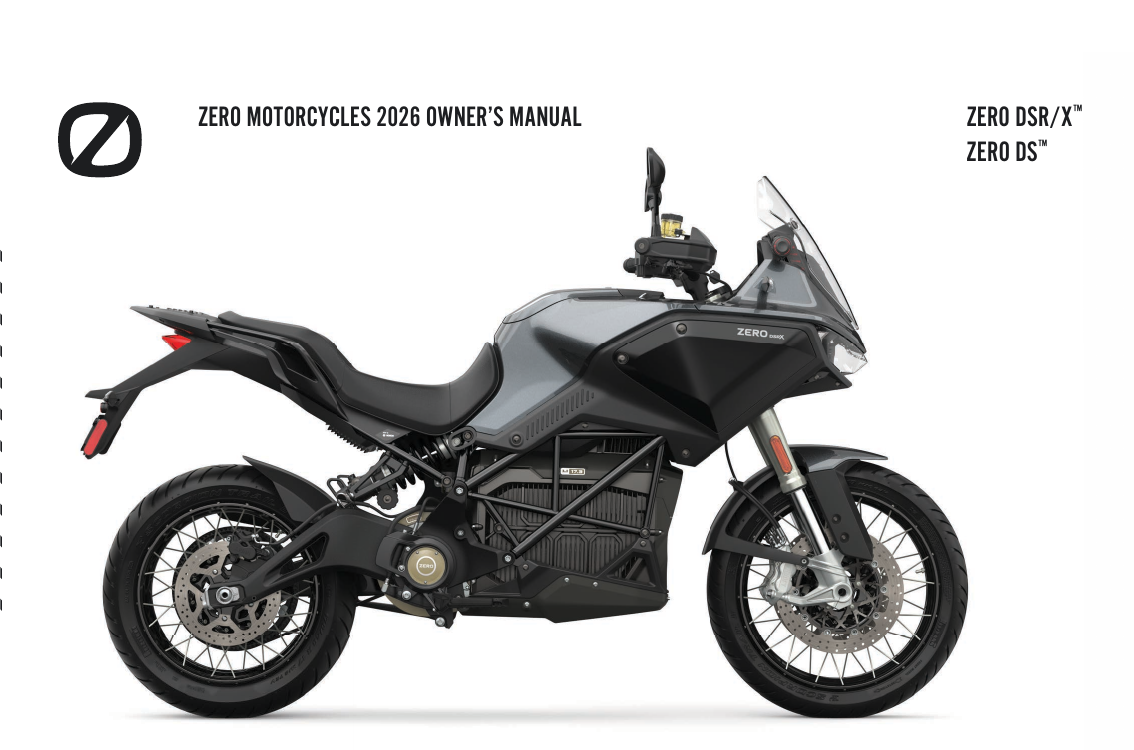
Zero DSR/X: complete owner's guide
The Zero DSR/X is Zero Motorcycles' flagship electric adventure-tourer, built on the FST Adventure platform with the Z-Force 75-10X motor, a 17.3 kWh power pack, and the Cypher III operating system. This guide collects what a DSR/X owner needs in one reference: the numbers behind the bike, how the dash and ride modes behave, how to charge and store the battery for maximum life, the full maintenance schedule with torque values, and what every warning light and fault code means. It is written for the 2024/2025 EU and North American DSR/X and is not a substitute for the official Zero manual or a qualified dealer's advice.
Full specifications
Full Zero DSR/X specifications from the official manual (2026 model year).
- Motor
- Z-Force 75-10X enhanced thermal efficiency, passively air-cooled, interior permanent magnet AC motor
- Peak power
- 75 kW (100 hp)
- Peak torque
- 229 Nm
- Top speed
- 180 km/h
- Regenerative braking
- Off-throttle (deceleration) regen: engages automatically when the throttle returns to the fully closed position while the motorcycle is in motion; controller provides regenerative deceleration; dash Regen/Torque meter shows applied regen
- Transmission
- Clutchless Direct Drive
- Max capacity
- 17.3 kWh
- Nominal capacity
- 15.1 kWh
- Chemistry
- Lithium-Ion (Z-Force)
- Onboard charger
- 6.6 kW
- Standard charge time
- Mode 2 (230V): 4.9 hours (100% charged) / 3.9 hours (95% charged)
- City
- 288 km
- Highway
- 172 km
- Curb weight
- 247 kg
- Seat height
- 828 mm
- Wheelbase
- 1525 mm
- Rake
- 25°
- Trail
- 109 mm
- Front
- Showa 47 mm big piston, separate function forks with adjustable spring preload, compression, and rebound damping
- Front travel
- 190 mm
- Rear
- Showa 46 mm piston, piggy-back reservoir shock with adjustable tool-less spring preload, compression, and rebound damping
- Rear travel
- 190 mm
- Front brake
- Bosch Advanced MSC with Combined Braking (eCBS), Vehicle Hold Control (VHC) and Off-Road mode, dual J-Juan radial-mounted 4-piston calipers, 320 x 5 mm disc
- Rear brake
- Bosch Advanced MSC with Combined Braking (eCBS), Vehicle Hold Control (VHC) and Off-Road mode, J-Juan single piston floating caliper, 265 x 4.5 mm disc
- ABS
- Bosch ABS with Advanced MSC (motorcycle stability control)
- Front tyre
- Pirelli Scorpion Trail II 120/70-19 · 38 psi (262 kPa)
- Rear tyre
- Pirelli Scorpion Trail II 170/60-17 · 38 psi (262 kPa)
- Final drive
- Gates Carbon Drive Moto X9 belt, 25 mm wide
- Belt / chain
- Gates Carbon Drive Moto X9™ belt, 25 mm wide
- Front pulley
- 22 T
- Rear sprocket
- 90 T
- Final drive ratio
- 90T/22T
- Headlight
- LED
- Taillight
- LED (Brake/Tail LED)
- Turn signals
- LED (LED Turn Signal Replacement documented; an incandescent bulb replacement procedure is also listed)
- DRL
- LED
Ride modes
How each selectable mode changes acceleration, top speed and regenerative braking.
| Mode | Character | Top speed | Regen | Best for |
|---|---|---|---|---|
| Eco | Softer, reduced acceleration; green accent screen. Ideal when you want gentle throttle response. | Capped at 75 mph (120 km/h) | Strong — increased regen when the throttle is released | Newer riders, relaxed riding, and extending range |
| Standard | Balanced torque and power — more than Eco, less than Sport; light-blue accent screen. | — | Moderate — more than Rain, less than Eco and Sport | Everyday all-round riding |
| Sport | Significantly faster acceleration than the other modes; light-orange accent screen. | — | Reduced — less regen than Eco when the throttle is released | Advanced riders wanting maximum acceleration |
| Rain | Reduced acceleration and the lowest peak torque of the factory modes; blue accent screen; tuned for low-traction surfaces. | Capped at 100 mph (160 km/h) | Lowest of all factory modes (to protect grip in the wet) | Wet, slippery or low-traction conditions |
| Canyon | Sport-level acceleration but with stronger engine-braking feel; dark-orange accent screen. | — | Strong — increased regen on throttle release (like Sport acceleration with more regen) | Spirited riding on twisty roads |
| Custom | App-configurable mode; ships identical to Standard and takes the Canyon slot once created. Rider can pick the accent colour (light blue, blue, green, light orange, dark orange). | — | User-defined via the Zero smartphone app | A personalised setup tailored via the Zero app |
Charging times
Charging scenarios and how long each takes to fill the pack.
| Method | Input | Time to full | Notes |
|---|---|---|---|
| Household outlet (Level 1 / Mode 2) | 110-120 V AC, 12-16 A circuit via portable EVSE cable | 11.6 h to 100% (11.1 h to 95%) | Slowest option; a standard domestic socket in Type 1 / J1772 markets. |
| Domestic 230 V socket (Mode 2, EU) | 230 V AC, ~10 A single-phase via portable EVSE cable | 4.9 h to 100% (3.9 h to 95%) | EU travel-cable charging into a home socket; single-phase limits the rate to about 3.3 kW. |
| AC charging station, single-phase (Mode 3, EU) | 230 V AC, 16/32 A single-phase, Type 2 (Mennekes) | 4.9 h to 100% (3.9 h to 95%) | Single-phase wallbox or public AC point; below the DSR/X's 6.6 kW maximum rate. |
| AC charging station, 3-phase (Mode 3, EU) | 230 V AC three-phase, Type 2 (Mennekes) | 2.7 h to 100% (2.0 h to 95%) | The DSR/X needs a 3-phase point to reach its full 6.6 kW charge rate. |
| Level 2 charging station (Type 1 markets) | 208-240 V AC, 12-80 A, J1772 (Type 1) | 2.7 h to 100% (2.2 h to 95%) | Full 6.6 kW on a split-phase 240 V home or public station. |
Dashboard warning lights
What each dashboard indicator means and what to do when it lights up.
The DSR/X instrument display centers on a circular Charge Indicator (state of charge) ringed by four customizable gauge quadrants (range, SOC, Trip A/B, etc.), with a large digital speedometer, the active ride mode, traction-control and ABS modes, odometer, clock and a Regen/Torque meter sharing the screen. Warning tell-tale lights and Bluetooth, cruise-control and heated-grip icons sit around the edges.
Looking for a specific error? Browse the full Zero error-code catalog →
Fault & diagnostic codes
Diagnostic codes the display and app can show, with what each means and the fix.
58 diagnostic codes for the Zero DSR/X
| Code / fault | Meaning | What to do |
|---|---|---|
| 1 · High Throttle Fault | Throttle input fault. | Contact your dealer; the bike is in reduced-torque mode. |
| 2-3 · Torque Fault | Torque fault; on code 2, no valid torque input from the MSC (Bosch stability unit). | Contact your dealer. |
| 4 · Throttle Fault | Throttle fault. | Contact your dealer. |
| 5 · CAN Fault | CAN bus communication fault. | Contact your dealer. |
| 6-7 · Mode Fault | Ride-mode data fault. | Reinstall the ride modes through the smartphone app. |
| 8 · Firmware Update Failure | Firmware update failed. | Try the update again later. |
| 9 · Controller Fault | Motor controller fault. | Contact your dealer. |
| 10 · Firmware Update Failure | Update failed — insufficient cellular signal. | Retry later with better signal. |
| 11 · Right Turn Signal Short Fault | Right turn-signal wiring short. | Have the right turn signal inspected. |
| 12 · Traction Control Fault | Traction control fault. | Contact your dealer. |
| 13 · Traction Control Fault | Traction control communication error. | Contact your dealer. |
| 14 · Right Turn Signal Bulb Out Fault | Right turn-signal circuit open (bulb out). | Repair or replace the right turn signal. |
| 15 · Stability Control Fault | Stability control fault. | Contact your dealer. |
| 16 · Headlight Short Fault | Headlight wiring short. | Have the headlight circuit inspected. |
| 17 · Headlight Bulb Out Fault | Headlight circuit open (bulb out). | Repair or replace the headlight. |
| 20 · Brake Bulb Short Fault | Brake-light wiring short. | Have the brake light inspected. |
| 21 · Brake Bulb Out Fault | Brake-light circuit open. | Replace the brake-light bulb. |
| 22 · 12V Battery Heater Short Fault | 12 V battery heater wiring short. | Contact your dealer. |
| 23 · 12V Battery Heater Disconnect Fault | 12 V battery heater circuit open. | Contact your dealer. |
| 24 · 12V Battery Reversed | 12 V battery installed in reverse. | Reinstall the 12 V battery with correct polarity. |
| 25 · 12V Battery Low | 12 V battery low. | Charge or replace the 12 V battery. |
| 26 · DC-DC Low | DC-DC converter voltage low. | Contact your dealer. |
| 27-28 · 12V Low Voltage Fault | 12 V system fault. | Contact your dealer. |
| 29 · HVIL Open Fault | Loose connection detected in the power-pack harness (high-voltage interlock open). | Contact your dealer. |
| 30 · Self Test Fail | Power-up self-test failed. | Disconnect the charger, key off for 2 minutes, then try again. |
| 31 · Battery Module Ineligible | Battery module not eligible. | Disconnect the charger, key off for 2 minutes, then try again. |
| 32 · Contactor Open | Battery contactor open. | Disconnect the charger, key off for 2 minutes, then try again. |
| 33 · Battery Module Awaiting Connection | Battery module awaiting connection. | Disconnect the charger, key off for 2 minutes, then try again. |
| 34 · Battery Module Connection Retries Fault | Battery module connection retries exceeded. | Disconnect the charger, key off for 2 minutes, then try again. |
| 35 · Pilot Signal Invalid Fault | Charging-station pilot-signal error. | Disconnect the charging pistol, wait 2 minutes, then retry. |
| 36 · Region Invalid Fault | Charger region uninitialized. | Contact your dealer. |
| 37 · Charger Not Connected | CAN communication fault with the charger. | Check the charger connection or contact your dealer. |
| 38 · Charger Fault | Charger fault. | Disconnect the charging pistol, wait 2 minutes, then retry. |
| 39 · Immobilizer Disconnected | CAN communication fault with the immobilizer. | Contact your dealer. |
| 40 · Immobilizer Fault | Immobilizer fault. | Try reprogramming the keys. |
| 41 · Motor High Temperature | Motor over temperature. | Performance is reduced; let the bike cool. |
| 42 · Heated Grip Fault | Heated grip fault. | Have the heated grips checked. |
| 43 · Isolation Fault | High-voltage isolation fault. | Refer to your dealer. |
| 44-48 · Memory Fault | Memory fault. | Key off for 2 minutes, then try again. |
| 49 · Battery Module Incompatible | Installed battery is not compatible with this motorcycle. | Install a compatible pack or contact your dealer. |
| 50 · Battery Module Features Not Supported | Module is newer or older than the bike; some features may be unavailable. | Update firmware or contact your dealer. |
| 51 · Battery Pack Voltage Too High | Pack voltage too high — charging paused. | Wait; contact your dealer if it persists. |
| 52 · Battery Pack Voltage Too Low | Pack voltage too low. | Refer to your dealer. |
| 53 · Power Pack Voltage Low | Power-pack voltage low. | Charge the motorcycle. |
| 54 · Battery Voltage Low | Battery voltage low. | Charge the motorcycle. |
| 55 · Battery Temperature High | Battery too hot. | Performance is reduced and charging may be disabled; let it cool. |
| 56 · Battery Temperature Low | Battery too cold. | Performance is reduced and charging may be disabled; warm it up. |
| 57 · Controller High Temperature | Controller over temperature. | Performance is reduced; let it cool. |
| 58 · Battery Fault | Battery fault. | Key off for 5 minutes, then try again. |
| 59 · Heated Grip Fault | Heated grips disconnected. | Reconnect or check the heated grips. |
| 60 · CCS Converter Fault | CCS DC-DC converter not connected or not functioning. | Contact your dealer (fast-charge system). |
| 61 · CCS Interface Fault | CCS interface unit not connected or not working properly. | Contact your dealer. |
| 62 · CCS Communication Fault | CCS communication fault with the charging station. | Try another station or contact your dealer. |
| 63 · Left Turn Signal Short Fault | Left turn-signal wiring short. | Have the left turn signal inspected. |
| 64 · Left Turn Signal Bulb Out Fault | Left turn-signal circuit open (bulb out). | Repair or replace the left turn signal. |
| 65 · Charger Fan Fault | Charger fan is experiencing a fault. | Contact your dealer. |
| 66 · Ignition Fault | Ignition connection loss. | Contact your dealer. |
| 67-99 · Motorcycle Fault | General motorcycle fault. | Refer to your dealer. |
Maintenance schedule
Official service intervals and the belt / fluid replacement points.
| Interval | Service tasks |
|---|---|
| Initial 100 mi (160 km) service | Drive belt tension, front brake lever pivot, throttle grip, kickstand pivots/switch, drive motor commissioning |
| Initial 600 mi (1,000 km) service | Wheel bearings, drive belt tension, steering bearings, front brake lever pivot, kickstand switch, drive motor commissioning |
| Every 8,000 mi (13,000 km) or 12 months | Replace brake fluid, wheels/wheel bearings, drive belt tension, steering bearings, chassis fasteners |
| Every 16,000 mi (25,000 km) | Repack steering bearings with all-purpose grease |
| Every 24,000 mi (37,000 km) | Replace drive belt, check swingarm pivot bearings |
See this schedule on a distance axis →What a noise between services means →
Torque specifications
Key fastener torque values from the service manual.
| Fastener | Torque |
|---|---|
| Rear axle nut | 75 lb·ft (102 Nm) |
| Belt tension adjustment bolts (left/right) | 4 lb·ft (5 Nm) |
| Power cable to BCB main BUS bolts | 10 lb·ft (13.5 Nm) |
| Service cover bolts | 2.5 lb·ft (3.5 Nm) |
| Front cover bolts (T25) | 2.5 lb·ft (3.5 Nm) |
| Rear cover bolts (T25) | 2.5 lb·ft (3.5 Nm) |
| Hand guard mount bolt | 12 lb·ft (16 Nm) |
| Inner top cover bolts | 12 in·lb (1.4 Nm) |
Zero DSR/X overview: motor, battery, range and weight at a glance
The Zero DSR/X is a full-size electric adventure motorcycle powered by the passively air-cooled, interior-permanent-magnet Z-Force 75-10X motor and a 900-amp three-phase controller with regenerative deceleration. It makes 100 hp (75 kW) peak and 229 Nm (169 lb-ft) of torque from zero rpm, giving a top speed of 112 mph (180 km/h) and a sustained top speed of about 100 mph (161 km/h). Because the powertrain is air-cooled rather than liquid-cooled, its 30-minute continuous rating is a lower 48 hp (36 kW). The bike is built for real-world touring rather than sustained track laps, and it manages heat through a thermal strategy rather than a radiator.
Energy comes from a Z-Force lithium-ion 'Intelligent Power Pack' rated at 17.3 kWh maximum capacity (15.1 kWh nominal usable). Zero quotes a city range of 179 miles (288 km) and a high-speed highway range of about 107 miles (172 km), with a typical recharge costing roughly $1.93 / €3.55 in electricity, the equivalent of nearly 400 MPGe. The pack is engineered to last the life of the bike, with an estimated life to 80% capacity of around 241,000 miles (388,000 km) of city use.
The DSR/X rolls on tubeless spoked wheels (a 19-inch front and 17-inch rear) with long-travel Showa suspension (190 mm at each end) and Bosch's Advanced Motorcycle Stability Control. Power reaches the rear wheel through a clutchless direct drive and a maintenance-friendly Gates Carbon Drive belt, so there is no gearbox to shift and no chain to oil.
- Motor: Z-Force 75-10X, air-cooled permanent-magnet AC; 100 hp (75 kW) peak, 229 Nm (169 lb-ft) peak torque
- Top speed: 112 mph (180 km/h) max, ~100 mph (161 km/h) sustained; 900A controller with regen
- Battery: 17.3 kWh max / 15.1 kWh nominal Z-Force pack; 6.6 kW onboard charger (100-240V AC input)
- Range: 179 mi (288 km) city, 107 mi (172 km) high-speed highway; pack life ~241,000 mi (388,000 km) to 80%
- Chassis: 1,525 mm (60 in) wheelbase, 25 deg rake, 109 mm (4.3 in) trail, 190 mm suspension travel front and rear
- Seat height: 828 mm (32.6 in); curb weight: 247 kg (545 lb); max carrying capacity: 252 kg (555 lb)
- Drive: clutchless direct drive with Gates Carbon Drive Moto X9 belt (25 mm wide, 22T motor / 90T wheel sprockets)
- Wheels/tyres: 3.00x19 front & 4.50x17 rear; Pirelli Scorpion Trail II 120/70-19 and 170/60-17
Controls, TFT dashboard and warning indicator lights
Everything on the DSR/X is navigated with a single thumb-operated MODE button on the left switchgear, using four gestures: a quick Tap (scroll), a Slide held ~0.5 seconds, a Hold of ~1 second, and a Press inward (to select). Tapping left scrolls up a menu, tapping right scrolls down or selects, sliding left steps back a menu (or opens heated-grip control from the riding screen), sliding right opens the traction-control menu, and holding left returns you to the riding screen from anywhere. To reach the main Menu (where Preferences, Battery, Performance and Data live), put the Motor Stop switch to OFF or the kickstand down, then press and hold MODE for about a second.
The colour TFT dash centres on a circular charge indicator and digital speedometer whose surrounding ring is divided into twelve 10-mph (20 km/h) segments up to 120 mph (240 km/h). Four customisable quadrant gauges around it can each show State of Charge, estimated range, battery or motor temperature, instant or trip efficiency, RPM, Trip A/B, or ambient temperature. A REGEN/TORQUE bar shows how much torque is going to (or being recovered from) the rear wheel. Battery and motor temperatures are shown as colour bars, not numbers: the battery bar runs blue (cold) through white (normal) to yellow and red as it heats, and the motor bar is white up to 244 F (118 C) then red beyond.
A row of tell-tale warning lights sits across the dash. Learn these before your first ride. Some are informational and some demand you stop and call a dealer.
- Armed/Live indicator: the bike is live and will move if you open the throttle (key ON, Motor Stop to Run, charger unplugged, kickstand up)
- ABS light: normal at key-on; must go out once both wheels pass 3 mph (5 km/h). If it stays lit while moving, ABS is faulted or was disabled
- Traction Control (MTC) light: lit steadily when traction control is switched OFF; blinks when it is actively intervening
- Charge/Plug icon: flashes while charging, then glows solid when full before the dash powers down
- Temperature warning (red): a powertrain component has hit its thermal limit and power will be trimmed until it cools. This is not a fault
- Check Engine Light (CEL): a diagnostic error has forced permanent torque reduction; it comes with an error code. See a dealer
- 12-volt battery light: a fault in the 12V system or DC-DC converter
- High-beam (blue) and green left/right turn-signal arrows complete the cluster
Ride modes, throttle response and regenerative braking
The DSR/X leaves the factory with five ride modes (ECO, STANDARD, SPORT, RAIN and CANYON), each with its own dash accent colour and its own blend of acceleration, top-speed cap and regenerative braking. Using the Zero smartphone app you can build CUSTOM modes; one custom profile can be loaded onto the bike at a time and it replaces CANYON. To change mode, ride with the kickstand up and Motor Stop in Run, press MODE for a second, tap left/right to the mode you want, then slide-and-hold MODE left for one second to apply it. You can switch on the move, but if the throttle is open the change waits until you close it.
Throttle and regen are linked through a 'zero-torque point' just off the fully closed position. Twist toward you to accelerate; release fully and the motor switches to regenerative braking, feeding energy back into the pack and giving a noticeable drag that slows the bike. If you want to coast freely, for example cresting a hill, hold the throttle at that zero-torque point rather than snapping it shut. The exact zero-torque point shifts with speed and with the selected ride mode.
How much regen you feel depends heavily on the mode: ECO and CANYON deliver strong regen for one-pedal-style riding and range, SPORT eases off it for a more free-rolling feel, and RAIN deliberately uses the least regen so a closed throttle cannot upset traction on a slippery surface.
- ECO (green): softened acceleration, top speed capped at 75 mph (120 km/h), strong regen, best for range and newer riders
- STANDARD (light blue): balanced everyday power and regen, more punch than ECO but less than SPORT
- SPORT (light orange): fastest acceleration and full power, reduced regen, for experienced riders
- CANYON (dark orange): SPORT-level acceleration but with increased regen when you close the throttle
- RAIN (blue): lowest peak torque of all modes, top speed capped at 100 mph (160 km/h) and the least regen, tuned for low grip
- CUSTOM: built in the app (accent colour of your choice), loaded in place of CANYON
- Cruise control works between 18 mph (30 km/h) and 89 mph (144 km/h); long-press to arm, short-press to set the current speed, brake or short-press to cancel
Battery, range and charging: connectors, times and battery care
The DSR/X carries a 6.6 kW onboard charger and charges through a single socket under the tank-panel cover: an IEC 62196 Type 2 (Mennekes) connector on EU bikes or a Type 1 (J1772) connector in North America. The DSR/X charger draws its full 6.6 kW from a three-phase supply: plugged into an ordinary single-phase point it will still charge, but at a reduced rate. From a 230V three-phase source the pack reaches 95% in about 2.0 hours (2.7 hours to 100%); on single-phase 230V or a portable EVSE lead it takes about 3.9 hours to 95% (4.9 hours to full). In North America a 208-240V Level 2 station gives roughly 2.2 hours to 95%, while a domestic 110-120V Level 1 outlet needs about 11 hours.
Battery longevity is mostly about how you charge and store, not how you ride. Lithium cells age from calendar time and from sitting at a high state of charge, especially when hot, so the goal is to avoid parking the pack full and warm. Use the Charge Target feature (set on the dash from 30% to 95% in 5% steps, or scheduled via the app) to cap charging to what you need. If you ride often but never use much of the pack, skip topping to 100%; if you ride weekly or less, charge the evening before you ride rather than right after. The pack will not charge below 32 F (0 C) or above 122 F (50 C) of internal temperature, and after aggressive riding it may need ~30 minutes to cool before it accepts a charge.
For longer trips the DSR/X includes Extended Range Charging, a Cypher III+ feature (standard on this model) that tops the pack to a displayed '110%' for about 10% extra capacity. It must be re-selected each time you want it, and you must override or disable any Charge Target to allow it.
- Connector: Mennekes Type 2 (EU) / J1772 Type 1 (NA); always use a UL- or CE-marked EVSE lead
- Fastest charge: three-phase 230V ~2.0 h to 95%; single-phase/portable ~3.9 h to 95%
- Never store below 30% SoC: deep discharge damages the pack and voids the warranty. If a fully flat pack occurs, recharge within 24 hours
- First five cycles: run below 5% then charge above 95% to calibrate the displayed SoC (it does not change actual capacity)
- Only charge with the onboard Zero charger or approved Zero accessory chargers, in a well-ventilated spot away from combustibles and rain
- Charge Target adjustable 30-95%; defaults to 100% if not enabled; app scheduling takes priority over the target
- 1Open the charging-connector cover on the tank panel
- 2Plug the Type 2 (EU) or Type 1 (NA) connector into the onboard charger socket
- 3The dash switches to the charging screen showing SoC %, time remaining, charging amps, range gained and kilowatts
- 4The plug/charge icon flashes while charging and glows solid when complete, after which the dash powers down
- 5Once charged, unplug the charger so the pack enters low-drain hibernate mode
Break-in and your first rides on a new DSR/X
An electric drivetrain has no engine to run in, but a new DSR/X still benefits from a gentle first few hundred miles while you learn the bike and the chassis beds in. Ride conservatively at first to get a feel for how far the instant torque, regenerative braking and considerable weight carry you, then adjust your style once you know your commute and real-world range. The most important 'break-in' task is a service one: the initial 100-mile (160 km) and 600-mile (1,000 km) checks are when the drive belt settles and needs its tension verified.
Brakes and tyres deserve deliberate bedding. New pads or discs give very little bite for the first few stops, so build friction gently at low speed before relying on them. Zero's recommended bedding routine is to brake from 40 mph (64 km/h) down to about 10 mph (16 km/h) without locking the wheels or triggering ABS and without coming to a full stop, repeating 15-20 times for the front and rear brakes separately, then taking a 10-mile (16 km) cruise to let everything cool. New tyres are similarly slippery until scrubbed in, so take corners progressively for the first tankful of riding.
Finally, calibrate the fuel gauge. For the first five charge cycles let the pack run down below 5% and then charge it back above 95%; this teaches the battery management system to report State of Charge accurately and does not harm the cells.
- Ride gently at first to learn range, throttle and regen behaviour before pushing on
- Have the initial 100 mi (160 km) and 600 mi (1,000 km) services done: chiefly belt tension, plus wheel/steering bearings at 600 mi
- Bed the brakes: 15-20 gentle 40-to-10 mph stops per brake, then a 10-mile cool-down ride
- Scrub in new tyres with progressive cornering for the first rides
- Run 5 full discharge-to-recharge cycles to calibrate the SoC display
Maintenance schedule, drive belt care and torque specs
With no oil, coolant, clutch, spark plugs or exhaust, the DSR/X needs far less servicing than a combustion bike, but it is not maintenance-free. Zero recommends a professional service every 12 months regardless of mileage, and where a chart lists both time and distance you follow whichever comes first. The power pack itself needs charging but no internal maintenance, and only an authorised technician should ever open it.
The belt-driven final drive is the item owners interact with most. Keep the Gates Carbon Drive belt clean of grit, grease and oil (wash it with mild soap and water), inspect it for cuts, cracking, edge bevelling or exposed cords, and check its tension at every service interval. Correct tension matters: too loose and the belt can 'ratchet' over the sprocket teeth, damaging the tensile cords; too tight and it drags and wears the drivetrain. Measure tension on the lower belt span midway between the sprockets, either with a Gates tension tester (target 170 +/- 44 lb / 77 +/- 20 kg) or the free Gates Carbon Drive phone app (target 62-84 Hz for the 11 mm-pitch belt). The belt is a scheduled replacement at 24,000 miles (37,000 km).
Brakes use DOT 4 fluid, which must be replaced every 12 months because it absorbs moisture over time. Check the reservoir levels frequently and never let them fall below the LOWER mark; replace pads once either pad drops below 0.04 in (1 mm), and replace a rotor if the front falls under 4.5 mm or the rear under 4.0 mm.
- Every ride: brake fluid levels, brake operation, tyre condition & cold pressure, belt condition/tension, throttle return
- Initial 100 mi (160 km): check belt tension, kickstand switch, motor commissioning
- Initial 600 mi (1,000 km): wheel bearings, belt tension, steering bearings, front brake-lever pivot, kickstand switch
- Every 8,000 mi (13,000 km) or 12 months: replace brake fluid; check wheels, bearings, belt, steering, chassis fasteners, forks, shock, throttle, kickstand
- Every 16,000 mi (25,000 km): repack steering-head bearings with grease
- Every 24,000 mi (37,000 km): replace drive belt; check swingarm-pivot bearings
- Belt tension: 62-84 Hz (Gates app) or 170 +/- 44 lb (Gates tester) on the 11 mm-pitch belt
- Common torques: rear axle nut 102 Nm (75 lb-ft), front axle 54 Nm (40 lb-ft), rear sprocket bolts 35 Nm (26 lb-ft), front caliper mounts 41 Nm (30 lb-ft), triple-clamp & axle pinch bolts 22 Nm (16 lb-ft), handlebar clamp 26 Nm (19 lb-ft)
- 1Remove the key from the switch and lift the rear fender arm
- 2Loosen the rear axle nut
- 3Turn the left and right adjuster bolts a quarter-turn at a time, equally, until tension is in range
- 4Torque the axle nut to 75 lb-ft (102 Nm)
- 5Test ride, then recheck and readjust the belt tension if needed
Tyres, brakes and adjustable Showa suspension
The DSR/X runs Pirelli Scorpion Trail II tyres (120/70-19 front and 170/60-17 rear), and both should sit at 38 psi (262 kPa) checked cold, meaning the bike has not been ridden for at least three hours. Correct pressure is a safety item: under-inflation is a leading cause of tyre failure and also upsets the ABS and traction control, which compare front-to-rear wheel speeds. Replace a tyre once tread drops below 1/16 in (1.6 mm) or if you find cuts, bulges, cords or uneven wear, and only ever fit Zero-approved radials of the same make and type on both wheels.
Braking is handled by a Bosch Advanced MSC system with combined braking (eCBS), Vehicle Hold Control and an Off-Road mode. Up front are twin radial-mounted four-piston J-Juan calipers on 320 mm discs; the rear is a single-piston floating caliper on a 265 mm disc. Vehicle Hold Control is useful when touring: at a stop with the kickstand up, give the front lever or rear pedal a firm squeeze and the system holds rear-brake pressure so the bike will not roll. It releases when you ride away, drop the kickstand, or after three minutes.
Suspension is fully adjustable Showa at both ends: 47 mm big-piston separate-function forks (190 mm travel) and a 46 mm piggy-back reservoir shock with tool-less preload (190 mm travel). Both are sprung from the factory for a 200 lb (90 kg) rider, which places each tyre about a third of the way through its travel. Set sag to match your weight and gear: the target total sag is 2.50 in (64 mm) at each end. If your measured sag exceeds that, add preload; if it is less, back preload off.
- Tyre pressure: 38 psi (262 kPa) front and rear, measured cold (unridden 3+ hours)
- Front brakes: dual J-Juan 4-piston radial calipers, 320 x 5 mm discs; rear: single-piston floating caliper, 265 x 4.5 mm disc
- Vehicle Hold Control holds the bike on hills; releases on throttle, kickstand-down, or after 3 minutes
- Forks: left leg = preload + rebound; right leg = compression. Factory: preload Min +2.0 turns, rebound & compression Max -2.0 turns
- Shock: factory preload Min +22 clicks, rebound Max -11 clicks, compression Max -19 clicks
- Fork oil: SS-47, 0.67 qt (635 cm3) per leg; recommended sag 2.50 in (64 mm) front and rear
- Brake pad limit 0.04 in (1 mm); rotor limits 4.5 mm front / 4.0 mm rear
Storage, transport and cold-weather winter care
For long-term parking of 30 days or more, the single most important rule is to leave the charger connected and never store the bike below 30% charge. After 30 days plugged in, the battery management system automatically enters long-term storage mode and drains the pack to a healthy ~80% for storage. Keep the bike somewhere cool (the recommended storage range is 50-95 F, or 10-35 C) and out of direct sun, since heat plus a high charge accelerates cell ageing. If you have an approved LiFePO4 trickle charger, put it on the 12-volt battery to keep the bike's electronics happy without diverting resources from the main pack.
Winter storage in an unheated garage is fine provided the temperature never drops below -31 F (-35 C); below that the pack can suffer accelerated permanent decay. As long as it stays plugged into AC above that threshold the BMS protects the cells, and it will not charge below 32 F (0 C). Cold riding costs range (expect up to a 30% temporary reduction near freezing versus a mild day, plus a slight power and top-speed dip in extreme cold), but it causes no lasting harm. Avoid riding when the pack itself is below 23 F (-5 C), and if you do, put it on the charger (above 0 C) as soon as you get home.
When transporting the DSR/X, never tow it or drag it on one wheel. Zero requires both wheels to be on a trailer or transport device, as rolling the motor can damage the powertrain. To bring the bike out of storage, disconnect the charger, turn the key ON, raise the kickstand and set the Run/Stop switch to Run to exit storage mode, then charge for at least 24 hours to restore full cell balance.
- Storing 30+ days: leave the charger connected; the BMS drains to ~80% after 30 days
- Never store below 30% SoC; ideal storage temperature 50-95 F (10-35 C), out of direct sunlight
- Winter: safe down to -31 F (-35 C) if left plugged in; pack won't charge below 32 F (0 C)
- Cold range loss up to ~30% near freezing; don't ride with pack below 23 F (-5 C)
- 12V battery has a built-in heater; below 41 F (5 C) it may disable the bike for 1-15 minutes while it warms
- Transport with both wheels secured on a trailer. Never tow the bike on its wheels
- Check stored SoC on the dash every 30 days in case a breaker or GFCI has tripped the charger
Warning lights, dash error codes and troubleshooting
The DSR/X separates transient system notifications from stored error codes. Notifications appear along the bottom of the dash for about five seconds when something non-critical happens (messages like 'Power Pack is Too Hot to Charge', 'Charging Delayed or Paused by Charge Station', '12V Battery Heating up', 'Vehicle Hold Control Active' or 'Motorcycle Tipped Over. Key-cycle to reactivate Throttle') and are not saved afterwards. Error codes, by contrast, are logged: the dash stores up to five, newest first, and you retrieve them through Menu > Data > Errors, where each can be viewed and cleared.
Some faults illuminate the Check Engine Light (CEL) and put the bike into permanent torque reduction until serviced. These are the ones to take seriously. The code list is extensive; common themes include throttle and torque faults (codes 1-4), CAN communication faults (5, 37, 39), ride-mode faults that ask you to reinstall modes via the app (6-7), lighting short/open faults (11, 14, 16-17, 20-21, 63-64), 12-volt and DC-DC issues (24-28), battery-module and contactor faults (29-34, 49-50), charging and CCS faults (35-38, 60-62, 65), thermal derates (41, 55-57), and an isolation fault (43) that needs a dealer.
For many charging and module faults the correct first step is simple: unplug the charger, turn the key off for two to five minutes, then try again. If a fault persists, or any CEL code appears, ride gently and book a dealer visit, because the high-voltage system has no user-serviceable parts.
- Codes 30-34 (self-test, contactor, module connection): disconnect charger, key OFF 2 minutes, retry
- Codes 25-28 (12V/DC-DC low): a 12V or converter issue; if it recurs, see a dealer
- Code 29 (HVIL Open): a loose connection in the power-pack harness, needing dealer service
- Codes 35, 38, 62 (pilot/charger/CCS): a charging-station or charge-fault; unplug the pistol, wait 2 minutes, retry
- Codes 41, 55-57 (high temperature): the bike is protecting itself; power returns once cooled
- Code 43 (Isolation Fault) and codes 67-99 (Motorcycle Fault): refer to a dealer
- 'Motorcycle Tipped Over' notification: stand the bike upright and do one full key cycle to re-enable the throttle
- 1Put the Motor Stop switch to OFF (or drop the kickstand) and press MODE for ~1 second to open the Menu
- 2Tap MODE right to highlight Data, then press to enter
- 3Tap right to highlight Errors and press to open the error list (up to five, newest at top)
- 4Tap left/right to a code and press to view its detail
- 5With the Clear bar highlighted, press MODE to clear the error; hold MODE left to exit to the riding screen
Safety, ABS off-road modes, keys and legal essentials
The DSR/X is a fast, heavy machine, so treat it with respect. Wear a regionally approved helmet and full protective gear on every ride, never let an untrained rider use it, and remember the near-silent drivetrain makes it easy to forget the bike is 'live'. Always set the key and Motor Stop switch to OFF and drop the kickstand when you are not actively riding, and toggle Motor Stop off before pushing the bike. The high-voltage system is dangerous: high-voltage cables are wrapped in orange insulation and must never be cut, probed or modified, and only trained Zero technicians should touch high-voltage components. In a crash, avoid all orange wiring; for a fire, knock down flames with a Class D dry-powder extinguisher before dousing with water.
For off-road riding the bike offers dedicated modes. The traction system has STREET, SPORT, RAIN, OFFROAD and OFF settings; OFFROAD disables rear-wheel ABS and permits more rear slip for loose surfaces. Zero recommends switching the ride mode to STANDARD before selecting OFFROAD (ABS follows automatically). Be aware that turning ABS off also disables Drag Torque Control, and the bike will then brake like a machine with no electronic aids, and stopping distances become longer and less predictable.
On the practical-legal side, the DSR/X is designed to carry a rider and one passenger up to a combined 252 kg (555 lb) of rider, passenger, cargo and accessories, and Zero does not permit towing anything. Guard your keys: the bike comes with two black transponder keys (up to five can be programmed) and one yellow programming key. Never start the bike with the yellow key, keep it off the motorcycle, and store it safely. It cannot be replaced, so losing it means replacing the key switch and locks. The 17-digit VIN is stamped on the frame's head tube and must not be altered.
- Always wear approved helmet and gear; set key + Motor Stop OFF and kickstand down when not riding
- Never cut, probe or modify orange high-voltage cabling; no user-serviceable HV parts
- OFFROAD traction mode disables rear ABS and allows more slip. Switch to STANDARD ride mode first
- Disabling ABS also disables Drag Torque Control; expect longer, less predictable braking
- Max carrying capacity 252 kg (555 lb), rider plus one passenger; towing is prohibited
- Two black transponder keys (max 5) plus one irreplaceable yellow programming key. Keep the yellow key safe and off the bike
- Warranty: 5 years including the Z-Force power pack (from in-service date); a pack is replaced only if capacity falls more than 20% below nominal
Frequently asked
What is the range of the Zero DSR/X on a full charge?
Zero rates the DSR/X at 179 miles (288 km) of city range and about 107 miles (172 km) of high-speed highway range on its 17.3 kWh pack. Real-world range depends on speed, temperature, elevation, tyre pressure and payload, so expect less at sustained motorway speeds and more in slower, mixed riding.
How long does it take to charge a Zero DSR/X?
With its 6.6 kW onboard charger the DSR/X reaches 95% in about 2.0 hours (2.7 hours to 100%) on a 230V three-phase supply, or roughly 3.9 hours to 95% on single-phase 230V or a portable EVSE lead. In North America a 208-240V Level 2 station takes about 2.2 hours to 95%, while a 110-120V household outlet needs around 11 hours.
What tyre pressure does the Zero DSR/X use?
Both tyres take 38 psi (262 kPa), checked cold, meaning the bike has not been ridden for at least three hours. The DSR/X runs Pirelli Scorpion Trail II tyres, 120/70-19 front and 170/60-17 rear. Correct pressure is critical because under-inflation also disrupts the ABS and traction control.
What charging connector does the Zero DSR/X have?
EU DSR/X bikes use an IEC 62196 Type 2 (Mennekes) socket and North American bikes use a Type 1 (J1772) socket. The DSR/X draws its full 6.6 kW from a three-phase point; on single-phase it still charges but more slowly. Always use a UL- or CE-marked EVSE charging lead.
How should I charge my DSR/X battery to make it last?
Avoid leaving the pack full and hot. Use the Charge Target (30-95%) to cap charging to what you need, don't top to 100% unless you'll ride soon, and charge the evening before a ride rather than right after. Never store below 30%, unplug once charged so the pack hibernates, and for the first five cycles run below 5% then charge above 95% to calibrate the gauge.
What are the Zero DSR/X ride modes and how do they differ?
There are five factory modes. ECO softens power, caps top speed at 75 mph and maximises regen; STANDARD is the balanced everyday setting; SPORT gives full power with less regen; CANYON offers SPORT-level acceleration with stronger regen; and RAIN limits torque and regen for low grip. You can also build CUSTOM modes in the app, which replace CANYON on the bike.
How often does the Zero DSR/X need servicing?
Zero recommends a professional service every 12 months regardless of mileage, plus early belt/bearing checks at 100 and 600 miles. Major service items fall every 8,000 miles (13,000 km) or 12 months, including a DOT 4 brake-fluid change, with steering-bearing repacking at 16,000 miles and a drive-belt replacement at 24,000 miles (37,000 km).
What does the Check Engine Light mean on a Zero DSR/X?
The Check Engine Light (CEL) means the diagnostic system has detected a fault and put the bike into permanent torque reduction; it appears with a stored error code. View codes via Menu > Data > Errors. For charging or module faults, unplug and cycle the key off for a few minutes; if the CEL remains or returns, ride gently and see a dealer, as the high-voltage system has no user-serviceable parts.
Can you ride and charge the Zero DSR/X in cold weather?
Yes, but expect up to a 30% temporary range loss near freezing and avoid riding with the pack below 23 F (-5 C). The battery will not charge below 32 F (0 C), and if it's near freezing the 12V heater may disable the bike for 1-15 minutes while it warms. Winter storage is safe down to -31 F (-35 C) as long as the bike stays plugged into AC power.
How do I set the suspension sag on a Zero DSR/X?
The Showa forks and shock come sprung for a 200 lb (90 kg) rider. Measure sag with you seated in full gear and aim for a total sag of 2.50 in (64 mm) at each end. If sag is greater than that, add preload; if less, reduce it. The left fork adjusts preload and rebound, the right fork adjusts compression, and the shock has tool-less preload plus rebound and compression clickers.
What is the yellow key on the Zero DSR/X for?
The yellow key is a programming key your dealer needs to add or replace the black transponder keys that start the bike (up to five can be programmed). Never start the motorcycle with the yellow key, keep it off the bike in a safe place, and pass it to the next owner if you sell. It cannot be replaced, and losing it means replacing the key switch and locks.
How much does the Zero DSR/X weigh and how much can it carry?
The DSR/X has a curb weight of 247 kg (545 lb) and a maximum carrying capacity of 252 kg (555 lb), which covers the combined weight of rider, passenger, cargo and any accessories. It is designed for a rider plus one passenger, and Zero does not permit towing. The bike must be transported with both wheels on a trailer.
This guide is an independent synthesis of the official Zero Motorcycles owner & service manuals, rewritten for clarity. Figures are stated as published for the latest model year and may vary by year, region and options. Always follow your bike's own manual and a qualified technician for service. Zero Motorcycles is a trademark of its respective owner.