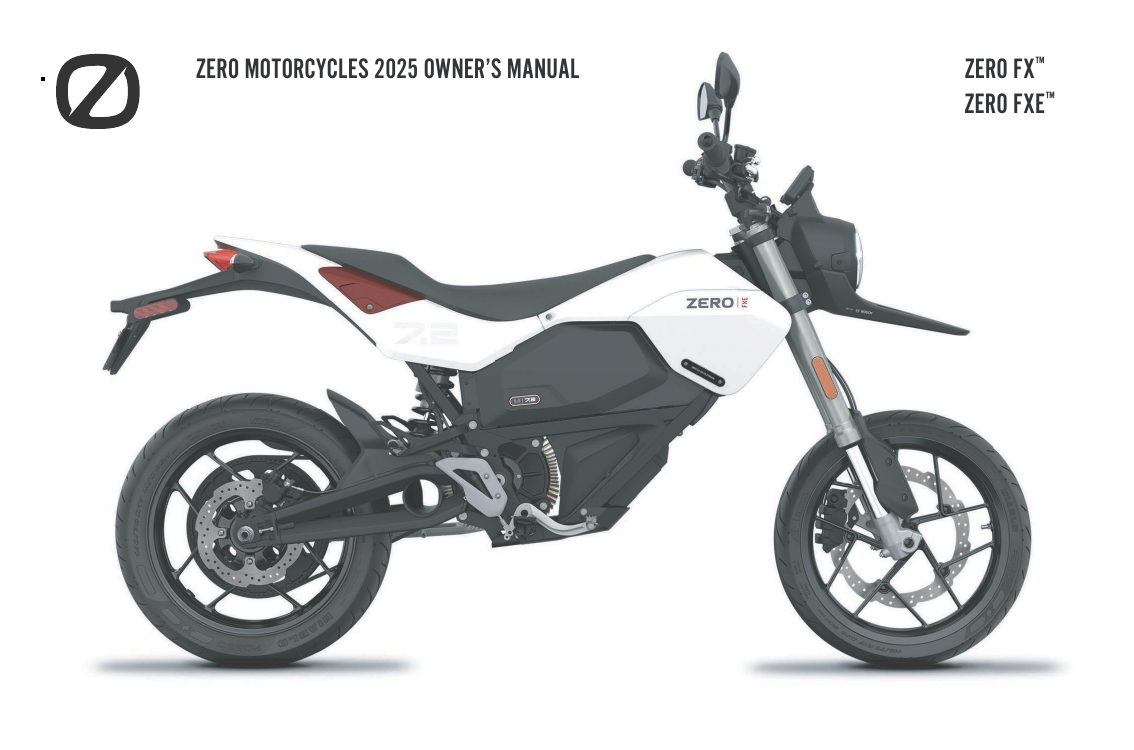
Zero FXE: complete owner's guide
The Zero FXE is the street-focused member of Zero's lightweight X platform: a nimble, 140 kg naked supermoto built around an integrated 7.2 kWh Z-Force power pack, a passively air-cooled brushless motor and full Bosch ABS. It shares its running gear with the dual-sport FX but rides on 17-inch street wheels, sport tyres and a bigger front brake disc. This guide reorganises the factory documentation into a reference for FXE owners: the main numbers (charge times, tyre pressures, torque values, service intervals), how the dash and ride modes behave, how to charge and store the battery for maximum life, and what every warning light and fault code means. Figures are given for the 2025 European and Rest-of-World specifications; always confirm details against your own bike's paperwork, as Zero updates hardware and firmware over time.
Full specifications
Full Zero FXE specifications from the official manual (2025 model year).
- Motor
- Z-Force 75-5 passively air-cooled, high-efficiency magnet, brushless motor (radial flux interior permanent magnet)
- Peak power
- 34 kW (46 hp)
- Peak torque
- 106 Nm
- Top speed
- 137 km/h
- Regenerative braking
- Regenerative deceleration via the high-efficiency 550 amp 3-phase brushless controller; dashboard REGEN meter shows torque/power fed back into the battery during braking. No adjustable regen levels described.
- Transmission
- Clutchless Direct Drive
- Max capacity
- 7.2 kWh
- Nominal capacity
- 6.3 kWh
- Chemistry
- Z-Force Li-Ion Intelligent Modular
- Onboard charger
- 0.65 kW
- Standard charge time
- 9.7 hours (100% charged) / 9.2 hours (95% charged)
- City
- 169 km
- Highway
- 95 km
- Combined
- 106 km
- Curb weight
- 140 kg
- Seat height
- 836 mm
- Wheelbase
- 1422 mm
- Rake
- 24.4°
- Trail
- 71 mm
- Front
- Showa 41 mm inverted cartridge forks, with adjustable spring preload, compression, and rebound damping
- Front travel
- 178 mm
- Rear
- Showa 40 mm piston, piggy-back reservoir shock with adjustable spring preload, compression, and rebound damping
- Rear travel
- 227 mm
- Front brake
- J-Juan asymmetric dual piston floating caliper, 320 mm OD x 5 mm thick disc
- Rear brake
- J-Juan single piston floating caliper, 240 mm OD x 4.5 mm thick disc
- ABS
- Bosch Gen 9
- Front tyre
- Pirelli Diablo Rosso II 110/70-R17 M/C 54H · 32 psi (221 kPa)
- Rear tyre
- Pirelli Diablo Rosso II 140/70-R17 M/C 66H · 34 psi (234 kPa)
- Final drive
- 90T/18T, Poly Chain HTD Carbon belt
- Belt / chain
- Poly Chain HTD Carbon belt
- Front pulley
- 18 T
- Rear sprocket
- 90 T
- Final drive ratio
- 90T/18T
- Headlight
- LED
- Taillight
- LED
- Turn signals
- Incandescent, amber RY10W (10W)
- DRL
- Separate running light present (FX-only; 'Running Light Bulb Replacement - FX', bulb-replaceable); bulb type/wattage not specified
Ride modes
How each selectable mode changes acceleration, top speed and regenerative braking.
| Mode | Character | Top speed | Regen | Best for |
|---|---|---|---|---|
| ECO | Softened, reduced acceleration and lower power delivery for smooth, gentle throttle response. | Reduced (capped below Sport; no figure given) | Increased — strongest regenerative braking on throttle release. | New riders, gentle city riding, and extending range. |
| SPORT | Full, significantly faster acceleration and maximum power; sharp throttle response. | Up to 137 km/h (85 mph) — full speed | Reduced — least regenerative braking on throttle release. | Advanced riders wanting maximum performance. |
| CUSTOM | User-defined acceleration/power set through the Zero smartphone app. | Configurable via the app | Configurable via the app | Riders who want to tailor throttle, top speed, and regen to preference. |
Charging times
Charging scenarios and how long each takes to fill the pack.
| Method | Input | Time to full | Notes |
|---|---|---|---|
| Standard on-board charging (Level 1 wall outlet) | 110 V AC or 220 V AC household outlet — 650 W integrated onboard charger | 9.7 h to 100% / 9.2 h to 95% | 120 V vs 240 V does not change the time (~10 h in mild temperatures); onboard charger draws up to 14 A. Will not charge below 0°C (32°F) or above 50°C (122°F). |
| On-board charger plus supplemental accessory quick charger | Onboard charger plus one or more Zero accessory chargers (up to 4) | 4.1 h to 100% / 3.6 h to 95% | Supplemental accessory chargers cut charge time by up to 75%; actual time varies with the number of chargers used. |
| Level 2 public station (J1772) | J1772 Level 2 charging station via optional Zero adapter (PN 10-03267) | Same as the standard cord (~9.7 h to 100%) | The J1772 adapter alone does not shorten charge time unless a supplemental accessory charger is also used. |
Dashboard warning lights
What each dashboard indicator means and what to do when it lights up.
A round central digital speedometer (km/h or mph) is ringed by a 12-segment analog speed arc (each segment ~20 km/h / 12.5 mph), with the selected performance mode (ECO/SPORT/CUSTOM) shown at its center. A customizable Display A (Range, Motor RPM, Trip 1, Error code) sits above and Display B (Trip 2, Instant/Average/Lifetime energy, Motor temp) below, alongside a charge-level bar (state-of-charge or time-to-full), torque/power Output and Regen meters, a clock and odometer, and a row of warning tell-tales across the top; SEL and ADJ buttons operate the menus.
Looking for a specific error? Browse the full Zero error-code catalog →
Fault & diagnostic codes
Diagnostic codes the display and app can show, with what each means and the fix.
64 diagnostic codes for the Zero FXE
| Code / fault | Meaning | What to do |
|---|---|---|
| 0 · No Error | No fault detected; normal operation. | None. |
| 1 · High Throttle | Throttle was open/applied at power-up, or the throttle circuit is bad. | Close the throttle at start-up; verify throttle action and check its connection. |
| 2 · Motor Temperature Warning Stage 1 | Motor is warming toward its thermal limit (early stage). | Informational; ease off power to let it cool. |
| 3 · Motor Temperature Warning Stage 2 | Motor has reached its thermal limit; power is being reduced. | Reduce speed/power and let the motor cool. |
| 4 · Controller Temperature Warning Stage 1 | Motor controller warming toward its thermal limit. | Informational; ease off power. |
| 5 · Controller Temperature Warning Stage 2 | Controller at its thermal limit; power reduced. | Reduce power and let it cool. |
| 6 · BMS Throttle Enable Wire Error | Fault in the BMS throttle-enable wiring. | Contact your Zero dealer for service. |
| 7 · Low Battery Voltage | Power pack voltage/charge is low. | Recharge the power pack before riding. |
| 8 · High Battery Temperature Status | Power pack is running hot. | Let the pack cool before riding or charging. |
| 9 · Low Battery Temperature Status | Power pack is too cold. | Warm the pack; charge only above 0°C (32°F). |
| 10 · Battery Temperature Warning Stage 1 | Pack temperature approaching its limit. | Informational; moderate use. |
| 11 · Battery Temperature Warning Stage 2 | Pack at its temperature limit; performance limited. | Let the pack cool; if it persists, contact your dealer. |
| 12 · Reserve Partition Warning | Operating in the battery's reserve range. | Recharge soon. |
| 13 · Reserve Switch Warning | Reserve-capacity switch is active. | Recharge soon. |
| 14 · Safety Override Active | A safety interlock/override is active. | If it persists, contact your Zero dealer. |
| 15 · Charger Attached But Not Charging | Charger is connected but no charge is flowing. | Check the AC outlet and charger; see charging troubleshooting. |
| 16 · CIB Contactor Compromised | Main contactor fault detected. | Contact your Zero dealer for service. |
| 17 · Charger Error | Onboard or accessory charger fault. | Reset the charger; if it persists, contact your dealer. |
| 18 · Battery Temperature Sensor Fault | A pack temperature sensor has failed. | Bike will run but needs service — contact your dealer. |
| 19 · High Charge Current | Charge current is above the expected level. | Informational; if persistent, contact your dealer. |
| 20 · BMS Low Isolation | Reduced electrical isolation in the pack. | Contact your Zero dealer for service. |
| 21 · Board Vpack Error | Control board read an abnormal pack voltage. | Contact your Zero dealer for service. |
| 22 · Board Temperature Error | Control board over-temperature. | Let it cool; if it persists, contact your dealer. |
| 23 · Post Error | Power-on self-test error. | Contact your Zero dealer for service. |
| 24 · Startup Error | Fault during system start-up. | Cycle the key; if it persists, contact your dealer. |
| 25 · Contactor Open Warning | Main contactor open when it should be closed. | Contact your Zero dealer for service. |
| 26 · Contactor Welded Error | Main contactor stuck/welded closed. | Contact your Zero dealer for service. |
| 27 · Precharge Error | Controller pre-charge failed. | Contact your Zero dealer for service. |
| 28 · BMS Isolation Fault | Isolation fault detected in the power pack. | Contact your Zero dealer for service. |
| 29 · BMS Isolation Danger | Severe isolation fault in the power pack. | Stop use and contact your Zero dealer immediately. |
| 30 · BMS CAN Error | BMS lost CAN-bus communication. | Contact your Zero dealer for service. |
| 31 · SEVCON CAN Error | Motor controller lost CAN-bus communication. | Contact your Zero dealer for service. |
| 32 · Module Variance Too High | Battery modules are too far out of balance. | Contact your Zero dealer for service. |
| 33 · SEVCON Error Turn Off | Controller fault forced a shutdown. | Contact your Zero dealer for service. |
| 34 · Charge Error Turn Off | Charging fault forced a shutdown. | Contact your Zero dealer for service. |
| 35 · Loopback Error | Missing second pack module or blanking plug. | Install the second module, or insert the blanking/connector plug. |
| 36 · Board 5V Error | Internal 5V supply fault. | Contact your Zero dealer for service. |
| 37 · Board 3.3V Error | Internal 3.3V supply fault. | Contact your Zero dealer for service. |
| 38 · Idle Turn Off | System shut down after being idle. | Cycle the key to restart. |
| 39 · Throttle Out Of Range Disable | Throttle signal out of range; throttle disabled. | Verify throttle action and check its connection. |
| 40 · BMS Throttle Enable Wire Disable | BMS disabled the throttle via the enable wire. | Contact your Zero dealer for service. |
| 41 · Low Battery Voltage Disable | Pack too low; throttle disabled. | Recharge the power pack. |
| 42 · High Battery Temperature Status Disable | Pack too hot; throttle disabled. | Let the pack cool; if it still shows after cooling, contact your dealer. |
| 43 · Low Battery Temperature Status Disable | Pack too cold; throttle disabled. | Warm the pack before riding. |
| 44 · Kill Switch Disable | Motor stop (kill) switch is in the OFF position. | Set the motor stop switch to ON. |
| 45 · Kickstand Switch Disable | Kickstand is down. | Raise the kickstand. |
| 46 · BMS Charger Connected Disable | Riding disabled while the charger is connected (BMS). | Disconnect the charger before riding. |
| 47 · MBB Charger Connected Disable | Riding disabled while the charger is connected (MBB). | Disconnect the charger before riding. |
| 48 · SEVCON Startup Disable | Motor controller failed to start. | Contact your Zero dealer for service. |
| 49 · Contactor Open Disable | Contactor open; drive disabled. | Contact your Zero dealer for service. |
| 50 · BMS Self-Test Error | BMS self-test failed. | Contact your Zero dealer for service. |
| 51 · BMS Self-Test Warning | BMS self-test raised a warning. | If it persists, contact your dealer. |
| 52 · Reserve Partition Disable | Reserve-partition limit reached; drive disabled. | Recharge the power pack. |
| 53 · BMS Internal Disable | BMS internal fault disabled the drive. | Cycle the key or reset the BMS with its button; if it persists, contact your dealer. |
| 54 · Internal Disable Error | Internal fault disabled the system. | Contact your Zero dealer for service. |
| 55 · Internal Fault Error | Internal fault detected. | Cycle the key or reset the BMS; if it persists, contact your dealer. |
| 56 · Monolith Not Connected | Power pack not detected/connected. | Check the pack connection; if it persists, contact your dealer. |
| 57 · Module Did Not Connect | A pack module failed to connect. | May only require recharging; otherwise contact your dealer. |
| 58 · BMS Sensor Warning | A BMS sensor reported a warning. | If it persists, contact your dealer. |
| 59 · BMS System Warning | General BMS system warning. | If it persists, contact your dealer. |
| 60 · Bike Configuration | Bike configuration mismatch/issue. | Contact your Zero dealer for service. |
| 61 · Tipover Detected | Tip-over sensor triggered; drive disabled. | Upright the bike and cycle the key OFF then ON to reset the sensor. |
| 62 · Target Magnet Warning | Speed-sensor target magnet warning. | If it persists, contact your dealer. |
| 63 · Target Magnet Disable | Speed-sensor target magnet fault; disabled. | Contact your Zero dealer for service. |
Maintenance schedule
Official service intervals and the belt / fluid replacement points.
| Interval | Service tasks |
|---|---|
| Every ride | Check brake fluid level (front & rear); check front & rear brake operation, fluid leakage and pads; check tyres (tread depth, damage, air pressure); inspect drive belt for damage/cracking; check belt & chain sprockets; check drive-chain slack/alignment/condition (lubricate after exposure to water); check front fork and rear shock for operation/oil leakage; check throttle grip operation and free play |
| Initial 100 mi (160 km) - first service / break-in | Check drive belt tension |
| Initial 600 mi (1,000 km) - second service | Check drive belt tension; check wheel bearings; adjust and thoroughly lubricate drive chain; check steering bearings for looseness; apply grease and check front brake lever pivot shaft; check kickstand switch operation; drive motor commissioning and timing |
| Every 8,000 mi (13,000 km) or 12 months | Replace brake fluid (front & rear); check wheels for run-out/damage; check wheel bearings; check drive belt tension; check steering bearings for looseness; check and tighten all chassis fasteners; grease/check/service front brake lever pivot shaft; check throttle grip; check and grease kickstand pivots; check/replace kickstand switch; drive motor commissioning and timing |
| Every 16,000 mi (25,000 km) - Note B | Repack steering bearings with all-purpose grease |
| Every 24,000 mi (37,000 km) - Note A | Replace drive belt; check swingarm pivot bearings for smooth operation |
| As needed | Replace worn drive chain |
See this schedule on a distance axis →What a noise between services means →
Torque specifications
Key fastener torque values from the service manual.
| Fastener | Torque |
|---|---|
| Rear axle end bolt | 75 lb-ft (102 Nm), Loctite 242 |
| Rear axle nut (drive belt adjustment) | 75 lb-ft (102 Nm), Loctite 242 |
| Belt tensioner / axle jam nuts | 15 lb-ft (20 Nm) |
| Front axle | 40 lb-ft (54 Nm), anti-seize |
| Main pivot bolt/nut (swingarm) | 75 lb-ft (102 Nm), Loctite 242 |
| Front brake caliper mount bolts | 19 lb-ft (26 Nm), Loctite 242 |
| Rear brake pad pin | 6 lb-ft (8 Nm), Loctite 242 |
| Rear axle slider retaining bolts | 15 lb-ft (26 Nm) |
| Handlebar clamp mount bolts | 18 lb-ft (24 Nm) |
| Shock mount bolts (upper / lower) | 52 lb-ft (70.5 Nm) / 38 lb-ft (51.5 Nm) |
Zero FXE at a glance: specs, range and main features
The 2025 Zero FXE is a fully street-homologated electric motorcycle powered by a Z-Force 75-5 passively air-cooled, high-efficiency brushless motor with a radial-flux interior permanent-magnet rotor. It produces a peak 34 kW (46 hp) and 106 Nm (78 lb·ft) of torque, drives the rear wheel through a clutchless direct-drive belt, and reaches an estimated top speed of 137 km/h (85 mph), with roughly 121 km/h (75 mph) sustainable indefinitely. There is no gearbox, no clutch and no oil to change in the drivetrain, so twist-and-go riding is immediate and near-silent.
Energy comes from an integrated Z-Force Li-Ion power pack rated at 7.2 kWh maximum (ZF7.2) and 6.3 kWh nominal usable. Unlike some modular FX variants, the FXE's pack is fixed in the frame rather than hot-swappable. Zero estimates the pack retains 80% of its capacity out to about 229,000 km (142,000 mi) of city riding. Standard equipment on the FXE includes an LED headlight, modified street body panels, a 320 mm front brake disc and a reach-adjustable front brake lever.
The FXE rolls on 17-inch cast wheels (3.00 front, 3.50 rear) shod with Pirelli Diablo Rosso II sport tyres, and uses fully adjustable Showa suspension at both ends. It is a light motorcycle at 140 kg (309 lb) curb weight with a low 836 mm (32.9 in) seat, which makes it approachable for newer riders while still being quick enough to entertain experienced ones.
- Motor: Z-Force 75-5 passively air-cooled brushless, peak 34 kW (46 hp) / 106 Nm (78 lb·ft)
- Battery: integrated ZF7.2 Z-Force Li-Ion, 7.2 kWh max / 6.3 kWh nominal
- Top speed: 137 km/h (85 mph) max; ~121 km/h (75 mph) sustained
- Range (EU): City 169 km (105 mi); low-speed highway commute 106 km (66 mi); high-speed highway commute 95 km (59 mi)
- Charging: 650 W on-board charger, ~9.7 h to 100% (9.2 h to 95%); accessory quick charge from ~4.1 h
- Drive: clutchless direct drive, 90T/18T Poly Chain HTD Carbon belt
- Brakes: Bosch Gen 9 ABS; 320 mm front dual-piston, 240 mm rear single-piston J-Juan calipers
- Suspension: Showa 41 mm inverted forks (178 mm travel), Showa piggyback rear shock (227 mm travel), fully adjustable
- Chassis: wheelbase 1,422 mm, seat height 836 mm (32.9 in), rake 24.4°, trail 71 mm
- Weight: curb 140 kg (309 lb), carrying capacity 146 kg (321 lb)
- Typical cost for a full recharge: about €1.48 / $0.81
Controls, dashboard display and warning indicators
The FXE uses a three-position key switch on the fork (Steering Lock, OFF, ON). Turning the key to ON powers up the lights and dash and readies the electrical system; the key can be removed in either OFF or the steering-lock position. To lock the steering, turn the bars fully left, push the key down and rotate it counter-clockwise. On the right handlebar are the throttle, front brake lever, the performance Mode button, high/low beam and flash-to-pass, the horn, turn-signal and hazard switches, and the motor stop (run/stop) switch that cuts power to the motor controller. Because an electric bike is silent when live, always set the run/stop switch to OFF and remove the key whenever you are not actively riding.
The digital dash centres on a speedometer that reads in mph or km/h, ringed by an analog speed arc divided into 12 segments (each segment represents 20 km/h / 12.5 mph). Two configurable readouts flank it. Display A cycles through Range (a learned estimate that adapts to your riding), Motor RPM, Trip 1, and any Error code. Display B cycles through Trip 2, Instant, Average and Lifetime energy use (Wh per mile/km), and Motor temperature. The lower dash shows the state-of-charge percentage (or, while plugged in, the estimated time to full), a charge-level bar, output (torque/power) and regen meters, the odometer, a clock and a Bluetooth pairing icon. The SEL and ADJ buttons set the clock, change units and reset trips. Trip 1 and the Average energy figure both reset automatically every time you charge to 100%.
A row of warning tell-tales communicates system status. Learn them before your first ride so nothing on the road catches you off guard.
- Armed/Live indicator: blinking = drive enabled but not yet ready; solid = ready to move if you open the throttle
- ABS light: normally lit at key-ON, extinguishes once both wheels exceed 5 km/h (3 mph); staying lit above that speed means ABS is off or faulted
- Charging indicator: green slow-flash = accepting charge; green solid = fully charged; orange rapid-flash = charge error
- Temperature warning: flashing = a powertrain component is nearing its thermal limit (no power loss yet); solid = limit exceeded, power is being reduced until it cools
- Check-engine light: an error has forced permanent torque reduction; it appears with a diagnostic code. See a dealer
- System warning (red): a fault is detected; count the number of red flashes and match it to the fault table
- High-beam (blue) and left/right turn-signal (green) indicators; turn signals must always be cancelled manually
- 1To pair a smartphone by Bluetooth: key the bike ON, put the kickstand down and the run/stop switch in Stop (bike not armed).
- 2Press and hold the Mode button on the right handlebar for at least 5 seconds until the dash Bluetooth icon blinks, then release.
- 3The bike appears as 'ZeroMotorcyclesXXXXX' (last 5 VIN digits); pair from your phone's Bluetooth settings (iOS) or the Zero app (Android).
- 4A solid Bluetooth icon on the dash confirms the connection. The app lets you set CUSTOM mode, view precise SOC and real-time power, and email logs to Zero support.
Ride modes, throttle and regenerative braking
The FXE has three selectable performance modes, toggled with the Mode button on the right handlebar. ECO softens acceleration and lowers top speed while dialling up regenerative braking, which is ideal for maximising range and for newer riders. SPORT sharpens acceleration considerably and reduces regen for a more free-rolling feel, and is aimed at experienced riders. CUSTOM is fully configurable through the Zero smartphone app, letting you tailor torque, top speed, regen and more. You can switch modes on the move, but the change only takes effect once you close the throttle.
Twist the throttle counter-clockwise (toward you) to accelerate; the harder you twist, the more torque. Release the throttle and it snaps closed, cutting drive and engaging regenerative braking, which converts the bike's momentum back into stored energy and produces a gentle deceleration drag. If you want to coast freely without regen, hold the throttle just off the fully-closed position. ECO gives the strongest regen effect, SPORT the least.
Because the powertrain is passively air-cooled, sustained high-power riding (long full-throttle stints, extended high speed, or spinning the wheel on low-traction surfaces) can heat components toward their limits. The bike then applies a thermal-management strategy: the temperature light flashes as a warning, and if you keep pushing it goes solid and power is gradually trimmed to a level the system can sustain. This is normal protective behaviour, not a fault. Ease off and the light clears with no harm done. A tip-over sensor also cuts drive if the bike falls; upright it and perform a full key cycle (OFF, wait for the dash to blank, then ON) to reset.
- ECO: gentler acceleration, lower top speed, strongest regen, best range and beginner-friendly
- SPORT: fastest acceleration, weakest regen, for advanced riders
- CUSTOM: user-defined via the Zero app
- Mode changes apply only after the throttle returns to closed
- Regen recharges the pack every time you roll off the throttle; hold slightly open to coast
Battery, range and charging: times, connectors and care
The FXE charges through its 650 W integrated on-board charger using the supplied cord. A full charge from empty to 100% takes about 9.7 hours (roughly 9.2 hours to 95%), and the supply voltage does not change that time: a 120 V and a 240 V outlet charge at the same rate. Adding Zero's optional off-board accessory (quick) chargers dramatically speeds things up; up to four can be connected in parallel with the on-board unit, cutting charge time by as much as 75%, with one accessory charger bringing a full charge down to about 4.1 hours. The pack itself needs no break-in period and no user maintenance beyond sensible charging habits.
Charging is temperature-managed for longevity. The pack will not accept a charge below 0°C (32°F) or above 50°C (122°F), and above about 43°C (109°F) the charger deliberately reduces current, lengthening charge time. If the pack has just been ridden hard it may internally exceed 50°C even on a cool day and refuse charge for up to 30 minutes until it cools. The whole pack must stay within -20°C to 60°C (-4°F to 140°F) to operate at all. Outside that band the Battery Management System (BMS) shuts the power controller down.
Always use the Zero charger and a grounded outlet; if you must use an extension lead, use a grounded 3-wire 12-AWG cord no longer than 7.6 m (25 ft), and avoid sharing a 15/20 A circuit because the charger can draw up to 14 A. For long-term battery health, unplug once charging is complete. The pack then enters a hibernate mode and self-discharges extremely slowly. Never let the bike sit below 30% state of charge, and in hot climates avoid parking it for long at 100%.
- On-board charger: 650 W, ~9.7 h to 100% (9.2 h to 95%); charge time is the same on 120 V or 240 V
- Accessory quick charging: up to 4 extra chargers, up to 75% faster; ~4.1 h to 100% with one
- Public charging: Level 1 works with the supplied cord; Level 2 needs the J1772 adapter (Zero PN 10-03267), which only speeds charging if a supplemental charger is also fitted
- Charge window: won't charge below 0°C (32°F) or above 50°C (122°F); charger throttles current above ~43°C (109°F)
- Charge within 24 hours if fully discharged to avoid pack damage
- If SOC drops below 30%, charge to at least 60% then unplug
- Unplug when full: the pack hibernates and self-discharges very slowly for best long-term health
- 1Plug the supplied cord into the on-board charger connector (under the fairing at the front) and always keep the cord with the bike.
- 2Connect the other end to a grounded outlet in a well-ventilated spot, away from combustibles, and avoid charging in the rain.
- 3The dash charge icon flashes while charging and the right-hand readout shows estimated time-to-full instead of SOC%.
- 4When the charge icon becomes solid (or SOC reads 100%), charging is complete. Disconnect the charger for best battery life.
- 5For accessory quick charging, uncover the connector above the motor, plug in the quick charger with the key ON, then turn the key OFF; a solid green charge LED or 100% SOC means done.
Break-in period and your first rides
There is no engine to run in, but the FXE still rewards a measured start. The lithium power pack requires no special break-in, yet Zero recommends riding conservatively at first so you learn how the bike's range responds to your route, riding style, weather and load. ECO mode is the natural choice for early rides: it softens the throttle, adds regen and extends range while you build familiarity. The motor-temperature readout on the dash may also be inaccurate for the first five miles of any ride while the system calibrates itself.
New brake pads and discs, on the other hand, do need bedding in: the first few applications will feel weak until an even transfer layer of pad material builds on the discs. Do this deliberately and gently at low speed before you rely on the brakes hard. The FXE is a very light motorcycle, so it stops quickly once the brakes are bedded, but its low weight also means emergency-stop technique differs from heavier bikes; practise in a safe area.
The bike's first two scheduled services fall early in its life and are important: an initial check at 160 km (100 mi) and a fuller service at 1,000 km (600 mi). Don't skip these. They catch the fastener settling and belt/adjustment changes that are normal on a new machine.
- 1Bed new brakes gently first: make several light stops from under 40 km/h (25 mph) to establish initial friction.
- 2Then bed properly: from 64 km/h (40 mph), brake smoothly down to about 16 km/h (10 mph) without locking a wheel, triggering ABS, or fully stopping.
- 3Accelerate back to 64 km/h and repeat 15–20 times, working the front and rear brakes separately.
- 4After the cycles, take a 16 km (10 mi) ride to let the brakes cool down evenly.
Maintenance schedule, drive belt and torque specs
An electric drivetrain cuts maintenance, but the FXE is still a performance motorcycle that needs periodic attention. Zero recommends a professional service every 12 months regardless of distance, plus the early 160 km (100 mi) and 1,000 km (600 mi) checks. The major recurring interval is every 13,000 km (8,000 mi) or 12 months, whichever comes first. Before every ride you should check brake fluid, brake operation, tyre pressure and tread, drive-belt condition and throttle return. Fluids and consumables are few: DOT 4 brake fluid is the only fluid, the drive belt replaces a chain-and-oil setup, and there is no coolant or transmission oil.
The Poly Chain HTD Carbon belt (11 mm pitch, 90T/18T final drive) is low-maintenance but tension-critical. Too little tension causes 'ratcheting' (the belt teeth skipping over the sprocket), which can damage the belt's carbon cords; if that happens, replace the belt before riding again. Too much tension accelerates wear. Correct tension is 25–76.5 kg by tension tester, or a plucked frequency of 42.5–73.6 Hz measured with the Gates Carbon Drive app on the lower belt span. Clean the belt only with mild soap and water. Optional chain-drive versions instead want 32 mm (1.25 in) total free play and lubrication after any wet ride.
When tightening fasteners, use the specified torque values and the noted thread compounds. The main figures are listed below; the FXE's LED headlight means the H3 bulb listed for the FX does not apply, though turn-signal (RY10W 10 W), brake/tail (1157 5 W) bulbs and the fuse ratings are shared across the range.
- Every ride: brake fluid level, front/rear brake function, tyre pressure & tread, drive-belt condition, throttle return
- Initial 160 km (100 mi): chassis fasteners, front fork and rear shock check
- Initial 1,000 km (600 mi): belt tension, chassis fasteners, throttle grip free play
- Every 13,000 km (8,000 mi) / 12 months: replace brake fluid, check wheels & bearings, belt tension, steering bearings, fork, shock, kickstand switch/pivots, motor timing
- Belt replacement and swingarm-pivot bearings: every 37,000 km (24,000 mi); repack steering bearings every 25,000 km (16,000 mi)
- Belt spec: 11 mm pitch; tension 25–76.5 kg or frequency 42.5–73.6 Hz
- Torque: front axle 54 Nm, front axle pinch 21.7 Nm, front caliper mount 26 Nm, triple-tree pinch 22 Nm, handlebar clamp 24 Nm
- Torque: swingarm pivot 102 Nm, rear axle nut 102 Nm, rear axle slider bolts 26 Nm, shock mounts 70.5 Nm upper / 51.5 Nm lower
- Torque: motor mounts 35 Nm left / 27 Nm right, rear brake pad pin 8 Nm (use threadlocker where specified)
- Fluid & parts: DOT 4 brake fluid only; FXE uses an LED headlight
- 1To adjust belt tension: remove the key, then loosen the right-side rear axle nut.
- 2Loosen the left and right 13 mm jam nuts on the adjusters.
- 3Turn the left and right 13 mm adjuster bolts a quarter-turn at a time, keeping both sides equal, until tension is in spec.
- 4Re-tighten both jam nuts, then torque the axle nut to 102 Nm (75 lb·ft).
- 5Test ride, then recheck and readjust the belt if needed.
Tyres, brakes and suspension setup
The FXE runs Pirelli Diablo Rosso II sport tyres (110/70-R17 front and 140/70-R17 rear) on 3.00 x 17 and 3.50 x 17 wheels. Correct cold pressures are 32 psi (2.21 bar / 221 kPa) front and 34 psi (2.34 bar / 234 kPa) rear; check them before every ride with an accurate gauge on tyres that haven't rolled for at least three hours. Under-inflation is a leading cause of tyre failure, so don't guess. Replace tyres once tread depth reaches 2 mm (0.08 in) or if you see cuts, bulges, exposed cords or uneven wear, and don't apply tyre dressings, which reduce grip.
Braking is handled by a Bosch Gen 9 ABS system with J-Juan calipers: a 320 mm x 5 mm front disc with an asymmetric dual-piston caliper and a 240 mm x 4.5 mm rear disc with a single-piston caliper. Use only fresh DOT 4 fluid from a sealed container, keep it between the MIN and MAX marks, and replace pads once either pad is worn to 1.35 mm (0.05 in) or less, always in pairs. Minimum disc thickness is 3.85 mm (0.15 in). The ABS light is meant to be on at key-ON and to go out once both wheels pass 5 km/h (3 mph); if it stays lit above that speed, ABS is inactive and needs attention. Wheelies, burnouts or loose gravel can momentarily trip ABS off. Reset it by stopping, cycling the key off for about 5 seconds, and back on.
Both ends use fully adjustable Showa suspension: 41 mm inverted cartridge forks (178 mm travel) and a 40 mm piggyback-reservoir rear shock (227 mm travel), each adjustable for spring preload, compression and rebound. The springs are set from the factory for an 82 kg (180 lb) rider; heavier riders or added cargo need more preload. Sag targets for the FXE are 60 mm (2.36 in) front and 82 mm (3.22 in) rear. The FXE also has a reach-adjustable front brake lever, tuned via the knob on the master cylinder.
- Cold tyre pressures: front 32 psi (2.21 bar / 221 kPa), rear 34 psi (2.34 bar / 234 kPa)
- Tyres: Pirelli Diablo Rosso II 110/70-R17 front, 140/70-R17 rear; replace at 2 mm (0.08 in) tread
- Front brake: 320 mm x 5 mm disc, J-Juan dual-piston caliper, Bosch Gen 9 ABS
- Rear brake: 240 mm x 4.5 mm disc, single-piston caliper; DOT 4 fluid only
- Replace pads at 1.35 mm (0.05 in); minimum disc thickness 3.85 mm (0.15 in)
- Suspension springs set for an 82 kg (180 lb) rider; add preload for heavier loads
- FXE sag targets: 60 mm (2.36 in) front, 82 mm (3.22 in) rear
- FXE factory front settings: compression 7 clicks out from max, rebound 12 clicks out from max, preload 5.5 turns in from full-out
- Rear factory settings: compression 9 clicks out, rebound 12 clicks out, preload 5th position from minimum
Storage, transport and winter care
For any layup longer than 30 days, the best approach is to leave the FXE plugged into its charger. After 30 days without the key being switched on, the BMS enters long-term storage mode: it draws the pack down to about 80%, then lets it drift down roughly 1% per day, and tops it back up to 80% whenever it falls to 30%. This keeps the cells in a healthy window automatically. Even so, check the state of charge every 30 days by briefly switching the key on, reading the SOC, and switching off. Never let the pack sit below 30%: doing so can damage it and void the warranty.
Winter storage in an unheated garage is fine provided the temperature never drops below -20°C (-4°F). Ideally store the bike around 60% charge, keep it out of direct sunlight, and aim for a cool spot; the recommended range is 10°C to 35°C (50°F to 95°F). Cold temperatures temporarily cut range, by up to 30% at around -1°C (30°F) versus mild conditions, and you shouldn't ride when the pack itself is below -5°C (23°F). The BMS won't discharge the pack below -20°C or charge it below 0°C, so if you ride in the cold, put it on charge somewhere above 0°C soon afterward.
When transporting the FXE, secure it with soft-sleeved ratchet straps at roughly a 45° angle from frame contact points (two straps at the front and two at the rear), and always carry it with both wheels on the trailer or transport device. Zero explicitly advises against towing the motorcycle in any way, as it can damage the powertrain. Clean the bike with mild detergent and a garden hose rather than a pressure washer or steam cleaner, keeping strong water spray away from the dash, quick-charge connector, power pack and controller, and always test the brakes afterward.
- 1To bring the FXE out of long-term storage: disconnect the charger and turn the key to ON.
- 2Raise the kickstand and set the run/stop switch to Run. This exits storage mode.
- 3Turn the key OFF, then reconnect the charger and charge for at least 24 hours to restore full cell balance.
- 4If the bike was stored 30+ days, this same key-cycle is what resets the BMS storage timer before you can charge to a true 100%.
Warning lights, fault codes and troubleshooting
The FXE reports faults two ways. The red system-warning indicator communicates by a repeating count of flashes: count the flashes and match them to the fault list. Separately, a two-digit diagnostic code can be read from dash Display A (select ERROR), which pinpoints the specific condition. Many faults are self-clearing rider issues (a run/stop switch left off, a kickstand down, a low pack), while others need a dealer. If the check-engine light is on with a code, the bike has entered permanent torque reduction and should be serviced.
Most drivability problems trace back to the battery. If the FXE won't turn on, confirm the pack is charged, the key is fully engaged and the motor stop switch is ON, then cycle the key. If it won't charge, check the AC outlet and the charge cord. A pack that is empty, too hot or badly out of balance will have the BMS disable the throttle until the condition is resolved, and you cannot ride until it clears. To force a self-test and see the current BMS flash pattern, turn the key OFF, wait about 5 seconds, and turn it back ON.
The tables below capture the most useful codes. When in doubt, note the code and the flash count and give them to your dealer, which speeds diagnosis considerably.
- 1 red flash: safety override active, BMS isolation fault, charger not charging, or motor-stop/kickstand disabled (raise kickstand / press run switch ON)
- 2 flashes: self-test failed, contact dealer; 3: high throttle (throttle open or bad connection); 4: pre-charge fail
- 5 flashes: low pack, charge before riding; 6: contactor error; 7: charger problem; 8: CAN bus error
- 9: BMS throttle disable; 10: module variance too high; 11: battery temp sensor fault (bike still runs, needs service); 12: welded contactor
- 13: motor controller error; 14: loopback error (needs second module or blanking plug); 15–17: BMS startup/internal faults (cycle key or reset BMS); 18: miscellaneous
- Diagnostic codes (Display A): 0 no error, 1 high throttle, 2/3 motor temp warning, 7 low battery voltage, 8 high battery temp, 42 high-temp disable, 57 module did not connect (may just need recharging), 61 tip-over detected
- Power pack empty: recharge; if no partial charge after 2 hours of charging, contact a dealer
- Power pack unbalanced: plug in and charge up to 72 hours to let the BMS rebalance the cells
- Handlebar shimmy: usually incorrect tyre pressure, a deformed/worn front tyre, or loose steering bearings
Safety, high-voltage precautions and warranty
The FXE is a high-voltage vehicle, and its orange-sleeved cables and connectors carry potentially lethal voltage. Never probe, cut, modify or attempt to service any orange high-voltage wiring, the power pack or its connectors. There are no user-serviceable parts inside, and components can be hot as well as live during and after riding. If the bike is in an accident, keep clear of the high-voltage system. In the rare event of a battery fire, extinguish visible flame with a Class D (metal/powder-type) extinguisher, then douse with a water-based extinguisher once the flame is out. The power pack must never be opened by anyone other than a trained Zero technician.
Ride within your ability and the law: wear a regionally approved helmet and proper protective gear on every ride, never ride impaired, and remember the bike's near silence: use the horn to alert pedestrians and cancel your turn signals manually. Because the FXE is light and quick, practise smooth, progressive braking and emergency stops; ABS reduces but does not eliminate the risk of a lock-up, especially if it has been disabled or is faulted. The bike is not designed for towing loads, and only Zero-approved parts, accessories and chargers should be fitted.
The 2025 FXE carries a five-year limited warranty from the in-service date (in the EU, provided by Zero Motorcycles B.V.), covering defects in materials and workmanship across the motor, controller, frame, suspension, brakes, wheels, electrical sub-assemblies and the power pack. A pack qualifies for repair or replacement if its capacity drops more than 20% below the published nominal figure. Wear items (tyres, brake pads and discs, the drive belt, fork seals, grips, pegs and the seat) are excluded, as is damage from racing, misuse, unapproved chargers or modifications, or failure to follow the maintenance and charging guidelines (including keeping firmware updated and never storing the pack below 30% for more than 30 days).
- High-voltage cabling is orange: never touch, cut or probe it; no user-serviceable HV parts
- Battery fire: Class D extinguisher first, then water-based once flame is out
- Always wear a certified helmet and protective gear; cancel turn signals manually; use the horn on a silent bike
- Use only Zero-approved parts, accessories and chargers; do not tow loads with the bike
- Warranty: 5 years from in-service date; pack covered if capacity falls >20% below nominal
- Not covered: wear items, racing/misuse, unapproved chargers/mods, and failure to maintain or update firmware
- Storing the pack below 30% SOC for over 30 days can damage it and void the warranty
Frequently asked
How long does it take to charge a Zero FXE?
Using the built-in 650 W on-board charger, a Zero FXE takes about 9.7 hours to reach 100% (roughly 9.2 hours to 95%). The charge time is the same whether you plug into a 120 V or 240 V outlet. Adding Zero's optional off-board accessory chargers can cut this by up to 75%. A single accessory charger brings a full charge down to around 4.1 hours, and up to four can run in parallel.
What is the range of the Zero FXE?
On the European test cycle the FXE is rated at 169 km (105 mi) in the city, about 106 km (66 mi) in low-speed highway commuting, and about 95 km (59 mi) in high-speed highway commuting. Real-world range depends on speed, acceleration, temperature, terrain, tyre pressure and load; riding in ECO mode and keeping speeds moderate will get you closest to the city figure. Expect up to 30% less range in near-freezing weather.
What tyre pressures does the Zero FXE need?
The Zero FXE runs 32 psi (2.21 bar / 221 kPa) in the front tyre and 34 psi (2.34 bar / 234 kPa) in the rear. Always check pressures cold (meaning the bike hasn't been ridden for at least three hours) with an accurate gauge before every ride. The FXE comes on Pirelli Diablo Rosso II tyres, 110/70-R17 front and 140/70-R17 rear.
Can you fast charge a Zero FXE?
Yes, with Zero's off-board accessory (quick) chargers. Up to four can be connected alongside the on-board charger for as much as a 75% reduction in charge time, with one accessory unit achieving a full charge in about 4.1 hours. The bike can also use Level 2 public stations via the optional J1772 adapter (Zero PN 10-03267), but that adapter only speeds charging if a supplemental accessory charger is fitted too.
What is the top speed of the Zero FXE?
The Zero FXE has an estimated maximum top speed of 137 km/h (85 mph), with roughly 121 km/h (75 mph) sustainable continuously. It makes a peak 34 kW (46 hp) and 106 Nm (78 lb·ft) of torque through a clutchless direct-drive belt, so acceleration is instant and smooth with no gear changes.
What is the difference between ECO and Sport mode on the Zero FXE?
ECO mode softens acceleration, lowers top speed and increases regenerative braking. It's the best choice for maximising range and for newer riders. SPORT mode sharpens acceleration significantly and reduces regen for a freer-rolling feel, and is aimed at experienced riders. A third CUSTOM mode is fully configurable through the Zero smartphone app. You can switch modes while riding, but the change only takes effect once you close the throttle.
How do I store my Zero FXE for winter?
Leave it plugged into the charger; after 30 days the BMS enters storage mode and keeps the pack cycling around 80% automatically. An unheated garage is fine as long as it never drops below -20°C (-4°F). Store the pack around 60% charge if unplugged, keep it out of direct sun, and check the state of charge every 30 days, and never let it fall below 30%. To wake it up, cycle the key ON with the run switch in Run, then charge for at least 24 hours to rebalance the cells.
What brake fluid and pads does the Zero FXE use?
The FXE uses DOT 4 brake fluid only, from a sealed container, in both the front and rear systems. Replace the brake pads when either pad wears to 1.35 mm (0.05 in) or less, always in pairs, and replace a disc if it drops below 3.85 mm (0.15 in) thick. The bike has Bosch Gen 9 ABS with a 320 mm front disc and a 240 mm rear disc.
How often does the Zero FXE need servicing?
Zero recommends a professional service every 12 months regardless of distance, plus early checks at 160 km (100 mi) and 1,000 km (600 mi). The main recurring interval is every 13,000 km (8,000 mi) or 12 months. Before every ride you should check brake fluid, brake operation, tyre pressure and tread, drive-belt condition and throttle return. There's no engine oil, coolant or transmission fluid, just DOT 4 brake fluid and the drive belt.
Does the Zero FXE have a belt or chain drive?
The Zero FXE uses a Poly Chain HTD Carbon belt drive as standard (90T/18T final drive, 11 mm pitch), which is quiet and low-maintenance with no lubrication needed. Correct belt tension is 25–76.5 kg by tension tester, or a plucked frequency of 42.5–73.6 Hz using the Gates Carbon Drive app. An optional chain-drive version exists; if fitted, it wants about 32 mm (1.25 in) of total free play and lubrication after wet rides.
Why won't my Zero FXE turn on or charge?
If it won't power up, confirm the battery is charged, the key is fully engaged, and the motor stop (run/stop) switch is ON, then cycle the key off and on. If it won't charge, check the AC outlet has power and inspect the charge cord. A pack that is empty, too hot, or badly out of balance will have the BMS disable the throttle or charging until the condition clears. Turn the key off for about 5 seconds and back on to run a self-test, and note any flash count or Display A error code for your dealer.
What does the temperature warning light mean on a Zero FXE?
The FXE is passively air-cooled, so sustained high-power riding can heat the motor or controller toward their limits. A flashing temperature light warns that a component is approaching its limit, with no power loss yet. If it goes solid, the thermal-management system is trimming power to a level the bike can sustain until it cools. This is normal protection, not a fault; ease off the throttle and the light clears with no harm done.
This guide is an independent synthesis of the official Zero Motorcycles owner & service manuals, rewritten for clarity. Figures are stated as published for the latest model year and may vary by year, region and options. Always follow your bike's own manual and a qualified technician for service. Zero Motorcycles is a trademark of its respective owner.