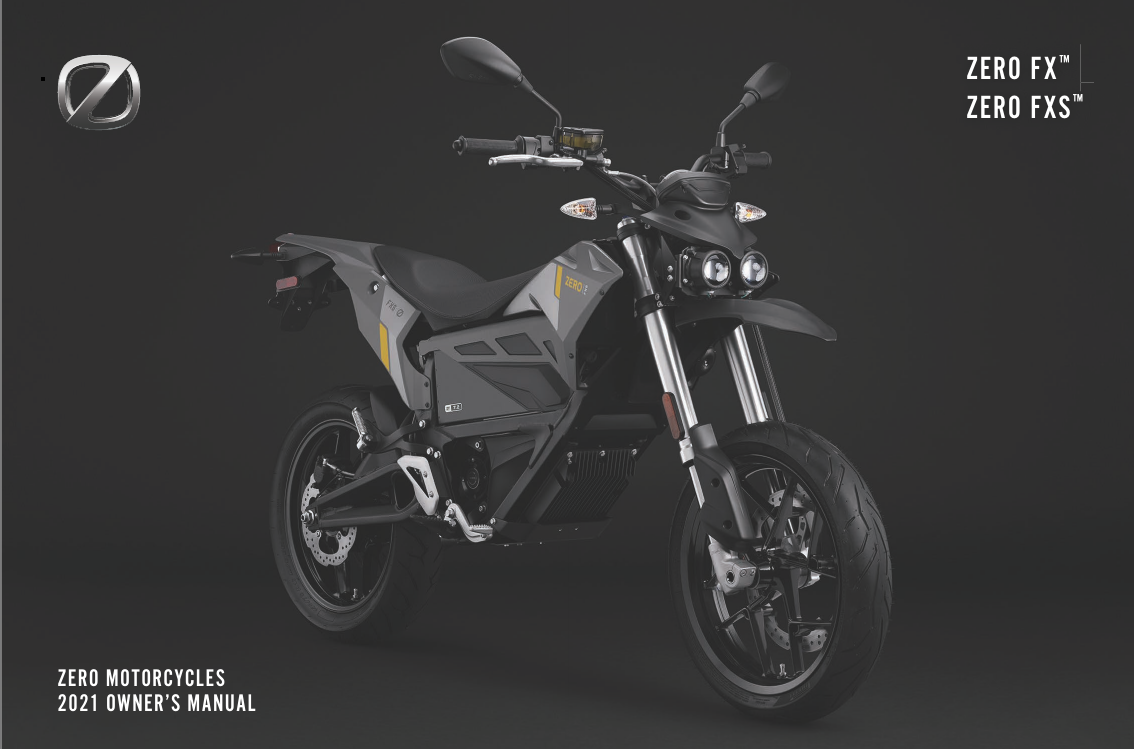
Zero FXS: complete owner's guide
The Zero FXS is the street-and-supermoto member of Zero Motorcycles' lightweight X-platform, sharing its powertrain and modular battery with the dual-sport FX but rolling on 17-inch cast wheels and grippy supermoto tyres for tarmac and urban riding. It pairs a passively air-cooled Z-Force brushless motor with a swappable Z-Force lithium-ion power pack, instant torque, one-hand twist-and-go operation, regenerative braking and Bosch ABS. This guide reorganises the official owner and service documentation into a reference: at-a-glance specs, how the dashboard and controls work, ride modes and regen, the full charging and battery-care regime, break-in advice, the maintenance and torque schedule, tyre/brake/suspension setup, storage and winter care, warning lights and fault codes, and the safety essentials. Numbers are given in both metric and imperial units.
Full specifications
Full Zero FXS specifications from the official manual (2021 model year).
- Motor
- Z-Force 75-5 passively air-cooled, high-efficiency magnet, brushless motor
- Peak power
- 33 kW (44 hp)
- Peak torque
- 106 Nm
- Top speed
- 132 km/h
- Regenerative braking
- Off-throttle regenerative deceleration: releasing the throttle begins regenerative braking, feeding energy back into the power pack; a slight drag is felt when active. To coast without regen, hold the throttle just off the fully closed position. Controller provides regenerative deceleration.
- Transmission
- Clutchless Direct Drive
- Max capacity
- 7.2 kWh
- Nominal capacity
- 6.3 kWh
- Chemistry
- Z-Force Li-Ion Intelligent Modular
- Onboard charger
- 0.65 kW
- Standard charge time
- 9.7 hours (100% charged) / 9.2 hours (95% charged)
- Combined
- 106 km
- Curb weight
- 133 kg
- Seat height
- 836 mm
- Wheelbase
- 1422 mm
- Rake
- 24.4°
- Trail
- 71 mm
- Front
- Showa 41 mm inverted cartridge forks, with adjustable spring preload, compression, and rebound damping
- Front travel
- 178 mm
- Rear
- Showa 40 mm piston, piggy-back reservoir shock with adjustable spring preload, compression, and rebound damping
- Rear travel
- 227 mm
- Front brake
- J-Juan asymmetric dual piston floating caliper, 320 mm OD x 5 mm thick disc
- Rear brake
- J-Juan single piston floating caliper, 240 mm OD x 4.5 mm thick disc
- ABS
- Bosch Gen 9
- Wheels
- cast
- Front tyre
- Pirelli Diablo Rosso II 110/70-R17 M/C 54H · 221 kPa (32 PSI)
- Rear tyre
- Pirelli Diablo Rosso II 140/70-R17 M/C 66H · 234 kPa (34 PSI)
- Final drive
- 90T/18T, Poly Chain HTD Carbon belt
- Belt / chain
- Poly Chain HTD Carbon belt
- Front pulley
- 18 T
- Rear sprocket
- 90 T
- Final drive ratio
- 90T/18T
- Headlight
- H3 halogen 55W
- Taillight
- 1157 incandescent 5W
- Turn signals
- RY10W amber 10W
- DRL
- W3W 3W
Ride modes
How each selectable mode changes acceleration, top speed and regenerative braking.
| Mode | Character | Top speed | Regen | Best for |
|---|---|---|---|---|
| Eco | Softer, reduced acceleration for smooth, gentle power delivery | Reduced (capped below Sport) | Increased (stronger regenerative braking off-throttle) | New riders, maximizing range, relaxed low-speed control |
| Sport | Full, significantly faster acceleration | 137 km/h (85 mph) max | Reduced (weaker off-throttle regen) | Advanced riders wanting full performance |
| Custom | Fully user-configurable via the Zero smartphone app | Adjustable via app | Adjustable via app | Tailoring acceleration, top speed and regen to preference |
Charging times
Charging scenarios and how long each takes to fill the pack.
| Method | Input | Time to full | Notes |
|---|---|---|---|
| Standard onboard charging | Standard 110 V AC or 220 V AC, 650 W integrated charger | 9.7 h to 100% (9.2 h to 95%) | Charge time is the same on 120 V or 240 V. Pack will not charge below 0 C (32 F) or above 50 C (122 F). |
| Supplemental / quick charging (accessory) | Off-board Zero accessory (Quick Charge) charger | 4.1 h to 100% (3.6 h to 95%) | Up to four accessory chargers can run in parallel with the onboard charger, cutting charge time by up to 75%. |
| Level 1 public charging station | Level 1 station via the supplied charge cord | 9.7 h to 100% | Uses the onboard charger, so the same as standard home charging. |
| Level 2 public charging station | Level 2 station via optional J1772 Zero adapter (PN 10-03267) | 9.7 h to 100% | The J1772 adapter alone does not speed charging unless a supplemental accessory charger is also fitted. |
Dashboard warning lights
What each dashboard indicator means and what to do when it lights up.
A single round LCD instrument dominated by a central speedometer ring, showing the active ride mode (ECO/SPORT/CUSTOM), a clock, two rider-configurable data fields (Display A and Display B), OUTPUT (torque/power) and REGEN meters, and a battery charge-level bar with a charge-time estimate. Tell-tale warning lights sit around the display, and the SEL and ADJ buttons cycle through the readouts. (FX-platform dash; shared with the FXS.)
Looking for a specific error? Browse the full Zero error-code catalog →
Fault & diagnostic codes
Diagnostic codes the display and app can show, with what each means and the fix.
64 diagnostic codes for the Zero FXS
| Code / fault | Meaning | What to do |
|---|---|---|
| 0 · No Error | No fault present. | None. |
| 1 · High Throttle | Throttle open at power-up. | Close throttle; check throttle/connection. |
| 2 · Motor Temperature Warning Stage 1 | Motor approaching its temperature limit. | Ease off; let it cool. |
| 3 · Motor Temperature Warning Stage 2 | Motor over temp limit; power reduced. | Slow down; let it cool. |
| 4 · Controller Temperature Warning Stage 1 | Controller approaching its temperature limit. | Ease off; let it cool. |
| 5 · Controller Temperature Warning Stage 2 | Controller over temp limit; power reduced. | Slow down; let it cool. |
| 6 · BMS Throttle Enable Wire Error | Fault in the BMS throttle-enable wiring. | Contact your Zero dealer. |
| 7 · Low Battery Voltage | Pack voltage is low. | Recharge the power pack. |
| 8 · High Battery Temperature Status | Power pack is too hot. | Let the pack cool. |
| 9 · Low Battery Temperature Status | Power pack is too cold. | Warm the pack before charging/riding. |
| 10 · Battery Temperature Warning Stage 1 | Pack approaching its temperature limit. | Reduce load; let it cool. |
| 11 · Battery Temperature Warning Stage 2 | Pack over its temperature limit. | Stop; let the pack cool. |
| 12 · Reserve Partition Warning | Charge has dropped into reserve. | Recharge soon. |
| 13 · Reserve Switch Warning | Riding on reserve range. | Recharge soon. |
| 14 · Safety Override Active | A safety interlock is active. | Contact your Zero dealer. |
| 15 · Charger Attached But Not Charging | Charger connected but no charge flowing. | Check the charger and AC outlet. |
| 16 · CIB Contactor Compromised | Contactor integrity fault. | Contact your Zero dealer. |
| 17 · Charger Error | Onboard charger fault. | Check AC supply; contact your dealer. |
| 18 · Battery Temperature Sensor Fault | Pack temperature sensor fault. | Rideable, but have it serviced. |
| 19 · High Charge Current | Charge current too high. | Check the charger; contact your dealer. |
| 20 · BMS Low Isolation | Reduced electrical isolation of the pack. | Contact your Zero dealer. |
| 21 · Board Vpack Error | BMS pack-voltage board fault. | Contact your Zero dealer. |
| 22 · Board Temperature Error | BMS board over temperature. | Let it cool; contact your dealer. |
| 23 · Post Error | Power-on self-test error. | Contact your Zero dealer. |
| 24 · Startup Error | System/BMS startup error. | Cycle key OFF/ON; contact your dealer. |
| 25 · Contactor Open Warning | Main contactor is open. | Contact your Zero dealer. |
| 26 · Contactor Welded Error | Contactor stuck welded closed. | Contact your Zero dealer. |
| 27 · Precharge Error | Controller precharge failed. | Contact your Zero dealer. |
| 28 · BMS Isolation Fault | Isolation fault detected. | Contact your Zero dealer. |
| 29 · BMS Isolation Danger | Severe isolation fault. | Stop; contact your Zero dealer. |
| 30 · BMS CAN Error | BMS CAN-bus communication fault. | Contact your Zero dealer. |
| 31 · SEVCON CAN Error | Controller CAN-bus communication fault. | Contact your Zero dealer. |
| 32 · Module Variance Too High | Pack modules too mismatched. | Contact your Zero dealer. |
| 33 · SEVCON Error Turn Off | Controller shut down on a fault. | Cycle key OFF/ON; contact your dealer. |
| 34 · Charge Error Turn Off | Charging stopped on a fault. | Check the charger; contact your dealer. |
| 35 · Loopback Error | Missing second module or blanking plug. | Fit a second module or blanking plug. |
| 36 · Board 5V Error | BMS 5V rail fault. | Contact your Zero dealer. |
| 37 · Board 3.3V Error | BMS 3.3V rail fault. | Contact your Zero dealer. |
| 38 · Idle Turn Off | Shut down after prolonged idle. | Cycle key OFF/ON to restart. |
| 39 · Throttle Out Of Range Disable | Throttle signal out of range; drive disabled. | Check throttle; contact your dealer. |
| 40 · BMS Throttle Enable Wire Disable | Throttle disabled via the BMS enable wire. | Contact your Zero dealer. |
| 41 · Low Battery Voltage Disable | Pack too low to ride. | Recharge the power pack. |
| 42 · High Battery Temperature Status Disable | Pack too hot to operate. | Let the pack cool. |
| 43 · Low Battery Temperature Status Disable | Pack too cold to operate. | Warm the pack. |
| 44 · Kill Switch Disable | Motor stop switch is OFF. | Set the motor stop switch to ON. |
| 45 · Kickstand Switch Disable | Kickstand is down. | Raise the kickstand. |
| 46 · BMS Charger Connected Disable | Riding blocked while charger is plugged in. | Unplug the charger before riding. |
| 47 · MBB Charger Connected Disable | Riding blocked while charger is plugged in. | Unplug the charger before riding. |
| 48 · SEVCON Startup Disable | Controller failed to start. | Cycle key OFF/ON; contact your dealer. |
| 49 · Contactor Open Disable | Contactor open; drive disabled. | Contact your Zero dealer. |
| 50 · BMS Self-Test Error | BMS self-test failed. | Reset BMS; contact dealer if it persists. |
| 51 · BMS Self-Test Warning | BMS self-test warning. | Monitor; service if it persists. |
| 52 · Reserve Partition Disable | Reserve depleted; drive disabled. | Recharge the power pack. |
| 53 · BMS Internal Disable | BMS internally disabled. | Cycle key OFF/ON or reset the BMS. |
| 54 · Internal Disable Error | BMS internal disable error. | Cycle key OFF/ON; contact your dealer. |
| 55 · Internal Fault Error | BMS internal fault. | Cycle key OFF/ON; contact your dealer. |
| 56 · Monolith Not Connected | Main pack not detected. | Contact your Zero dealer. |
| 57 · Module Did Not Connect | A power-pack module failed to connect. | May only need recharging; else contact dealer. |
| 58 · BMS Sensor Warning | BMS sensor warning. | Monitor; service if it persists. |
| 59 · BMS System Warning | General BMS system warning. | Contact your Zero dealer. |
| 60 · Bike Configuration | Vehicle configuration mismatch. | Contact your Zero dealer. |
| 61 · Tipover Detected | Tip-over / lean-angle sensor tripped. | Right the bike; cycle key OFF/ON. |
| 62 · Target Magnet Warning | Speed-sensor target magnet warning. | Service if it persists. |
| 63 · Target Magnet Disable | Speed-sensor magnet fault; drive disabled. | Contact your Zero dealer. |
Maintenance schedule
Official service intervals and the belt / fluid replacement points.
| Interval | Service tasks |
|---|---|
| Every ride | Check brake fluid level (front & rear); check front & rear brake operation, fluid leakage and pads; check tyres (tread depth, damage, air pressure); inspect drive belt for damage/cracking; check belt & chain sprockets; check drive-chain slack/alignment/condition (lubricate after exposure to water); check front fork and rear shock for operation/oil leakage; check throttle grip operation and free play |
| Initial 100 mi (160 km) - first service / break-in | Check drive belt tension |
| Initial 600 mi (1,000 km) - second service | Check drive belt tension; check wheel bearings; adjust and thoroughly lubricate drive chain; check steering bearings for looseness; apply grease and check front brake lever pivot shaft; check kickstand switch operation; drive motor commissioning and timing |
| Every 8,000 mi (13,000 km) or 12 months | Replace brake fluid (front & rear); check wheels for run-out/damage; check wheel bearings; check drive belt tension; check steering bearings for looseness; check and tighten all chassis fasteners; grease/check/service front brake lever pivot shaft; check throttle grip; check and grease kickstand pivots; check/replace kickstand switch; drive motor commissioning and timing |
| Every 16,000 mi (25,000 km) - Note B | Repack steering bearings with all-purpose grease |
| Every 24,000 mi (37,000 km) - Note A | Replace drive belt; check swingarm pivot bearings for smooth operation |
| As needed | Replace worn drive chain |
See this schedule on a distance axis →What a noise between services means →
Torque specifications
Key fastener torque values from the service manual.
| Fastener | Torque |
|---|---|
| Rear axle end bolt | 75 lb-ft (102 Nm), Loctite 242 |
| Rear axle nut (drive belt adjustment) | 75 lb-ft (102 Nm), Loctite 242 |
| Belt tensioner / axle jam nuts | 15 lb-ft (20 Nm) |
| Front axle | 40 lb-ft (54 Nm), anti-seize |
| Main pivot bolt/nut (swingarm) | 75 lb-ft (102 Nm), Loctite 242 |
| Front brake caliper mount bolts | 19 lb-ft (26 Nm), Loctite 242 |
| Rear brake pad pin | 6 lb-ft (8 Nm), Loctite 242 |
| Rear axle slider retaining bolts | 15 lb-ft (26 Nm) |
| Handlebar clamp mount bolts | 18 lb-ft (24 Nm) |
| Shock mount bolts (upper / lower) | 52 lb-ft (70.5 Nm) / 38 lb-ft (51.5 Nm) |
Zero FXS at a glance: supermoto specs and figures
The FXS is built on Zero's X platform, the same lightweight chassis and drivetrain used by the FX dual-sport and later FXE street bike. What sets the FXS apart is its supermoto stance: 17-inch cast wheels front and rear wearing street rubber (Pirelli Diablo Rosso-class tyres, roughly 110/70-17 front and 140/70-17 rear), quicker steering geometry, and a lower seat than the wire-wheeled FX. Underneath, it is a full-strength electric performance motorcycle designed to be light, simple and low-maintenance.
Power comes from the Z-Force 75-5, a passively air-cooled, high-efficiency radial-flux interior-permanent-magnet brushless motor driven by a 550-amp three-phase controller with regenerative deceleration. That combination delivers around 106 Nm (78 lb-ft) of torque from zero rpm, roughly 34 kW (46 hp) net motor power, and an estimated top speed near 137 km/h (85 mph). There is no clutch and no gearbox: it is clutchless direct drive through a quiet, low-maintenance Gates Carbon belt (a chain drive was offered as an option).
Energy is stored in Zero's Z-Force Intelligent Modular power pack. The FXS accepts one or two battery modules: a single module gives roughly 3.6 kWh of maximum capacity, while the full ZF7.2 configuration offers 7.2 kWh maximum / about 6.3 kWh usable. Because the pack is modular, you can carry a spare module to extend range or swap in a fresh one. Each module weighs about 19 kg (42 lb), keeping the whole motorcycle in the featherweight class for its category.
- Motor: Z-Force 75-5 passively air-cooled brushless, interior-permanent-magnet
- Peak torque: ~106 Nm (78 lb-ft); net power ~34 kW (46 hp)
- Estimated top speed: ~137 km/h (85 mph)
- Transmission: clutchless direct drive, Gates Carbon belt (90T/18T); chain optional
- Battery: Z-Force modular lithium-ion, one or two modules (~3.6 kWh each, up to 7.2 kWh / 6.3 kWh usable)
- Wheels/tyres: 17-inch cast, supermoto/street tyres front and rear
- Brakes: Bosch Gen 9 ABS with J-Juan calipers, single front and single rear disc
- Suspension: fully adjustable Showa 41 mm inverted forks and piggyback rear shock
- Onboard charger: 650 W integrated, 110-240 V AC compatible
Controls, dashboard display and indicator lights
The FXS uses a three-position key switch on the fork: Steering Lock, OFF and ON. OFF disables the electrical system; ON powers up the lights and dash and readies the bike to ride. To lock the steering, turn the bars fully left, push the key in with it in the OFF position and turn it counter-clockwise, then remove it. Always remove the key when leaving the bike to prevent theft.
The digital dash centres on a large speedometer ring (switchable between km/h and mph) surrounded by information zones. A clock sits at the top; a state-of-charge percentage and battery bar show remaining energy; and two customisable panels (Display A and Display B) can show range, motor rpm, trip meters, instant/average/lifetime energy use, motor temperature or stored error codes, set via the SEL (select) and ADJ (adjust) buttons. Two live meters, OUTPUT (torque and power being drawn) and REGEN (energy being fed back to the battery), let you see exactly how your right wrist is affecting efficiency. A Bluetooth icon confirms when a paired phone is connected. When charging, the charge-percentage field switches to an estimated time-to-full countdown.
The handlebar controls are conventional: left cluster carries the high/low beam switch, flash-to-pass, turn signals, hazard flasher and horn; the right side has the throttle, front brake lever, the motor stop (run/stop) switch and the performance mode button. The rear brake is a foot pedal on the right. Learn the warning lights before you ride, because on an electric motorcycle they are your main window into what the powertrain and battery are doing.
- Armed/Live indicator: blinking = drive system enabled but not yet ready; solid = ready to move when you open the throttle
- ABS light: on with key ON, goes out above 5 km/h (3 mph); if it stays lit above that speed, ABS has a fault
- Charging indicator: green slow-flash = charging; solid green = fully charged; rapid orange flash = charging error
- Temperature warning: flashing = powertrain nearing its heat limit (no power loss yet); solid = power is being reduced until it cools
- Check-engine light: an error has forced a permanent torque reduction. A diagnostic code accompanies it; see a dealer
- System-warning (red) light: a system fault has been detected. Count the flashes to identify it
- High-beam (blue) and left/right turn indicators (green) work as on any motorcycle
Ride modes, throttle and regenerative braking
The FXS has no gears: you twist the throttle counter-clockwise to accelerate and ease it back to slow down. Because it is direct drive, response is instant and completely smooth. The performance mode button on the right handlebar cycles between three modes: ECO, SPORT and CUSTOM. You can switch modes while riding, but the change only takes effect once the throttle returns to the fully closed position.
ECO softens acceleration and lowers top speed while increasing regenerative braking, ideal for new riders, slippery conditions, or squeezing out extra range. SPORT unlocks the bike's full acceleration and reduces regen drag on a closed throttle, which suits confident riders who want maximum response. With CUSTOM you use the Zero app to dial in your own acceleration, top-speed and regen levels to build a personal profile somewhere between the two presets.
Regenerative braking is a core part of how the FXS rides. When you roll off the throttle, the motor becomes a generator, converting the bike's momentum back into battery energy and producing a smooth engine-braking-like deceleration. You will feel a slight drag as it engages. If you want to coast freely, for example to carry speed through a corner, hold the throttle just off the fully closed position so regen does not activate. Because the bike is silent, remember to use the horn to alert pedestrians and other traffic to your presence.
- ECO: gentler power, lower top speed, stronger regen, best range, good for beginners
- SPORT: full acceleration, reduced regen, recommended for experienced riders
- CUSTOM: your own acceleration/top-speed/regen mix, configured in the smartphone app
- Mode changes apply only when the throttle is fully closed
- Regen recovers energy on throttle-off; a light drag signals it is working
- Hold the throttle slightly open to coast without regen
Battery, range and charging: connectors, times, do's and don'ts
The FXS carries a 650 W integrated onboard charger tucked under the front bodywork. You charge by plugging the supplied cord into the onboard charger connector and into a grounded wall outlet. The charger runs on either 110-120 V or 220-240 V AC, and the mains voltage does not change how long a charge takes; the onboard charger's power is the limiting factor. A full ZF7.2 pack takes roughly 9.7 hours to reach 100% (about 9.2 hours to 95%) from the onboard charger in mild temperatures; a single 3.6 kWh module takes roughly half that. To cut charge times dramatically, the FXS supports Zero's off-board accessory quick chargers, which connect to the accessory port above the motor: adding one supplemental charger brings a full pack down to about 4.1 hours (3.6 hours to 95%), and up to four supplemental chargers can be stacked to reduce charging time by as much as 75%.
Battery care matters more than any other maintenance item on an electric bike, because lithium cells age with both use and calendar time, and ageing accelerates when a pack sits at a high state of charge, especially when hot. Charge only with the Zero charger or Zero-approved accessory chargers; unapproved chargers can damage cells and void the warranty. Always charge in a well-ventilated area away from combustible materials, and avoid charging outdoors in the rain. The onboard charger draws up to about 14 A on a 120 V circuit, so do not share that circuit with another heavy appliance.
The pack will not accept a charge if its internal temperature is below 0°C (32°F) or above 50°C (122°F); after hard riding it can be internally hot even on a cool day, and usually needs around 30 minutes to cool before it will charge again. Range in real-world use depends on speed, terrain, rider weight and weather; conservative riding and ECO mode maximise it.
- Onboard charge (full ZF7.2 pack): ~9.7 h to 100% / ~9.2 h to 95%
- With one accessory quick charger: ~4.1 h to 100% / ~3.6 h to 95%; up to four chargers cut time by ~75%
- Charge voltage 110-240 V AC (voltage does not affect charge duration)
- Pack will not charge below 0°C (32°F) or above 50°C (122°F)
- If fully discharged, recharge within 24 hours to avoid damage
- Never store below 30% state of charge; if below 30%, charge to at least 60% then unplug
- In hot weather (>35°C/95°F) let a hot pack cool a few hours before charging
- 1Charge according to Zero's guidelines and only with the supplied or an approved charger.
- 2Plug the supplied cord into the onboard charger connector under the front fairing.
- 3Connect the other end to a grounded outlet; if using an extension cord, use a grounded 3-wire 12 AWG cord no longer than 7.6 m (25 ft).
- 4The charge icon on the dash flashes while charging; the panel shows an estimated time to full that counts down as range climbs.
- 5When the charge indicator turns solid green (or the dash reads 100%), charging is complete.
- 6For best long-term battery health, unplug once charged rather than leaving it connected indefinitely.
Break-in and your first rides on the FXS
The FXS's motor and battery need no special break-in period. The electric powertrain is ready to use from delivery. What does need bedding in are the brakes and tyres, and the most important early habit is following the initial-service schedule. Zero specifies inspections at the first 160 km (100 miles) and again at the first 1,000 km (600 miles); these early checks catch anything that has settled or loosened after assembly and are vital to long-term reliability, so do not skip them.
New brake pads and discs deliver very little stopping power on their first applications until an even layer of pad material transfers onto the rotor. Bed them in deliberately: from about 64 km/h (40 mph) gradually brake down to roughly 16 km/h (10 mph) without locking the wheels or triggering ABS and without coming to a full stop, then accelerate back and repeat, doing front and rear separately, for 15-20 cycles. Finish with a 16 km (10 mile) ride to let everything cool. Fresh tyres also have a slippery release-agent film, so take it easy and increase your lean angle gradually over the first tankful of riding.
Spend your first rides learning the throttle-and-regen relationship, practising smooth stops (the FXS is light and can lock a wheel if ABS is off or inoperative), and getting used to the near-silent operation. Before every ride, run through the 'every ride' checks: tyre pressures and condition, brake feel, lights and horn, and the battery charge level shown on the dash.
- No mechanical engine break-in needed: the powertrain is ready from delivery
- Complete the initial services at 160 km (100 mi) and 1,000 km (600 mi)
- Bed in new brakes: 15-20 controlled slow-downs from ~64 to ~16 km/h, front and rear separately
- Ease into fresh tyres: build lean angle gradually over the first rides
- Do the pre-ride check every time: tyres, brakes, lights, horn, charge level
Maintenance schedule, torque specs and drive belt care
An electric motorcycle needs far less servicing than a petrol one (there is no oil, filters, spark plugs or coolant), but the FXS still has a defined schedule that keeps it safe and preserves warranty coverage. After the initial 160 km and 1,000 km services, the recurring interval is every 13,000 km (8,000 miles) or 12 months, whichever comes first. Zero recommends a dealer inspection every 12 months regardless of distance. Where items list both time and mileage, follow whichever arrives first.
The Gates Carbon belt needs no lubrication, only cleaning with water and a soft brush (never detergent), and it must never be crimped, twisted, back-bent, inverted or used as a lever, any of which can break the internal carbon cords. Check its tension and condition at the scheduled intervals and after belt exposure to grit; correct tension for the 11 mm-pitch belt is roughly 42.5-73.6 Hz measured with the Gates Carbon Drive phone app (or about 25-76.5 kg with a mechanical tension tester) on the lower belt span between the sprockets. The belt itself is a wear item and should be replaced at about 37,000 km (24,000 miles). If you ever hear or feel the belt 'ratcheting' (teeth skipping over the sprocket), replace it before riding again.
Brake fluid is DOT 4 and should be checked at the scheduled services and periodically replaced. Steering-head bearings get repacked with grease at longer intervals (around every 25,000 km / 16,000 miles), and swingarm pivot and steering bearings are inspected on the extended schedule (around every 37,000 km / 24,000 miles). Periodically confirm the main chassis fasteners are at their correct torque.
- Service interval: every 13,000 km (8,000 mi) or 12 months, after initial 160 km and 1,000 km checks
- Drive belt: no lubrication; replace at ~37,000 km (24,000 mi); tension ~42.5-73.6 Hz (11 mm pitch)
- Brake fluid: DOT 4, checked regularly and replaced on schedule
- Front axle: 54 Nm (40 lb-ft); rear axle end bolt: 102 Nm (75 lb-ft)
- Swingarm main pivot bolt/nut: 102 Nm (75 lb-ft) with threadlocker
- Handlebar clamp bolts: 24 Nm (18 lb-ft); triple-tree pinch bolts: 22 Nm (16 lb-ft)
- Shock mount bolts: 70.5 Nm upper / 51.5 Nm lower; front caliper mounts: 26 Nm with threadlocker
- Steering-bearing repack ~ every 25,000 km (16,000 mi)
- 1Remove the key and safely support the bike with the rear wheel off the ground.
- 2Measure belt tension on the lower span midway between the sprockets, using the Gates app or a tension tester.
- 3If out of range, loosen the rear axle nut and both 13 mm jam nuts.
- 4Turn each 13 mm adjuster bolt a 1/4-turn at a time, keeping both sides equal, until tension is in spec.
- 5Re-tighten the jam nuts and torque the rear axle end bolt to 102 Nm (75 lb-ft) with fresh threadlocker.
Tyres, brakes and suspension setup
Correct tyre pressure is the single most important safety check on the FXS. Set them cold (not ridden for at least 3 hours) to 32 psi (2.21 bar / 221 kPa) front and 34 psi (2.34 bar / 234 kPa) rear, and replace the valve caps afterward. Under-inflation is a leading cause of tyre failure and unstable handling, so check before every ride. Inspect for cuts, cracks, bulges, uneven wear and exposed cords, and never use tyre-dressing products, which reduce grip. Because the ABS compares front and rear wheel speeds, only fit the tyre sizes and types Zero specifies. The wrong tyres can degrade ABS behaviour and stopping distance.
Braking is handled by a Bosch Gen 9 ABS system with J-Juan hydraulic calipers: a single front disc (larger diameter on the 17-inch supermoto setup) and a single rear disc, both running DOT 4 fluid. Replace the pads once either pad's friction material reaches 1.35 mm (0.05 in) or less, always in pairs, and replace a disc if it wears below 3.85 mm (0.15 in). ABS switches off automatically below 5 km/h (3 mph) and can be manually disabled for off-road or performance riding; a completed key-off cycle (bring the bike to a stop, key OFF, wait about 5 seconds, key ON) restores it once both wheels pass 5 km/h. If the ABS light stays on above 5 km/h, treat the system as inoperative and get it serviced.
The FXS runs fully adjustable Showa suspension: 41 mm inverted cartridge forks and a piggyback-reservoir rear shock, each with adjustable spring preload, compression and rebound damping. Springs are set at the factory for an 82 kg (180 lb) rider; heavier riders need more preload. The recommended sag targets are about 60 mm at the front and 82 mm at the rear. Factory front settings for the supermoto (17-inch) chassis are roughly 7 clicks of compression and 12 clicks of rebound out from full-hard, with 5.5 turns of fork preload from fully out. Never wind any adjuster fully to one extreme. Always leave at least one click in each direction.
- Tyre pressure (cold): 32 psi / 2.21 bar front, 34 psi / 2.34 bar rear
- Check pressures before every ride; fit only Zero-specified tyre sizes/types
- Brake fluid: DOT 4; replace pads at 1.35 mm remaining (in pairs); disc minimum 3.85 mm
- ABS auto-disables below 5 km/h; if the light stays on above that speed, there is a fault
- Suspension: fully adjustable Showa 41 mm forks and piggyback shock
- Factory sag: ~60 mm front, ~82 mm rear (sprung for an 82 kg / 180 lb rider)
- Never force any damping adjuster fully hard or soft
Storage, transport and winter care
For any layup longer than 30 days, leave the charger connected. After 30 days without the key being switched on, the Battery Management System (BMS) activates Long Term Storage Mode: it drains the pack to about 80% state of charge, then lets it self-discharge slowly (roughly 1% per day), and whenever it falls to 30% the charger tops it back to 80% and repeats. This keeps the cells in the healthiest window automatically. If you cannot leave it plugged in, check the dash state of charge at least every 30 days and never let it drop below 30%. Storing a pack at a low charge for a prolonged period can permanently damage it and void the warranty.
Store the bike somewhere cool and dry; the ideal storage temperature band is 10-35°C (50-95°F). Heat ages lithium cells, so avoid hot sheds and direct sunlight. Cold storage in an unheated garage is fine provided the temperature never falls below -20°C (-4°F) and the pack is kept above 30% charge and was last topped off above 0°C. When you bring it out of storage, disconnect the charger, key ON, raise the stand and set the run switch to Run to exit storage mode, then key off and charge for at least 24 hours to fully re-balance the cells before riding.
For transport, both wheels must be on a trailer or transport device. Zero does not permit towing the FXS on its own wheels. Secure it with two ratchet straps at the front and two at the rear, anchored to frame contact points and pulled at about a 45-degree angle, using soft straps to protect the finish. Cold riding does not permanently harm the pack, but expect reduced range (up to about 30% less at -1°C versus 27°C) and softer performance; avoid riding when the pack is below -5°C (23°F), and if you do, put it on a charger above 0°C as soon as you get home.
- Layup over 30 days: leave the charger connected and the BMS manages storage automatically
- Storage Mode drains to ~80%, self-discharges ~1%/day, recharges to 80% at 30%
- If unplugged, check SoC every 30 days and never let it fall below 30%
- Ideal storage temperature: 10-35°C (50-95°F); keep out of heat and direct sun
- Unheated winter storage OK above -20°C (-4°F) with pack above 30%
- Exiting storage: run-switch cycle, then charge 24 h to rebalance cells
- Transport with both wheels supported; two front + two rear soft straps at ~45°
- Cold-weather range can drop up to ~30%; don't ride with pack below -5°C (23°F)
Warning lights, fault codes and troubleshooting
The FXS communicates faults in two ways: a red system-warning light that flashes a repeating count, and two-digit diagnostic codes you can retrieve from dash Display A. The flash count is the quickest diagnosis. A single flash can mean a safety override is active, a BMS isolation fault, a charging problem, or that the motor-stop switch is OFF or the kickstand is down. You can fix the last two instantly by pressing the run switch ON and raising the stand. Other common counts: 3 flashes means the throttle was open (or has a connection issue) at power-up; 5 means the pack is too low to ride and needs charging; 11 means a battery temperature sensor fault (rideable but needs service). Counts such as 2, 4, 6, 7, 8, 10, 12, 13 and 15-18 indicate faults that require a dealer.
Diagnostic codes give more detail, for example code 1 (high throttle), 2-5 (motor or controller temperature warnings), 7 (low battery voltage), 14 (safety override), 24 (startup error), 44 (kill-switch disable), 45 (kickstand-switch disable), 57 (a module did not connect, which may only mean the bike needs recharging), or 61 (tip-over detected). Temperature-related codes usually clear once components cool. If the yellow temperature indicator flashes, the passively air-cooled powertrain is nearing its heat limit but power is unaffected; if it goes solid, the bike is deliberately reducing power (or top speed) until it cools. This is normal thermal protection, not a fault, and causes no damage.
The BMS itself can disable the throttle or block charging to protect the pack. If the pack is empty, too hot (above 50°C internal), or grossly out of cell balance, the throttle is cut until the condition clears. For an unbalanced pack the fix is to leave it charging for up to 72 hours so the BMS can rebalance the cells. The bike also has a tip-over sensor that disables drive if it falls; upright it and perform one full key cycle (OFF, wait for the display to go blank, then ON) to reset. For many niggles, the first move is key OFF, wait about 5 seconds, and key ON to re-run the self-test.
- 1 flash: safety override, BMS isolation, charging issue, or run-switch OFF / kickstand down
- 3 flashes: throttle open or throttle connection fault at startup
- 5 flashes: pack too low, charge before riding
- 11 flashes: battery temp-sensor fault (rideable, but service it)
- Solid yellow temperature light: normal power reduction to protect an overheating powertrain
- Unbalanced-pack fault: leave charging up to 72 hours to let the BMS rebalance
- Tip-over: upright the bike and do one full key OFF/ON cycle to reset
- Multi-flash faults (2, 4, 6-8, 10, 12-18) generally require a dealer
Safety, high-voltage precautions and legal notes
The FXS is a performance motorcycle and should be treated with respect. Always wear a regionally approved helmet, eye protection, gloves, over-the-ankle boots and protective clothing on every ride, however short. Read the safety labels on the bike, never let an untrained rider use it, never ride under the influence, and complete the 'every ride' pre-ride checks. Its near-silent running means pedestrians and drivers may not hear you coming, so ride defensively and use the horn.
The battery and drive system operate at high voltage. Any cable or wiring with an orange covering is high-voltage. Do not probe, cut, tamper with or modify it, and never open the power pack (that is strictly a job for trained Zero technicians). High-voltage components can be hot during and after use, so mind both shock and burn hazards. In the rare event of a crash, do not touch orange wiring or the components it connects to. If a fire ever occurs, extinguish visible flame with a Class D extinguisher, then douse with a water-based extinguisher once the flame is out.
Do not modify the motorcycle in ways that affect safety. Non-approved modifications can make it unsafe and are not covered by Zero. Use only Zero-approved parts, accessories and chargers to preserve both performance and warranty. Zero advises against towing anything with the FXS, as it can damage the powertrain. Keep the firmware up to date through your dealer, and keep this documentation with the bike. In many regions it is legally part of the vehicle and should be passed on to any future owner.
- Full protective gear every ride: helmet, eye protection, gloves, boots, riding clothing
- Orange wiring = high voltage: never probe, cut or modify it; never open the power pack
- High-voltage parts can be hot, so beware shock and burns during and after riding
- After a crash, avoid orange HV wiring/components; use a Class D then water-based extinguisher on fire
- Use only Zero-approved parts, accessories and chargers to keep the warranty valid
- Do not tow with the bike; keep firmware current via your dealer
- This manual is, by law in many regions, part of the vehicle, so keep it with the bike
Frequently asked
How long does it take to charge a Zero FXS?
Using the built-in 650 W onboard charger, a full 7.2 kWh Zero FXS pack takes about 9.7 hours to reach 100% (roughly 9.2 hours to 95%) in mild temperatures; a single 3.6 kWh module takes about half that. Adding one Zero accessory quick charger drops a full charge to around 4.1 hours, and using up to four supplemental chargers can cut charging time by as much as 75%. Mains voltage (110-240 V) does not change the charge time.
What is the top speed and range of the Zero FXS?
The Zero FXS has an estimated top speed of around 137 km/h (85 mph), produced by its Z-Force 75-5 motor's roughly 106 Nm (78 lb-ft) of torque and about 34 kW (46 hp). Real-world range depends heavily on speed, terrain, rider weight and weather, and varies from one charge to the next. Conservative riding in ECO mode delivers the most distance, while sustained high-speed riding reduces it significantly.
What tyre pressure should a Zero FXS have?
Set the tyres cold (not ridden for at least 3 hours) to 32 psi (2.21 bar / 221 kPa) at the front and 34 psi (2.34 bar / 234 kPa) at the rear. Check pressures before every ride, since under-inflation is a leading cause of tyre failure and unstable handling, and always fit the tyre sizes and types Zero specifies so the ABS works correctly.
Does the Zero FXS have a clutch or gears?
No. The Zero FXS uses clutchless direct drive: there is no clutch lever, no gearbox and no shifting. You twist the throttle to accelerate and roll off to slow down. Power is delivered through a low-maintenance Gates Carbon belt (a chain was available as an option), giving smooth, instant response from a standstill.
How often does the Zero FXS drive belt need replacing?
The Gates Carbon belt is a wear item that should be replaced at about 37,000 km (24,000 miles). It needs no lubrication (clean it only with water and a soft brush), and its tension should be checked at the scheduled services (target roughly 42.5-73.6 Hz on the 11 mm-pitch belt using the Gates app). If the belt ever starts 'ratcheting' or skipping teeth, replace it before you ride again.
How often does a Zero FXS need servicing?
After initial inspections at the first 160 km (100 miles) and 1,000 km (600 miles), the Zero FXS follows a recurring service interval of every 13,000 km (8,000 miles) or 12 months, whichever comes first. Zero also recommends a dealer inspection every 12 months regardless of distance. There's no oil, filters or spark plugs, so routine maintenance is minimal: mainly brakes, belt, tyres, fasteners and battery care.
Can I ride and charge the Zero FXS in the rain?
The FXS is designed to be ridden in the rain like any motorcycle. Charging, however, should be done in a well-ventilated area away from combustible materials and, if outdoors, not in the rain. Always plug into a grounded outlet and use only the Zero charger or approved accessory chargers. After washing or wet riding, let electrical components dry and apply the brakes a few times to clear moisture from the pads.
Why is my Zero FXS losing power or slowing down?
If the yellow temperature light is solid, the passively air-cooled powertrain has reached its heat limit and the bike is deliberately reducing power (or top speed) to protect itself. This is normal thermal management, not a fault, and causes no damage; ease off and it recovers as it cools. If a check-engine light and a diagnostic code appear instead, or the red system-warning light is flashing, note the code/flash count and have it checked. A very low battery will also limit power until you recharge.
How should I store my Zero FXS over winter?
For any layup over 30 days, leave it plugged in: after 30 days the BMS enters Long Term Storage Mode, holding the pack around 80% automatically. Store it cool and dry (ideally 10-35°C), out of direct sun, and never let the charge fall below 30%. Unheated garages are fine down to about -20°C (-4°F) if the pack stays above 30%. When you return it to service, cycle the run switch to exit storage mode, then charge for at least 24 hours to rebalance the cells.
What do the ride modes on the Zero FXS do?
The FXS has three modes selected by the handlebar button. ECO softens acceleration, lowers top speed and increases regenerative braking for maximum range and easier riding. SPORT unlocks full acceleration and reduces regen for experienced riders. CUSTOM lets you set your own acceleration, top-speed and regen levels through the Zero smartphone app. Mode changes only take effect once the throttle is fully closed.
Is the Zero FXS battery removable or swappable?
Yes. The FXS uses Zero's Intelligent Modular power pack and can run one or two modules. Each module weighs about 19 kg (42 lb) and can be slid out of the frame after unlocking the retaining rail, so you can charge one module while riding on another or carry a spare to extend range. If running a single module it must sit in the forward position, and the connector plug must be fitted or the bike won't operate. Never open a pack: that's a trained-technician-only job.
What does the ABS light on the Zero FXS mean?
The ABS light illuminates when you switch the key ON and should go out once the bike passes 5 km/h (3 mph). If it stays lit above that speed, the ABS is not working and you should have it serviced. The bike will brake like a non-ABS machine with longer stopping distances. ABS can also be intentionally disabled (for off-road use, wheelies or burnouts); to restore it, stop completely, key OFF, wait about 5 seconds, then key ON.
This guide is an independent synthesis of the official Zero Motorcycles owner & service manuals, rewritten for clarity. Figures are stated as published for the latest model year and may vary by year, region and options. Always follow your bike's own manual and a qualified technician for service. Zero Motorcycles is a trademark of its respective owner.