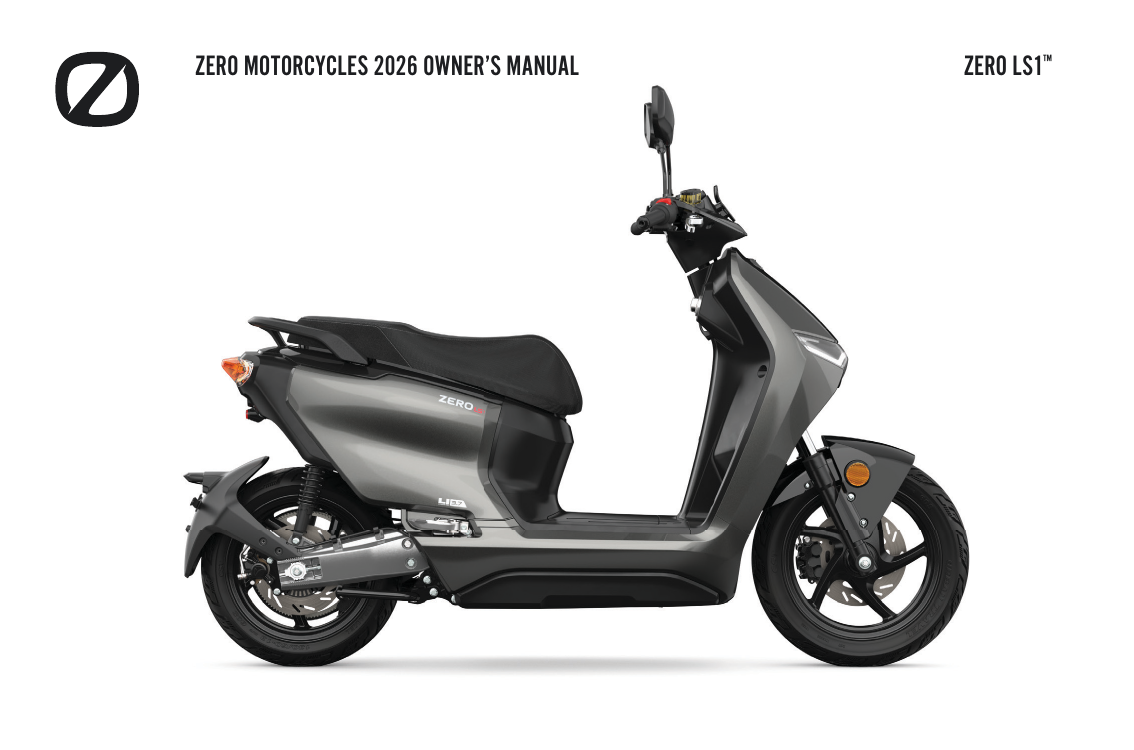
Zero LS1: complete owner's guide
The Zero LS1 is Zero Motorcycles' full-size electric maxi-scooter: a quiet, clutchless, twist-and-go commuter built around a 74-volt powertrain, twin removable lithium battery packs and a maintenance-light belt final drive. This owner's guide puts what an LS1 rider needs in one place: the numbers behind range and charging, how the dashboard and ride modes behave, tyre pressures and torque figures, the full scheduled-maintenance calendar, plus what every warning light and fault code means. Use it as a reference to keep the LS1 safe, efficient and covered by its warranty.
Full specifications
Full Zero LS1 specifications from the official manual (2026 model year).
- Motor
- DC brushless, rear-wheel drive (efficiency >85%)
- Peak power
- 8.4 kW (11 hp)
- Peak torque
- 51 Nm
- Top speed
- 100 km/h
- Regenerative braking
- Dash Regen Meter indicates the amount of torque applied to the rear wheel while decelerating (off-throttle regeneration); no adjustable ride-mode regen described
- Transmission
- Clutchless direct drive
- Max capacity
- 4.4 kWh
- Nominal capacity
- 3.7 kWh
- Chemistry
- Lithium
- Onboard charger
- 0.8 kW
- Standard charge time
- 5.0 h (100%) / 4.5 h (90%) with standard 800 W off-board charger; 3.1 h (100%) / 2.6 h (90%) with one accessory charger
- City
- 115 km
- Curb weight
- 132 kg
- Seat height
- 780 mm
- Wheelbase
- 1330 mm
- Front
- Telescopic fork
- Rear
- Dual shocks, non-adjustable; 104 mm travel
- Front brake
- Hydraulic disc brake operated by hand lever; DOT 4 brake fluid; pad wear limit 1.5 mm, rotor limit 3.5 mm (no caliper piston count or disc diameter specified)
- Rear brake
- Hydraulic disc brake operated by hand lever; DOT 4 brake fluid; pad wear limit 1.5 mm, rotor limit 3.5 mm (no caliper piston count or disc diameter specified)
- ABS
- ABS equipped (15 A ABS fuse; also Traction Control System with 10 A fuse); brand/generation not specified
- Front tyre
- CST Urban Travel 110/80-14 59S · 29 psi (200 kPa)
- Rear tyre
- CST Urban Travel 130/60-13 60S · 31 psi (215 kPa)
- Final drive
- Belt
- Front pulley
- 22 T
- Rear sprocket
- 104 T
- Final drive ratio
- 104T/22T
- Headlight
- LED
- Taillight
- LED
- Turn signals
- LED
Ride modes
How each selectable mode changes acceleration, top speed and regenerative braking.
| Mode | Character | Top speed | Regen | Best for |
|---|---|---|---|---|
| Eco | Softer power and gentler acceleration | — | — | New or inexperienced riders |
| Standard | Moderate power and acceleration (default mode) | — | — | Everyday riding once familiar with the scooter |
| Sport | Strong power for the best acceleration; highest battery-consumption rate | — | — | Experienced riders already comfortable with the scooter |
Charging times
Charging scenarios and how long each takes to fill the pack.
| Method | Input | Time to full | Notes |
|---|---|---|---|
| Standard charging (single onboard charger) | 230 V AC wall outlet (socket rated ≥840 W recommended) via the 800 W off-board charger | 5.0 h to 100% (4.5 h to 90%) | Default single-charger setup; battery can be charged on or off the scooter. |
| Fast charging (with one accessory charger) | As standard, plus one additional accessory charger | 3.1 h to 100% (2.6 h to 90%) | Adding a second charger nearly halves the charge time. |
Dashboard warning lights
What each dashboard indicator means and what to do when it lights up.
A single digital instrument display with a large central speedometer, ringed by the battery state-of-charge gauge, live motor speed, and the active ride mode (shows PARK before travel begins), plus a clock, trip and total odometers, and torque and regen bar meters. A row of tell-tale icons (turn signals, high beam, ABS, traction control, temperature, charging, malfunction, kickstand, kill switch, tip-over and cruise) runs along the display; note the manual does not state the icon colours, so the colours below follow standard motorcycle telltale conventions.
Looking for a specific error? Browse the full Zero error-code catalog →
Fault & diagnostic codes
Diagnostic codes the display and app can show, with what each means and the fix.
102 diagnostic codes for the Zero LS1
| Code / fault | Meaning | What to do |
|---|---|---|
| b103 · Cell differential pressure fault 1 | Level 1 battery cell voltage imbalance detected | Contact your local Zero dealer |
| b110 · Discharge cell undervoltage fault 1 | Level 1 battery cell voltage too low during discharge | Charge the battery |
| b114 · BMS charging overcurrent fault 1 | Level 1 charge current too high | Reduce charging current |
| b119 · BMS discharge over-temperature fault 1 | Level 1 battery too hot while discharging | Scooter limits power (level 1) |
| b120 · BMS charging over-temperature fault 1 | Level 1 battery too hot while charging | Limit charging current |
| b121 · BMS discharge under-temperature fault 1 | Level 1 battery too cold while discharging | Scooter limits power (level 1) |
| b122 · BMS charging under-temperature fault 1 | Level 1 battery too cold while charging | Reduce charging current |
| b130 · BMS discharge overcurrent fault 1 | Level 1 discharge current too high | Reduce output current |
| b131 · Battery insulation fault 1 | Level 1 battery insulation (isolation) problem | Contact your local Zero dealer |
| b140 · Charging-unit battery undervoltage fault 1 | Level 1 battery voltage too low for charging unit | Charge the battery |
| b141 · Uneven temperature fault 1 | Level 1 uneven temperature across the pack | Contact your local Zero dealer |
| b155 · Starting battery overvoltage fault | 12 V starting battery voltage too high | Contact your local Zero dealer |
| b156 · Starting battery undervoltage fault | 12 V starting battery voltage too low | Contact your local Zero dealer |
| b203 · Cell differential pressure fault 2 | Level 2 battery cell voltage imbalance | Contact your local Zero dealer |
| b210 · Discharge cell undervoltage fault 2 | Level 2 cell voltage too low during discharge | Charge the battery |
| b214 · BMS charging overcurrent fault 2 | Level 2 charge current too high | Reduce charging current |
| b219 · BMS discharge over-temperature fault 2 | Level 2 battery too hot while discharging | Scooter limits power (level 2) |
| b220 · BMS charging over-temperature fault 2 | Level 2 battery too hot while charging | Limit charging current |
| b221 · BMS discharge under-temperature fault 2 | Level 2 battery too cold while discharging | Scooter limits power (level 2) |
| b222 · BMS charging under-temperature fault 2 | Level 2 battery too cold while charging | Reduce charging current |
| b230 · BMS discharge overcurrent fault 2 | Level 2 discharge current too high | Reduce output current |
| b231 · Battery insulation fault 2 | Level 2 battery insulation problem | Contact your local Zero dealer |
| b240 · Charging-unit battery undervoltage fault 2 | Level 2 battery voltage too low for charging unit | Charge the battery |
| b241 · Uneven temperature fault 2 | Level 2 uneven temperature across the pack | Contact your local Zero dealer |
| b302 · Cell failure | A battery cell has failed | Contact your local Zero dealer |
| b303 · Cell differential pressure fault 3 | Level 3 (most severe) cell voltage imbalance | Contact your local Zero dealer |
| b307 · BMS internal MOS/relay failure | Battery management MOSFET or relay failure | Contact your local Zero dealer |
| b309 · Total discharge overvoltage fault | Total pack discharge voltage too high | Charge the battery |
| b310 · Discharge cell undervoltage fault 3 | Level 3 cell voltage too low during discharge | Charge the battery |
| b314 · BMS charging overcurrent fault 3 | Level 3 charge current too high | Replace the charger |
| b319 · BMS discharge over-temperature fault 3 | Level 3 battery too hot while discharging | Resume use after the battery temperature drops |
| b320 · BMS charging over-temperature fault 3 | Level 3 battery too hot while charging | Charge after the battery temperature drops |
| b321 · BMS discharge under-temperature fault 3 | Level 3 battery too cold while discharging | Resume use after the battery temperature drops |
| b322 · BMS charging under-temperature fault 3 | Level 3 battery too cold while charging | Charge after the battery temperature rises |
| b330 · BMS discharge overcurrent fault 3 | Level 3 discharge current too high | Contact your local Zero dealer |
| b331 · Battery insulation fault 3 | Level 3 battery insulation problem | Contact your local Zero dealer |
| b332 · Battery short-circuit failure | Short circuit detected in the battery | Contact your local Zero dealer |
| b333 · BMS internal communication failure | Internal battery-management communication lost | Contact your local Zero dealer |
| b334 · Abnormal dual-battery box status | Fault in the dual-battery box arrangement | Contact your local Zero dealer |
| b340 · Charging cell undervoltage fault 3 | Level 3 cell voltage too low during charging | Charge the battery |
| b341 · Uneven temperature fault 3 | Level 3 uneven temperature across the pack | Contact your local Zero dealer |
| b342 · Total charging overvoltage fault | Total charging voltage too high | Check the input voltage |
| b343 · Total discharge undervoltage fault | Total pack discharge voltage too low | Check the battery |
| b344 · Total charging undervoltage fault | Total charging voltage too low | Check the input voltage |
| b345 · Discharge cell overvoltage fault | A cell voltage is too high during discharge | Check the battery |
| b346 · Cell charging overvoltage fault | A cell voltage is too high during charging | Wait for battery voltage to return to nominal |
| b347 · Power transistor temperature fault | BMS power transistor over-temperature | Wait for temperature to return to normal |
| b348 · Communication failure | Battery communication failure | Contact your local Zero dealer |
| b349 · Welded contactor | Battery main contactor has welded | Have the battery diagnosed |
| C101 · Charger fault 1 | Level 1 general charger fault | Contact your local Zero dealer |
| C106 · Charger high-temperature fault 1 | Level 1 charger over-temperature | Reduce charging current |
| C107 · Charger input overvoltage 1 | Level 1 charger input voltage too high | Check input voltage |
| C108 · Charger input undervoltage 1 | Level 1 charger input voltage too low | Check input voltage |
| C109 · Charger output overcurrent 1 | Level 1 charger output current too high | Power the scooter off and on to reset |
| C110 · Charger output overvoltage 1 | Level 1 charger output voltage too high | Power the scooter off and on to reset |
| C111 · Charger output undervoltage 1 | Level 1 charger output voltage too low | Power the scooter off and on to reset |
| C201 · Charger fault 2 | Level 2 general charger fault | Contact your local Zero dealer |
| C206 · Charger high-temperature fault 2 | Level 2 charger over-temperature | Reduce charging current |
| C207 · Charger input overvoltage 2 | Level 2 charger input voltage too high | Check input voltage |
| C208 · Charger input undervoltage 2 | Level 2 charger input voltage too low | Check input voltage |
| C209 · Charger output overcurrent 2 | Level 2 charger output current too high | Power the scooter off and on to reset |
| C210 · Charger output overvoltage 2 | Level 2 charger output voltage too high | Power the scooter off and on to reset |
| C211 · Charger output undervoltage 2 | Level 2 charger output voltage too low | Power the scooter off and on to reset |
| C301 · Charger fault 3 | Level 3 general charger fault | Contact your local Zero dealer |
| C302 · Charger hardware fault 3 | Level 3 charger hardware fault | Contact your local Zero dealer |
| C303 · Charger communication fault 3 | Level 3 charger communication fault | Contact your local Zero dealer |
| C304 · Charger short-circuit protection 3 | Level 3 charger short-circuit protection tripped | Contact your local Zero dealer |
| C305 · Charger open-circuit protection 3 | Level 3 charger open-circuit protection tripped | Contact your local Zero dealer |
| C306 · Charger temperature fault 3 | Level 3 charger over-temperature | Charge after the temperature drops |
| C307 · Charger input overvoltage 3 | Level 3 charger input voltage too high | Check input voltage |
| C308 · Charger input undervoltage 3 | Level 3 charger input voltage too low | Check input voltage |
| C309 · Charger output overcurrent 3 | Level 3 charger output current too high | Contact your local Zero dealer |
| C310 · Charger output overvoltage 3 | Level 3 charger output voltage too high | Contact your local Zero dealer |
| C311 · Charger output undervoltage 3 | Level 3 charger output voltage too low | Contact your local Zero dealer |
| I101 · Instrument power supply failure | Dash/instrument power supply failure | Contact your local Zero dealer |
| I102 · Instrument IO detection fault | Dash input/output detection fault | Contact your local Zero dealer |
| I103 · Instrument CAN communication failure | Dash lost CAN-bus communication | Contact your local Zero dealer |
| P111 · Controller over-temperature fault 1 | Level 1 motor controller over-temperature | Scooter limits power (level 1) |
| P123 · Motor controller system fault 1 | Level 1 motor controller system fault | Check the controller power cord for looseness |
| P124 · Motor over-temperature fault 1 | Level 1 motor over-temperature | Scooter limits power (level 1) |
| P126 · Battery imbalance warning 1 | Level 1 battery imbalance between packs | Charge the batteries; contact your Zero dealer |
| P211 · Controller over-temperature fault 2 | Level 2 motor controller over-temperature | Scooter limits power (level 2) |
| P223 · Motor controller system fault 2 | Level 2 motor controller system fault | Check the controller power cord for looseness |
| P224 · Motor over-temperature fault 2 | Level 2 motor over-temperature | Scooter limits power (level 2) |
| P225 · Motor temperature sensor failure | Motor temperature sensor has failed | Contact your local Zero dealer |
| P226 · Battery imbalance warning 2 | Level 2 battery imbalance between packs | Charge the batteries; contact your Zero dealer |
| P301 · Controller overvoltage failure | Motor controller input overvoltage | Replace the battery, then the controller if needed |
| P302 · Controller undervoltage failure | Motor controller input undervoltage | Charge the battery |
| P303 · Controller overcurrent protection failure | Controller overcurrent protection tripped | Power the scooter off and on to reset |
| P304 · Motor locked failure | Motor stalled / rotor locked | Power the scooter off and on to reset |
| P305 · Motor position sensor failure | Motor position (Hall) sensor failure | Contact your local Zero dealer |
| P306 · Power tube failure | Controller power transistor (IGBT/MOSFET) failure | Contact your local Zero dealer |
| P307 · Controller phase-loss failure | A motor phase is missing | Contact your local Zero dealer |
| P309 · Brake condition fault | Abnormal brake condition detected | Contact your local Zero dealer |
| P310 · Motor controller self-test fault | Controller failed its self-test | Contact your local Zero dealer |
| P311 · Controller over-temperature fault 3 | Level 3 motor controller over-temperature | Allow the controller to cool |
| P314 · Throttle failure | Throttle (acceleration handle) fault | Check the handle for damage and the wiring plug for looseness |
| P320 · Brake failure | Brake system failure | Contact your local Zero dealer |
| P321 · Communication failure | Controller communication failure | Contact your local Zero dealer |
| P322 · Precharge fault | High-voltage precharge circuit fault | Contact your local Zero dealer |
| P323 · Motor controller system fault 3 | Level 3 motor controller system fault | Contact your local Zero dealer |
| P324 · Motor over-temperature fault 3 | Level 3 motor over-temperature | Allow the motor to cool |
Maintenance schedule
Official service intervals and the belt / fluid replacement points.
| Interval | Service tasks |
|---|---|
| Every ride | Check/adjust tire pressure and tread depth; check brake operation, damage and pad wear; check and fill brake fluid; check wheels/tires for damage; check front/rear suspension operation and for leakage; inspect battery for damage; check headlight operation |
| Initial service — 60 mi (100 km) | Mandatory first (break-in) dealer service — perform the applicable inspection/adjustment checks; the initial maintenance is stated as vitally important and must not be neglected |
| Every 300 mi (500 km) | — |
| Every 1,250 mi (2,000 km) | Check hardware/fastener torque (see Component Fasteners) and replace as necessary; inspect drive belt for damage/cracking; check drive belt tension; inspect sprockets for wear; inspect and secure wiring harnesses; check bike tip-over protection operation; check all bearings (wheel, steering, swingarm) for smooth operation and replace as necessary |
| Every 3,100 mi (5,000 km) | — |
| Every 6,200 mi (10,000 km) or 12 months (whichever first) | Replace brake fluid; replace front/rear suspension components as necessary |
See this schedule on a distance axis →What a noise between services means →
Torque specifications
Key fastener torque values from the service manual.
| Fastener | Torque |
|---|---|
| Rear axle nut | 55 +/- 4 lb-ft (75 +/- 5 Nm) |
| Front axle nut | 55 +/- 4 lb-ft (75 +/- 5 Nm) |
| Rear sprocket bolts | 30 +/- 4 lb-ft (40 +/- 5 Nm) |
| Motor (front) sprocket bolt | 22 +/- 1.5 lb-ft (30 +/- 2 Nm) |
| Front brake caliper bolts | 22 +/- 1.5 lb-ft (30 +/- 2 Nm) per Owner Manual (Service Manual lists 30 +/- 4 lb-ft / 40 +/- 5 Nm) |
| Rear brake caliper bolts | 22 +/- 1.5 lb-ft (30 +/- 2 Nm) |
| Front/rear brake rotor bolts | 22 +/- 1.5 lb-ft (30 +/- 2 Nm) |
| Swingarm mounting bolts | 73 lb-ft (100 Nm) per Owner Manual (Service Manual lists 55 +/- 4 lb-ft / 75 +/- 5 Nm) |
| Fork mounting bolts | 30 +/- 4 lb-ft (40 +/- 5 Nm) |
| Motor mounting shafts | 44 +/- 4 lb-ft (60 +/- 5 Nm) |
Zero LS1 at a glance: main specs and performance
The Zero LS1 is a highway-capable electric scooter driven by an IPMAC (interior permanent-magnet AC) motor rated at 8.4 kW peak. It produces 51 Nm at the motor and, through the belt reduction, delivers roughly 240 Nm to the rear wheel, enough for confident hill-climbing and quick getaways from traffic lights. Maximum speed is 100 km/h, with a comfortable sustained cruise of about 85 km/h. Power is managed by a 350 A field-oriented-control (FOC) controller, and the whole drive system runs at 74 volts, which classifies it as a high-voltage system that only Zero-trained technicians should open.
Energy comes from two removable lithium packs giving a maximum capacity of 4.4 kWh (3.7 kWh nominal usable). On the standard twin-pack setup the LS1 covers about 115 km in mixed city riding, or 110 km in steady low-speed commuting. An optional third 'accessory' battery lifts range to roughly 173 km city and 166 km commuting. The scooter is easy to live with physically: a low 780 mm seat, 1330 mm wheelbase and 132 kg curb weight make it manageable at walking pace, while ABS and a switchable traction-control system add all-weather confidence.
Because two battery packs sit low under the floorboard, weight is kept down where it helps stability. The maximum payload (rider plus passenger plus any luggage) is 150 kg, and the gross vehicle weight (curb plus payload) is 282 kg. Staying within these limits protects the suspension, brakes and tyres, and keeps handling predictable.
- Motor: IPMAC permanent-magnet AC, 8.4 kW peak, 51 Nm (about 240 Nm at the rear wheel)
- Top speed: 100 km/h maximum, ~85 km/h sustained
- System voltage: 74 V high-voltage powertrain, 350 A FOC controller
- Battery: two removable packs, 4.4 kWh max / 3.7 kWh nominal; optional third accessory pack
- Range: ~115 km city / 110 km commuting (twin pack); ~173 km / 166 km with the third battery
- Final drive: clutchless direct drive, 104T/22T belt
- Curb weight 132 kg · seat height 780 mm · wheelbase 1330 mm · max payload 150 kg · GVW 282 kg
Controls, dashboard and indicator lights
The LS1 uses a four-position key switch on the console (Lock, Off, On and Seat), operable with the key fob or the manual key. Lock secures the steering for parking; Off cuts power; On enables travel; turning the key counter-clockwise to Seat pops the seat for access to the storage box, charge port and battery release. The key fob adds keyless Lock and Unlock buttons and a key-release button (the alarm button is inactive on this model), and it takes a common CR2032 coin cell when it needs a new battery.
Handlebar controls are split into two clusters. The left switch carries the turn signals, horn, high/low-beam toggle, flash-to-pass, cruise control, reverse and the MENU/SET buttons for the dash. The right switch holds the hazard flashers, the kill switch and the MODE button for cycling ride modes. Twisting the throttle counter-clockwise energises the motor; releasing it lets the throttle spring back and cuts drive. Turn signals do not self-cancel: you must return the switch to centre or press it in to switch them off.
The colour dash shows state of charge, speed, motor speed, the active ride mode (it reads 'Park' before you set off), a clock, trip and total odometers, and separate torque and regen meters that show how much drive or braking the rear wheel is applying. A cluster of tell-tales reports kill-switch and kickstand status, turn signals, high beam, cruise, charging, ABS activation, traction control, tip-over protection, temperature and a general malfunction indicator. It is normal for the malfunction light to appear alongside the temperature light when the battery, motor or controller runs hot.
- Battery / temperature / malfunction lights: temperature and malfunction often illuminate together when a component is hot. This is expected, not a defect
- Kill-switch indicator: shows the motor is disabled; it goes out when the powertrain is live
- Kickstand indicator: lit whenever the stand is fully down (drive is inhibited)
- ABS indicator: flashes while the anti-lock system is intervening during braking
- TCS indicator: shown when traction control is switched OFF (no icon means TCS is active)
- Tip-over indicator: appears when the tilt sensor has cut drive after a lean/fall
- Brightness has five levels; Theme offers Light, Dark or Auto (adjusts to ambient light)
- 1Put the kill switch in the top (motor-off) position. The dash menu is only reachable with the motor disabled.
- 2Short-press MENU to open the menu; short-press SET to move the highlight between items.
- 3Long-press SET to enter a screen (Ride, Theme, Brightness, Units, Language, Faults, Time, System or Reset).
- 4Change the value with short SET presses, then long-press MENU to confirm and step back out.
Ride modes, throttle and regenerative braking
The LS1 offers three ride modes selected with the MODE button on the right cluster. ECO gives the softest, most progressive power delivery and the gentlest acceleration, ideal for new riders, wet roads and stretching range. STANDARD (the default at every start-up) balances response and efficiency for everyday riding. SPORT unlocks the strongest acceleration and is best kept for riders already comfortable with the scooter; it also draws the most energy, so range is shortest in this mode. You can change modes on the move as long as the throttle is fully released.
Regenerative braking recovers energy and adds engine-braking feel when you roll off the throttle. Its strength is adjustable across three levels in the dash Ride menu, where level 1 is the mildest and level 3 the strongest. At level 3 the scooter slows noticeably the instant you close the throttle. Higher regen is useful on long descents, where it takes load off the friction brakes and helps prevent them overheating. The same Ride menu also lets you switch the Traction Control System (TCS) on or off; TCS limits wheelspin on slippery surfaces and is best left on for normal road use.
Cruise control holds a steady speed without throttle input. Press the cruise button while riding to set it. It automatically cancels the moment you brake, change ride mode, press the kill switch, or press the cruise button again. A reverse assist is also built in: with the scooter stationary, hold the Reverse button and gently apply throttle to back out of a parking spot; the dash displays 'Reverse' while it is active and the scooter stops as soon as you release the button.
- ECO: soft power, best economy and grip; recommended for new riders
- STANDARD: default balanced mode for daily use
- SPORT: maximum acceleration, highest energy use
- Regen levels 1–3 (1 = mild, 3 = strong deceleration when coasting)
- TCS: switchable in the Ride menu; leave on for slippery conditions
- Cruise control: cancels on brake, mode change, kill switch or button press
- Reverse: hold the button and roll on throttle to back up slowly
Battery, range and charging: times, connectors and rules
The LS1 carries two removable lithium packs beneath the floorboard and charges through a port under the seat. You can charge the packs in place or lift them out. The supplied 800 W off-board charger fills the twin-pack system from empty in about 5.0 hours to 100% (roughly 4.5 hours to 90%). If you add the optional accessory charger, charging drops to about 3.1 hours to full (2.6 hours to 90%). For a healthy supply, use a socket circuit rated above 840 W, charge in a dry, well-ventilated place away from anything flammable, and never charge in the rain.
A critical rule with the twin-pack (and optional third-pack) layout is balance: all installed batteries must be within 20% state of charge of one another. If they drift further apart, the scooter deliberately reduces power until they are re-balanced, so always charge to full when you have added or swapped a pack. Only ever use the Zero charger supplied with the scooter or a Zero-approved replacement. Unapproved chargers can damage the battery or start a fire. The charger has a trickle stage, but a normal charge should never run beyond 12 hours, and if the charger light stays red (charging) for more than 8 hours you should stop and contact your dealer.
The battery is designed to operate between -20 and 55°C, and to be charged between -10 and 50°C. For everyday use, avoid leaving a pack sitting empty. For storage, keep packs at 40–60% charge in a dry space at 20–25°C, top them up monthly to stay in that band, and once a year run a full 100% charge followed by a discharge below 10% before returning to the 40–60% storage level. Store packs upright, never in a sealed container, and never expose them to water, direct sun or open flame.
- Standard charge: ~5.0 h to 100% / ~4.5 h to 90% (800 W charger)
- With accessory charger: ~3.1 h to 100% / ~2.6 h to 90%
- Keep all installed packs within 20% SOC of each other or power is reduced
- Use only the Zero-supplied or Zero-approved charger
- Charge in the -10 to 50°C range, in the dry, away from combustibles
- Optional third accessory battery extends range and routes through the storage box
- If the charger stays red beyond 8 hours, stop and call your dealer
- 1Turn the scooter off, remove the key and lift the seat to reach the charge port.
- 2Plug the charger's output lead into the battery charging socket.
- 3Connect the charger's input plug to the mains supply.
- 4Confirm the charging indicator lights up, showing the pack is taking charge.
- 5When the charger shows a solid green light (fully charged), unplug it from the mains first, then from the scooter.
Break-in period and pre-ride inspection for new owners
The LS1 has no engine to bed in, but the first weeks of ownership still matter. Zero treats the early period as a break-in during which fasteners settle, the drive belt beds onto its sprockets and brake components wear in. The single most important step is the initial service at 100 km (60 miles): Zero describes this first inspection as vitally important, and it should not be skipped. Booking it lets a dealer re-torque hardware, check belt tension and confirm nothing has loosened before you rack up bigger distances.
New or less-experienced riders should spend their first rides in ECO mode, which softens throttle response and makes the scooter easy to modulate in traffic. Get comfortable with the twist-throttle feel, how strongly regenerative braking slows you when you roll off, and how the ABS and traction control behave before stepping up to STANDARD and eventually SPORT. Practise low-speed manoeuvres, the reverse-assist function and using the centrestand versus the side kickstand somewhere quiet first.
Build a pre-ride inspection habit from day one. A two-minute walk-around catches most problems before they become failures: check lights, tyres, brakes and the throttle return every time you set off, and make sure the kickstand cut-out disables drive when the stand is down.
- 1Confirm the headlight, brake light and indicators all work.
- 2Check the handlebars turn freely and the steering hardware is tight.
- 3Verify battery charge on the dash or pack gauge is enough for your trip.
- 4Check both brakes for firm feel and adequate fluid, and inspect tyres and cold tyre pressures.
- 5With the key off, twist the throttle and release it. It must spring back freely to neutral.
- 6Confirm the kickstand power-cut works (drive disabled with the stand down).
Maintenance schedule, drive belt and torque specs
The LS1 follows a distance-or-time scheduled-maintenance plan, and you always act on whichever interval arrives first. The checkpoints are: every ride (tyres, brakes, lights, battery, suspension for leaks), an initial check at 100 km (60 mi), then recurring inspections at 500 km (300 mi), 2,000 km (1,250 mi), 5,000 km (3,100 mi) and a major service every 10,000 km (6,200 mi) or 12 months. The 500 km and longer intervals fold in belt inspection and tension, sprocket wear, hardware torque, suspension, wiring, headlights, tip-over protection and bearing checks, while brake fluid is replaced on the long 10,000 km / 12-month cycle.
Because the LS1 uses a toothed belt rather than a chain, drive maintenance is mostly inspection and tension. Look for cuts, cracks, edge bevelling (a sign of sprocket misalignment), stone damage on the ribbed outer face and any exposed tensile cords, which mean the belt must be replaced. Correct belt tension is 500–800 N, measured with a Gates 508C ultrasonic tension meter set to Mass 4.6 g/m, Width 23 mm and Span 356 mm. Tension is adjusted with the axle adjusters on both sides of the rear wheel; because tension varies slightly around the belt, it should be checked at four wheel positions (0°, 90°, 180°, 270°) and the average brought into range, then re-checked after a short test ride.
When tightening fasteners, use the specified torque figures. The values include the front and rear axle nuts at 75 ± 5 Nm, swingarm mounting bolts at 100 Nm, handlebar and fork/suspension bolts around 40–50 Nm, brake caliper and rotor bolts at 30 ± 2 Nm, the motor mounting shafts at 60 ± 5 Nm and the rear sprocket bolts at 40 ± 5 Nm. For anything not individually listed, fall back on standard values by size (for example M6 at 10 ± 2 Nm, M8 at 30 ± 2 Nm, M10 at 40 ± 5 Nm). Lubricate the kickstand, centrestand and axle pivots with all-purpose or lithium grease during service.
- Every ride: tyres/pressure, brakes, lights, battery condition, suspension leaks
- Initial 100 km (60 mi): first full inspection, do not skip
- Every 500 km (300 mi): belt, sprockets, brakes, hardware, suspension, bearings
- Belt tension: 500–800 N via Gates 508C ultrasonic meter
- Brake fluid: DOT 4, replaced at the 10,000 km / 12-month major service
- Axle nuts 75 Nm · swingarm 100 Nm · calipers/rotors 30 Nm · motor shafts 60 Nm
- 1Switch the scooter off and secure the key fob before working on the belt.
- 2Loosen the rear axle shaft, then turn the axle adjusters evenly on both sides: tighten to add tension, loosen to reduce it.
- 3Measure tension with the Gates 508C set to Mass 4.6 g/m, Width 23 mm, Span 356 mm; target 500–800 N.
- 4Re-check at 90°, 180° and 270° of wheel rotation and bring the average into range.
- 5Torque the axle nut to spec (75 ± 5 Nm), test-ride, then re-check tension and readjust if needed.
Tyres, brakes and suspension: pressures and wear limits
The LS1 runs a 110/80-14 front tyre and a 130/60-13 rear (CST Urban Travel), on 3.00 x 14 front and 3.50 x 13 rear wheels. Cold tyre pressures are 29 psi (200 kPa) front for all loads, with the rear at 31 psi (215 kPa) solo and 32 psi (225 kPa) two-up. Never exceed 32 psi (225 kPa). Check pressures before each ride with an accurate gauge while the tyres are cold (not ridden for at least three hours), because under-inflation is a leading cause of tyre failure. Replace a tyre if you find cuts, cracks, bulges, exposed cords, uneven or flat-spotted wear, or once the tread-wear indicators (TWI) show.
Braking is handled by floating discs (dual-piston front, single-piston rear), both with ABS. Squeeze the right lever for the front brake and the left lever for the rear, and always release the throttle as you brake. Use DOT 4 fluid only, from a sealed container, and keep the level between the MIN and MAX marks in each reservoir sight glass. Replace the brake pads before they wear below 1.5 mm and the rotors before they thin below 3.5 mm. Each lever should have about 15 mm (0.6 in) of free stroke; a long, spongy lever or any significant fluid loss means you should stop riding and see a dealer.
Suspension is a pair of non-adjustable front forks with 109 mm of travel and twin non-adjustable rear shocks with 104 mm of travel. Maintenance is limited to inspection and cleaning: check the forks for damage, cracks or oil weeping, wipe the fork tubes clean after each ride without flushing water up into the dust seals, and apply a light film of all-purpose grease to keep the tubes lubricated. Have any leaking or worn suspension unit replaced rather than run on.
- Front tyre 110/80-14 · rear 130/60-13 · wheels 3.00x14 / 3.50x13
- Cold pressures: front 29 psi (200 kPa); rear 31 psi (215 kPa) solo, 32 psi (225 kPa) two-up
- Never exceed 32 psi (225 kPa)
- Brake fluid: DOT 4 only, kept between MIN and MAX
- Wear limits: pads replace below 1.5 mm, rotors below 3.5 mm
- Brake lever free stroke ~15 mm (0.6 in)
- Forks 109 mm travel · rear shocks 104 mm travel · both non-adjustable
Storage, transport and winter care
If the LS1 will sit unused for more than about 60 days, prepare it properly. Clean the scooter thoroughly, set the battery packs to roughly 40–60% state of charge, then turn the key switch off. Store it somewhere dry, clean, ventilated and shaded, out of rain and direct sun, and away from flammable or corrosive substances. Heat and humidity shorten battery life, so avoid hot or damp corners of a garage. Set tyre pressures to spec and use jack stands to lift the wheels clear of the ground so the tyres don't develop flat spots.
Battery care over a long lay-up is specific. Keep the packs in the 40–60% band and top them back up once a month to hold that charge; each year, give them one full 100% charge followed by a discharge below 10% before returning to the storage level. This exercise keeps the cells healthy. Store packs upright in a dry, cool place at 20–25°C, don't stack anything on top of them, and never leave a pack below 30% for more than 30 days. Doing so risks damage and is specifically excluded from the warranty. When you return the scooter to service, fully charge every pack before riding.
In cold weather, remember the battery's limits: it operates between -20 and 55°C and charges between -10 and 50°C. A cold pack has reduced capacity and range until it warms up, and the dash may show a temperature-related limit in extreme cold or heat. For transport, secure the scooter upright with the key off and the packs kept level. The tip-over sensor disables both drive and charging while the scooter is tilted, and it only resets after you stand it upright and complete a full key cycle.
- Long-term storage SOC: 40–60%, topped up monthly
- Never leave a pack below 30% for over 30 days (voids battery warranty cover)
- Store packs upright at 20–25°C, dry and unstacked
- Battery operating range -20 to 55°C; charge -10 to 50°C
- Lift tyres off the ground to prevent flat spots
- Tip-over sensor blocks drive/charge until the scooter is upright and re-cycled
- 1Clean and dry the scooter, then set the battery packs to 40–60% charge.
- 2Turn the key switch off and store the scooter in a dry, shaded, ventilated space.
- 3Set tyre pressures to spec and raise the wheels off the ground on jack stands.
- 4Top the packs back up to 40–60% once a month during storage.
- 5Once a year, fully charge to 100%, discharge below 10%, then return to the 40–60% level.
- 6Before riding again, charge all packs fully to restore condition.
Warning lights, fault codes and troubleshooting
When the LS1 detects a problem it lights the malfunction indicator and logs a diagnostic code you can read through the dash Faults menu (Menu > Faults). Codes are grouped by system, which makes them easy to interpret. Codes beginning with 'b' relate to the battery and its management system (BMS): cell voltage or pressure differences, over/under-temperature during charge or discharge, over-current and insulation faults. Many 'b' codes ask you to charge the battery, reduce charging current, or wait for the pack temperature to normalise; more serious ones (cell failure, insulation faults, welded contactor, short circuit) call for a dealer.
Codes starting with 'C' point to the charger: high-temperature, input over/under-voltage or output protection faults; several output faults clear by powering the scooter off and on. 'I' codes indicate an instrument (dash) fault such as a power-supply or CAN communication problem and should be checked by a dealer. 'P' codes cover the motor controller and motor: over-temperature (which triggers a power-limit mode), over/under-voltage, over-current, throttle failure (P314), brake faults, or sensor and communication problems. A common, self-clearing example is a controller over-current fault that resets with an off/on power cycle.
Before assuming the worst, run through the basics. If the scooter won't move after switching on, the usual causes are the kickstand being down, a brake or kill-switch cut-out, the throttle not sitting at neutral, an unreset tip-over sensor, or a low battery. If there's no power at all, check that the battery plugs are seated, the pack isn't in a temperature protection state, and that a fuse hasn't blown. Reduced power most often means a hot motor or controller, a low or temperature-limited battery, or packs that are more than 20% apart in charge.
- 'b' codes = battery/BMS: often 'charge the battery', reduce current, or let temperature normalise; serious cell/insulation faults need a dealer
- 'C' codes = charger: many output faults reset with an off/on power cycle; check input voltage for over/under-voltage codes
- 'I' codes = instrument/dash: power-supply or CAN faults, see a dealer
- 'P' codes = controller/motor: over-temp triggers power limiting; P314 = throttle fault; over-current often clears with a power cycle
- Won't move: retract the kickstand, check brakes/kill switch, let the throttle return to neutral, reset the tip-over sensor, or charge
- No power: reseat battery plugs, check for a blown fuse, allow the pack to reach normal temperature
- Reduced power: cool the motor/controller, charge, or re-balance packs to within 20% SOC
Safety, legal and warranty essentials
Ride the LS1 legally and equipped. You must hold the appropriate licence, obey local traffic law, and wear a helmet plus protective eyewear, gloves and suitable clothing. Avoid loose garments and open footwear that could snag or slip. Keep both hands on the bars and both feet on the pegs, ride within your ability, and never ride impaired by alcohol, medication or fatigue. Respect the 150 kg maximum payload, and take extra care on gravel, wet or low-friction surfaces where grip drops and stopping distances grow. The scooter is not designed for racing, and doing so voids Zero's liability.
Treat the high-voltage system with respect. The 74 V powertrain (battery, motor, controller and wiring) must never be opened, modified or repaired by anyone other than a Zero-trained technician; tampering risks electric shock, burns or fire. Don't fit non-approved electrical accessories or chargers, don't modify any part of the scooter (it compromises stability, reliability and your warranty), and keep the VIN on the frame riser and the motor serial number intact, since they are the legal identifiers for your machine. A faint magnetic buzzing from the motor while riding is normal, not a fault.
Every 2026 Zero LS1 sold in the EU carries a two-year limited warranty from the in-service date (two years from shipment date for demonstrators), covering defects in materials and workmanship across the motor, controller, frame, suspension, brakes, wheels, electrical assemblies and the batteries, including a battery whose nominal capacity drops by more than 20%. Wear-and-tear items (tyres, pads, rotors, belt, fork seals, grips, seat) and damage from misuse, unapproved parts or chargers, skipped maintenance, racing or improper storage are not covered. Keeping up with scheduled service and firmware updates is a condition of coverage.
- Hold the correct licence and wear a helmet, eye protection, gloves and proper clothing
- Maximum payload 150 kg (rider + passenger + luggage)
- Never open or modify the 74 V high-voltage system (Zero technicians only)
- Use only Zero-approved chargers and accessories; modifications void the warranty
- EU limited warranty: 2 years from in-service date (batteries included)
- Battery covered if nominal capacity falls more than 20%
- Not covered: wear items, misuse, racing, unapproved parts/chargers, neglected maintenance
Frequently asked
How long does it take to charge the Zero LS1?
With the standard 800 W off-board charger, the Zero LS1's twin battery packs charge from empty to 100% in about 5.0 hours, or to 90% in roughly 4.5 hours. Adding the optional accessory charger cuts this to about 3.1 hours to full (2.6 hours to 90%). A normal charge should never exceed 12 hours, and if the charger light stays red beyond 8 hours you should stop and contact your dealer.
What is the range of the Zero LS1?
On its two standard battery packs the Zero LS1 travels about 115 km in mixed city riding or 110 km in steady low-speed commuting. Fitting the optional third accessory battery increases range to roughly 173 km city and 166 km commuting. Real-world range depends on speed, ride mode, load, terrain and temperature.
What is the top speed of the Zero LS1?
The Zero LS1 has a maximum speed of 100 km/h and a comfortable sustained cruising speed of about 85 km/h. Its 8.4 kW IPMAC motor delivers around 240 Nm at the rear wheel, giving strong acceleration and hill-climbing, especially in SPORT mode.
What tyre pressure does the Zero LS1 need?
Check pressures cold (not ridden for at least three hours). The front tyre takes 29 psi (200 kPa) at all loads. The rear takes 31 psi (215 kPa) with one rider and 32 psi (225 kPa) with a passenger. Never exceed 32 psi (225 kPa). The LS1 runs a 110/80-14 front and 130/60-13 rear tyre.
Does the Zero LS1 have a belt or chain drive?
The Zero LS1 uses a clutchless direct drive with a toothed belt final drive (104T/22T gearing), not a chain. Belt maintenance is mostly inspection and tension: the correct tension is 500–800 N, measured with a Gates 508C ultrasonic meter and adjusted via the rear axle adjusters. A belt needs no lubrication, unlike a chain.
What ride modes does the Zero LS1 have?
The Zero LS1 offers three ride modes selected with the MODE button: ECO (soft, economical, best for new riders), STANDARD (the balanced default) and SPORT (maximum acceleration, highest energy use). You can switch modes while riding as long as the throttle is fully released. Regenerative braking is separately adjustable across three levels in the dash menu.
Can I ride the Zero LS1 with only one battery?
No. The Zero LS1 must always be operated with both main battery packs installed. Running it on a single pack lets the battery tray move under acceleration and braking, which can damage the scooter. In addition, all installed packs (including the optional third battery) must be kept within 20% state of charge of each other, or the scooter reduces power.
What brake fluid does the Zero LS1 use?
The Zero LS1 uses DOT 4 brake fluid only, drawn from a fresh, sealed container. Keep the fluid between the MIN and MAX marks in each reservoir sight glass. Replace the brake pads before they wear below 1.5 mm and the rotors before they thin below 3.5 mm. Brake fluid itself is replaced at the major 10,000 km / 12-month service.
How often does the Zero LS1 need servicing?
The Zero LS1 has a first service at 100 km (60 miles), then recurring inspections at 500 km, 2,000 km and 5,000 km, with a major service every 10,000 km or 12 months, whichever comes first. Daily checks of tyres, brakes, lights and battery are also recommended before every ride. The initial 100 km service is described as essential and should not be skipped.
What does the malfunction warning light mean on the Zero LS1?
The malfunction indicator lights when the LS1 logs a fault, which you can read in the dash Faults menu. It's normal for it to appear alongside the temperature light when a component runs hot. Codes are grouped by system: 'b' = battery/BMS, 'C' = charger, 'I' = instrument, 'P' = controller/motor. Many are cleared by charging, cooling down or a power cycle; persistent or serious codes need a Zero dealer.
How do I store the Zero LS1 for winter or long periods?
For lay-ups over about 60 days, clean the scooter, set the battery packs to 40–60% charge and turn the key off. Store it dry, shaded and ventilated, set tyre pressures to spec and lift the wheels off the ground on jack stands. Top the packs back up monthly, and once a year run a full 100% charge then a discharge below 10%. Never leave a pack below 30% for more than 30 days, as that risks damage and is excluded from the warranty.
What is the warranty on the Zero LS1?
In the EU, the 2026 Zero LS1 has a two-year limited warranty from the in-service date (two years from shipment date for demonstrators), covering defects in materials and workmanship, including the batteries and a battery whose nominal capacity drops by more than 20%. Wear items (tyres, pads, rotors, belt, seals) and damage from misuse, unapproved parts or chargers, racing or neglected maintenance are not covered.
How much does the Zero LS1 weigh and how much can it carry?
The Zero LS1 has a curb weight of 132 kg and a low 780 mm seat height, making it easy to manage at low speed. Its maximum payload (rider plus passenger plus luggage) is 150 kg, giving a gross vehicle weight of 282 kg. Staying within the payload limit protects the brakes, tyres and suspension and keeps handling predictable.
This guide is an independent synthesis of the official Zero Motorcycles owner & service manuals, rewritten for clarity. Figures are stated as published for the latest model year and may vary by year, region and options. Always follow your bike's own manual and a qualified technician for service. Zero Motorcycles is a trademark of its respective owner.