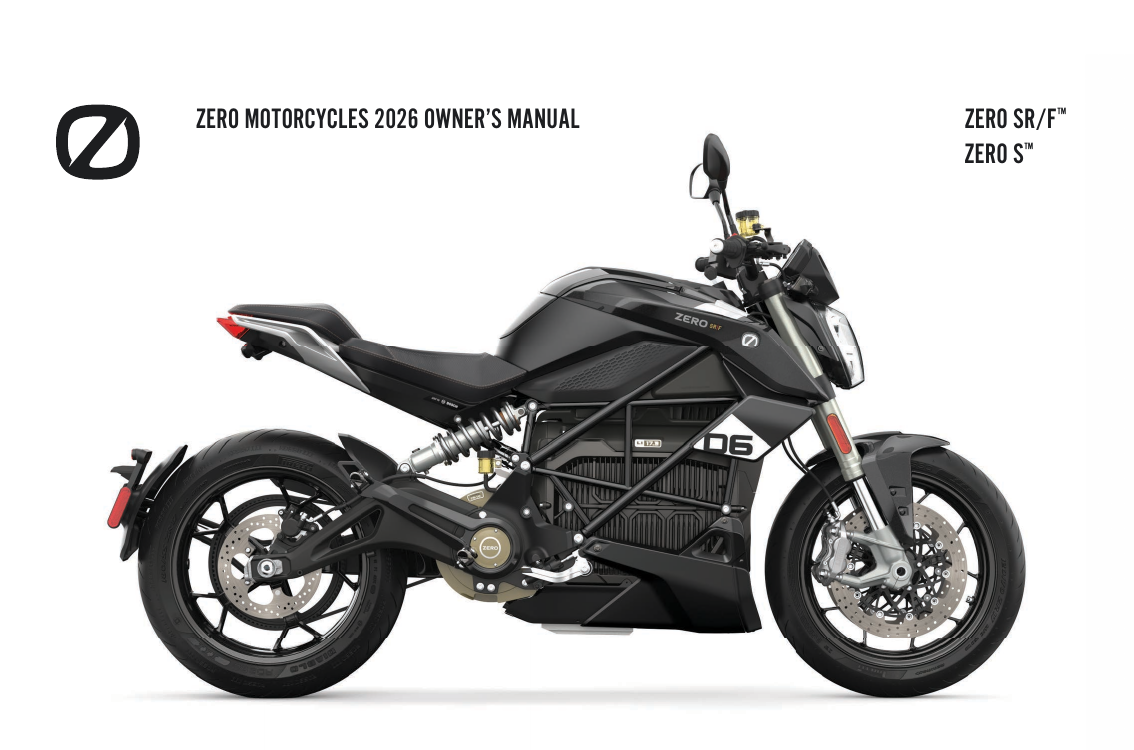
Zero SR/F: complete owner's guide
The Zero SR/F is the flagship naked streetfighter of Zero Motorcycles' FST platform: an 84 kW (113 hp) Z-Force powertrain, a 17.3 kWh lithium-ion pack, a maintenance-light carbon belt drive and the Cypher III operating system, all built around Bosch's Advanced motorcycle stability control. This owner's guide reorganises the official SR/F documentation into a reference for running one: charge times, ride-mode behaviour, tyre pressures, service intervals, torque values, warning-light meanings and cold-weather rules. All figures come from that documentation and are stated in both metric and imperial units.
Full specifications
Full Zero SR/F specifications from the official manual (2026 model year).
- Motor
- Z-Force 75-10 enhanced thermal efficiency, passively air-cooled, interior permanent magnet AC motor
- Peak power
- 83 kW (111 hp)
- Peak torque
- 190 Nm
- Top speed
- 200 km/h
- Regenerative braking
- Regenerative deceleration via motor controller (regenerative braking); dash REGEN/TORQUE meter shows regen while decelerating; ride modes ECO/STANDARD/SPORT/CANYON/RAIN/CUSTOM
- Transmission
- Clutchless Direct Drive
- Max capacity
- 17.3 kWh
- Nominal capacity
- 15.1 kWh
- Chemistry
- Z-Force Li-Ion Intelligent Power Pack
- Onboard charger
- 6.6 kW
- Standard charge time
- Mode 2 (230V): 4.9 hours (100% charged) / 3.9 hours (95% charged)
- City
- 283 km
- Highway
- 188 km
- Curb weight
- 227 kg
- Seat height
- 787 mm
- Wheelbase
- 1450 mm
- Rake
- 24.5°
- Trail
- 94 mm
- Front
- Showa 43 mm big piston, separate function forks with adjustable spring preload, compression, and rebound damping
- Front travel
- 120 mm
- Rear
- Showa 40 mm piston, piggy-back reservoir shock with adjustable spring preload, compression, and rebound damping
- Rear travel
- 140 mm
- Front brake
- Dual J-Juan radial-mounted 4-piston calipers, 320 x 5 mm disc
- Rear brake
- J-Juan single piston floating caliper, 240 x 4.5 mm disc
- ABS
- Bosch ABS with Advanced MSC (motorcycle stability control)
- Wheels
- cast
- Front tyre
- Pirelli Diablo Rosso III 120/70-17 · 36 psi (248 kPa)
- Rear tyre
- Pirelli Diablo Rosso III 180/55-17 · 36 psi (248 kPa)
- Final drive
- Poly Chain HTD Carbon belt
- Belt / chain
- Poly Chain HTD Carbon belt
- Front pulley
- 20 T
- Rear sprocket
- 90 T
- Final drive ratio
- 90T/20T
- Headlight
- LED
- Taillight
- LED (integrated brake/tail light; 'Brake/Tail LED Replacement')
- Turn signals
- Both bulb and LED replacement documented (Turn Signal Light Bulb Replacement + LED Turn Signal Replacement)
- DRL
- LED
Ride modes
How each selectable mode changes acceleration, top speed and regenerative braking.
| Mode | Character | Top speed | Regen | Best for |
|---|---|---|---|---|
| Eco | Softened throttle and reduced acceleration for smooth, gentle power delivery | Capped at 75 mph (120 km/h) | High — most regen of the everyday modes when the throttle is released | New riders, extending range and relaxed low-effort riding |
| Standard | Balanced everyday power; torque and acceleration above Eco but below Sport | Not reduced (full) | Medium — more than Rain, less than Eco and Sport | General daily riding and commuting |
| Sport | Aggressive throttle; accelerates significantly faster than the other modes | Not reduced (full) | Reduced compared to Eco when the throttle is released | Advanced riders wanting maximum performance |
| Canyon | Same fast acceleration as Sport but with stronger engine braking | Not reduced (full) | Increased — strong regen on throttle-off for aggressive deceleration | Spirited riding on twisty roads where strong engine braking helps |
| Rain | Reduced acceleration and the lowest peak torque of the factory modes for gentle, predictable power | Capped at 100 mph (160 km/h) | Lowest of all factory modes — minimal throttle-off braking to protect traction | Wet roads and low-traction conditions |
| Custom | Factory-set identical to Standard; fully adjustable (throttle, torque, regen, top speed) via the Zero smartphone app | As configured (default same as Standard) | As configured (default same as Standard) | Riders who want personalized settings and a chosen accent color |
Charging times
Charging scenarios and how long each takes to fill the pack.
| Method | Input | Time to full | Notes |
|---|---|---|---|
| Level 1 (North America, household outlet) | 110-120 V AC domestic wall outlet, 12-16 A, J1772 (Type 1) connector | 11.6 h to 100% / 11.1 h to 95% | Slowest method; uses a standard household socket via the onboard 6.6 kW charger |
| Level 2 (North America, charging station) | 208-240 V AC charging station, J1772 (Type 1) connector | 2.7 h to 100% / 2.2 h to 95% | Fastest onboard AC charging in North America |
| Mode 2 (Europe, portable cable) | 230 V AC domestic wall outlet, ~10 A, Type 2 (Mennekes) via portable EVSE cable | 4.9 h to 100% / 3.9 h to 95% | Home wall-outlet charging with the supplied/portable EVSE cable |
| Mode 3 single-phase (Europe, station) | 230 V AC wall-mounted or public station, 16 or 32 A single-phase, Type 2 | 4.9 h to 100% / 3.9 h to 95% | Single-phase supply limits the SR/F below its maximum charge rate |
| Mode 3 three-phase (Europe, station) | 230 V AC wall-mounted or public station, three-phase, Type 2 | 2.7 h to 100% / 2.0 h to 95% | SR/F requires a 3-phase point to reach the full 6.6 kW charge rate |
Dashboard warning lights
What each dashboard indicator means and what to do when it lights up.
The SR/F uses a round TFT instrument display built around a central charge (state-of-charge) gauge ringed by four rider-customizable quadrant gauges, with a large digital speedometer sitting inside a 12-segment analog speed ring (each segment = 10 mph / 20 km/h, up to 120 mph / 240 km/h). Surrounding readouts show the active ride mode, clock, odometer, a regen/torque meter and the ABS/traction modes, above a row of warning telltale lights (armed, high-beam, turn signals, ABS, traction, charge, temperature, check-engine and 12V battery).
Looking for a specific error? Browse the full Zero error-code catalog →
Fault & diagnostic codes
Diagnostic codes the display and app can show, with what each means and the fix.
65 diagnostic codes for the Zero SR/F
| Code / fault | Meaning | What to do |
|---|---|---|
| 1 · High Throttle Fault | Throttle fault detected | Contact dealer for service |
| 2 · Torque Fault | No valid torque input provided from the MSC | Contact dealer for service |
| 3 · Torque Fault | Torque fault detected | Contact dealer for service |
| 4 · Throttle Fault | Throttle fault detected | Contact dealer for service |
| 5 · CAN Fault | CAN communications fault | Contact dealer for service |
| 6 · Mode Fault | Ride mode data invalid or lost | Reinstall ride modes through the smartphone app |
| 7 · Mode Fault | Ride mode data invalid or lost | Reinstall ride modes through the smartphone app |
| 8 · Firmware Update Failure | Firmware update failed | Try the update again later |
| 9 · Controller Fault | Motor controller fault | Contact dealer for service |
| 10 · Firmware Update Failure | Firmware update failed due to insufficient cellular signal | Retry later where cellular signal is stronger |
| 11 · Right Turn Signal Short Fault | Right turn signal connection short | Contact dealer for service |
| 12 · Traction Control Fault | Traction control fault | Contact dealer for service |
| 13 · Traction Control Fault | Traction control fault (communication error) | Contact dealer for service |
| 14 · Right Turn Signal Bulb Out Fault | Right turn signal connection open (bulb out) | Have the right turn signal inspected/repaired by a dealer |
| 15 · Stability Control Fault | Stability control fault | Contact dealer for service |
| 16 · Headlight Short Fault | Headlight connection short | Contact dealer for service |
| 17 · Headlight Bulb Out Fault | Headlight connection open (bulb out) | Have the headlight inspected/repaired by a dealer |
| 20 · Brake Bulb Short Fault | Brake light connection short | Contact dealer for service |
| 21 · Brake Bulb Out Fault | Brake light connection open (bulb out) | Have the brake light inspected/repaired by a dealer |
| 22 · 12V Battery Heater Short Fault | 12V battery heater connection short | Contact dealer for service |
| 23 · 12V Battery Heater Disconnect Fault | 12V battery heater connection open | Contact dealer for service |
| 24 · 12V Battery Reversed | 12V battery installed in reverse | Have the 12V battery reinstalled correctly by a dealer |
| 25 · 12V Battery Low | 12V battery low | Charge or replace the 12V battery; see dealer |
| 26 · DC-DC Low | DC-DC converter voltage low | Contact dealer for service |
| 27 · 12V Low Voltage Fault | 12V system fault | Contact dealer for service |
| 28 · 12V Low Voltage Fault | 12V system fault | Contact dealer for service |
| 29 · HVIL Open Fault | Loose connection detected in the power pack harness | Contact dealer for service |
| 30 · Self Test Fail | Power pack self-test failed | Disconnect charger, key off for 2 minutes, then try again |
| 31 · Battery Module Ineligible | Battery module ineligible | Disconnect charger, key off for 2 minutes, then try again |
| 32 · Contactor Open | Power pack contactor open | Disconnect charger, key off for 2 minutes, then try again |
| 33 · Battery Module Awaiting Connection | Battery module awaiting connection | Disconnect charger, key off for 2 minutes, then try again |
| 34 · Battery Module Connection Retries Fault | Battery module connection retries fault | Disconnect charger, key off for 2 minutes, then try again |
| 35 · Pilot Signal Invalid Fault | Charging station error (invalid pilot signal) | Disconnect the charging pistol, wait 2 minutes, then retry |
| 36 · Region Invalid Fault | Charger region uninitialized | Contact dealer for service |
| 37 · Charger Not Connected | CAN communication fault with the charger | Check the charger connection; contact dealer if it persists |
| 38 · Charger Fault | Charger fault | Disconnect the charging pistol, wait 2 minutes, then retry |
| 39 · Immobilizer Disconnected | CAN communication fault (immobilizer) | Contact dealer for service |
| 40 · Immobilizer Fault | Immobilizer fault | Try reprogramming the keys |
| 41 · Motor High Temperature | Motor temperature high | Performance is reduced; ease off and let the motor cool |
| 42 · Heated Grip Fault | Heated grip fault | Contact dealer for service |
| 43 · Isolation Fault | High-voltage isolation fault | Refer to dealer |
| 44 · Memory Fault | Memory fault | Key off for 2 minutes, then try again |
| 45 · Memory Fault | Memory fault | Key off for 2 minutes, then try again |
| 46 · Memory Fault | Memory fault | Key off for 2 minutes, then try again |
| 47 · Memory Fault | Memory fault | Key off for 2 minutes, then try again |
| 48 · Memory Fault | Memory fault | Key off for 2 minutes, then try again |
| 49 · Battery Module Incompatible | Installed battery is not compatible with this motorcycle | Install a compatible battery; see dealer |
| 50 · Battery Module Features Not Supported | Installed module is newer or older than the motorcycle; some features may be unavailable | Contact dealer for service |
| 51 · Battery Pack Voltage Too High | Pack voltage too high; charging paused | Charging is paused automatically; see dealer if it persists |
| 52 · Battery Pack Voltage Too Low | Pack voltage too low | Refer to dealer |
| 53 · Power Pack Voltage Low | Power pack voltage low | Charge the motorcycle |
| 54 · Battery Voltage Low | Battery voltage low | Charge the motorcycle |
| 55 · Battery Temperature High | Power pack temperature high | Performance reduced and charging may be disabled; let the pack cool |
| 56 · Battery Temperature Low | Power pack temperature low | Performance reduced and charging may be disabled; warm/charge above 0°C (32°F) |
| 57 · Controller High Temperature | Motor controller temperature high | Performance is reduced; ease off and let it cool |
| 58 · Battery Fault | Battery fault | Key off for 5 minutes, then try again |
| 59 · Heated Grip Fault | Heated grips disconnected | Reconnect the heated grips; see dealer |
| 60 · CCS Converter Fault | CCS DC-DC converter not connected or not functioning | Contact dealer for service |
| 61 · CCS Interface Fault | CCS interface unit not connected or not functioning properly | Contact dealer for service |
| 62 · CCS Communication Fault | CCS communication fault with the charging station | Try another charging station; contact dealer if it persists |
| 63 · Left Turn Signal Short Fault | Left turn signal connection short | Contact dealer for service |
| 64 · Left Turn Signal Bulb Out Fault | Left turn signal connection open (bulb out) | Have the left turn signal inspected/repaired by a dealer |
| 65 · Charger Fan Fault | Charger fan is experiencing a fault | Contact dealer for service |
| 66 · Ignition Fault | Ignition connection loss | Contact dealer for service |
| 67-99 · Motorcycle Fault | General motorcycle fault | Refer to dealer |
Maintenance schedule
Official service intervals and the belt / fluid replacement points.
| Interval | Service tasks |
|---|---|
| Initial 100 mi (160 km) | drive belt tension, front brake lever pivot, throttle grip, kickstand pivots/switch, drive motor commissioning |
| Initial 600 mi (1,000 km) | wheel bearings, drive belt tension, steering bearings, front brake lever pivot, kickstand switch, drive motor commissioning |
| Every 8,000 mi (13,000 km) or 12 months | replace brake fluid, wheels run-out, wheel bearings, drive belt tension, steering bearings, chassis fasteners |
| Every 16,000 mi (25,000 km) | repack steering bearings with grease |
| Every 24,000 mi (37,000 km) | replace drive belt, swingarm pivot bearings |
See this schedule on a distance axis →What a noise between services means →
Torque specifications
Key fastener torque values from the service manual.
| Fastener | Torque |
|---|---|
| Rear axle nut | 75 lb·ft (102 Nm) |
| Belt tension adjustment bolts | 4 lb-ft (5 Nm) |
| Power pack to frame bolts (left/right side) | 26 lb-ft (35 Nm) |
| Brake hose banjo bolt | 20 lb-ft (27 Nm) |
| Power pack ground strap bolt | 5 lb-ft (7 Nm) |
Zero SR/F at a glance: specs and performance figures
The Zero SR/F is powered by the passively air-cooled Z-Force 75-10 interior-permanent-magnet AC motor fed by a 900-amp three-phase controller with regenerative deceleration. It produces a peak 84 kW (113 hp) and 190 Nm (140 lb-ft) of torque available from zero rpm, with a 30-minute continuous rating of 40 kW (54 hp). Top speed is a claimed 200 km/h (124 mph), with a thermally sustainable top speed of around 170 km/h (106 mph). Because the powertrain is air-cooled rather than liquid-cooled, prolonged full-power running triggers a thermal-management strategy that gently trims power to protect the motor and controller. This is normal behaviour, not a fault.
Energy comes from a Z-Force lithium-ion power pack rated at 17.3 kWh maximum and 15.1 kWh nominal capacity, driving a rear wheel through a low-maintenance Gates Poly Chain HTD Carbon belt (20-tooth motor sprocket, 90-tooth wheel sprocket). Official range is 283 km (176 mi) in city riding and 188 km (117 mi) in high-speed highway commuting; real-world range depends heavily on speed, temperature, terrain and load. Zero rates the pack to retain 80% of its capacity for roughly 372,000 km (231,000 mi) of city use.
The chassis pairs a fully adjustable Showa 43 mm SFF-BP big-piston fork (120 mm travel) with a Showa 40 mm piggyback-reservoir shock (140 mm travel). Braking is by Bosch Advanced MSC ABS with twin J.Juan four-piston radial front calipers on 320 mm discs and a single-piston floating rear caliper on a 240 mm disc. It rides on 17-inch cast wheels shod with Pirelli Diablo Rosso III tyres. The SR/F weighs 227 kg (500 lb) at the kerb, carries up to 227 kg (500 lb) of rider, passenger and cargo, and has a 787 mm (31.0 in) seat height.
- Motor: Z-Force 75-10, 84 kW (113 hp) peak, 190 Nm (140 lb-ft) peak torque
- Battery: 17.3 kWh max / 15.1 kWh nominal Z-Force lithium-ion pack
- Onboard charger: 6.6 kW AC (Cypher III operating system)
- Range: 283 km (176 mi) city / 188 km (117 mi) high-speed highway
- Top speed: 200 km/h (124 mph); sustained 170 km/h (106 mph)
- Kerb weight 227 kg (500 lb); seat height 787 mm (31.0 in); wheelbase 1,450 mm
- Rake 24.5°, trail 94 mm; final drive by Gates carbon belt (20T/90T)
- Brakes: Bosch Advanced MSC ABS, twin 320 mm front discs, 240 mm rear disc
Controls, dashboard and warning indicators
The right handlebar carries the twist throttle, the motor stop (run/stop) switch and the front brake lever with its adjustable reach knob. The left handlebar holds the high/low beam switch, flash-to-pass, turn signals (self-cancelling once the bike is moving), the horn, the hazard flasher, the cruise-control button and the MODE toggle. Most of the interface runs through the MODE button: 'tap' to scroll, 'slide' (hold ~0.5 s) to enter sub-menus, 'hold' (~1 s) to jump back, and 'press' inward to select. Sliding it left from the riding screen opens the heated-grip menu (Off/Low/Medium/High), while sliding right opens traction-control settings. Heated grips are standard on the SR/F.
The three-position key switch sits ahead of the tank storage compartment: ON (lights and dash come up, the contactor closes with an audible click, bike is live), OFF, and a steering-lock position reached by turning the bars fully left, pushing the key down and turning it anticlockwise. The bike ships with black keys for starting and a yellow programming key the dealer needs to add new keys. Never use the yellow key to start the bike. Keep it safe and pass it to the next owner, because it cannot be replaced without swapping the entire lock set. A tip-over sensor cuts drive if the bike falls (reset with one full key cycle once upright), and lowering the kickstand disables the drive system.
The Cypher III TFT dash centres on a circular charge indicator flanked by four customisable quadrant gauges (state of charge, estimated range, battery temp, motor temp, instant/trip efficiency, rpm, trip A/B, ambient temp). The digital speedometer is ringed by a 12-segment analogue speed bar, and a REGEN/TORQUE meter shows torque under acceleration and regeneration under deceleration. Around the display sit the warning tell-tales you must learn to read.
- Armed/Live indicator: bike is ready to move if the throttle is opened
- ABS indicator: normal at key-on; must extinguish above 5 km/h (3 mph). If it stays lit, there is a fault or ABS is disabled
- Traction control light: lit when MTC is off or has intervened; blinks during an active event
- Temperature warning: solid red means a powertrain component hit its thermal limit and power is being trimmed
- Check Engine Light (CEL): a fault has forced permanent torque reduction. A code accompanies it; see a dealer
- 12-volt battery light: a fault in the 12 V battery or DC-DC converter
- Charge/plug indicator: flashes while charging, goes solid briefly when complete before the dash powers down
- High-beam (blue) and left/right turn-signal (green) indicators behave as on any motorcycle
Ride modes, throttle and regenerative braking
The SR/F leaves the factory with five ride modes plus a customisable one, each changing acceleration, top speed and how much regenerative braking you feel when you roll off. ECO softens throttle response, caps top speed at 120 km/h (75 mph) and adds strong regen, which suits new riders and stretches range. STANDARD is the balanced everyday setting. SPORT gives the fastest acceleration with reduced regen for advanced riders. CANYON matches Sport's acceleration but dials in stronger engine-braking-style regen for twisty roads. RAIN limits acceleration and top speed to 160 km/h (100 mph), gives the softest torque and the lightest regen for low-grip surfaces. CUSTOM ships identical to Standard and can be tailored (power, regen, accent colour, even the MTC setting) through the Zero smartphone app. Each mode is colour-coded on the dash, from ECO green to CANYON dark orange.
There is no clutch and no gears: twist the throttle towards you to accelerate and release it to slow. Closing the throttle fully engages regenerative braking, which recovers energy back into the pack and provides noticeable engine-braking-like deceleration. If you want to coast freely, hold the throttle just off the fully-closed position at its 'zero-torque point,' which shifts slightly with speed and ride mode. You can change ride modes on the move: the switch takes effect immediately if the throttle is closed, or waits until you close it if you are accelerating.
Rider aids layer on top. Cruise control is set with a 0.5-second long-press of the cruise button and works between 18 mph (30 km/h) and 89 mph (144 km/h); a short press or any brake input cancels it. Motorcycle Traction Control (MTC) offers Street, Sport, Rain and Off modes (auto-selected with the ride mode but manually overridable via a right-slide of MODE). The Bosch Advanced MSC ABS can be switched off in the Performance menu. Disabling ABS also disables Drag Torque Control (DTC), which manages rear-wheel slip under regen, though MTC stays active. The optional Parking Mode (a Cypher III+ upgrade) adds a low-speed walking forward/reverse for tight spots. It is not a parking brake.
- ECO: reduced power, 120 km/h (75 mph) cap, strong regen, best range, green
- STANDARD: balanced power and regen for daily riding, light blue
- SPORT: maximum acceleration, reduced regen, light orange
- CANYON: Sport acceleration with increased regen, dark orange
- RAIN: reduced power, 160 km/h (100 mph) cap, softest torque and lightest regen, blue
- CUSTOM: app-configurable clone of Standard with selectable accent colour
- Cruise control range: 18–89 mph (30–144 km/h); cancel via button or brake
- MTC traction modes: Street, Sport, Rain, Off
- 1From the riding screen (motor stop ON, kickstand up), press MODE and release after ~1 second.
- 2Tap MODE left or right to cycle through ECO, STANDARD, SPORT, RAIN, CANYON, CUSTOM.
- 3Hold MODE left for 1 second to exit and lock in the highlighted mode.
- 4If you switch while riding with the throttle open, the change applies the moment you close the throttle.
Battery, range and charging: times, connectors, do's and don'ts
The SR/F charges through a 6.6 kW onboard charger. European bikes use an IEC 62196 Type 2 (Mennekes) socket; North American bikes use a Type 1 (J1772) socket. From a 230 V supply, a portable EVSE cable (Mode 2, ~10 A domestic outlet) takes about 4.9 hours to 100% or 3.9 hours to 95%; a single-phase wall station (Mode 3) is similar. Because the SR/F's charger draws on three-phase power, a three-phase Mode 3 station cuts that to roughly 2.7 hours to 100% or 2.0 hours to 95%. A single-phase point will still charge the bike, but not at full rate. In North America, a 110–120 V household outlet (Level 1) needs about 11.6 hours to full, while a 208–240 V Level 2 station manages about 2.7 hours. In mild temperatures a full recharge is typically under 5 hours.
Temperature governs charging. The BMS will not charge the pack when its internal temperature is below 0°C (32°F) or above 50°C (122°F); after hard riding the pack can exceed 50°C internally even on a cool day, in which case it usually accepts a charge again within about 30 minutes once it cools. You can cap charging with a Charge Target set on the dash from 30% to 95% in 5% steps, schedule charging for off-peak rates through the app. With the Cypher III+ Extended Range Charging upgrade you can also add a further 10% (shown as '110%') for long trips, selected fresh each time you charge.
How you charge shapes battery life. For the first five charge cycles, run the pack below 5% and charge above 95% so the BMS learns to report state of charge accurately (this does not change performance, only display accuracy). After that, avoid unnecessary 100% charges if your ride doesn't need them, and don't leave the bike sitting at high charge in the heat. Never store the bike below 30%. If it drops that low, charge to at least 60% and disconnect. If the pack ever fully discharges, recharge it within 24 hours to avoid damage. Once charged, unplug: the pack enters hibernate mode and self-discharges extremely slowly.
- EU 230 V Mode 2 / single-phase Mode 3: ~4.9 h to 100% (3.9 h to 95%)
- EU three-phase Mode 3: ~2.7 h to 100% (2.0 h to 95%)
- US Level 1 (110–120 V): ~11.6 h to full; Level 2 (208–240 V): ~2.7 h to full
- Charge Target adjustable 30–95% in 5% increments on the dash
- Extended Range Charging (Cypher III+) adds ~10% capacity, re-selected each charge
- Won't charge below 0°C (32°F) or above 50°C (122°F) internal pack temp
- Always use a UL- or CE-marked EVSE cable; only Zero-approved chargers
- 1Park in a well-ventilated, dry spot away from combustibles, and avoid charging in the rain.
- 2Plug the Type 2 (EU) or J1772 (US) connector fully into the bike's charge socket.
- 3The dash wakes to the charging screen showing SoC, time remaining, charge amps, range and kW.
- 4The charge/plug icon flashes while charging and goes solid when complete; the dash then powers down.
- 5Unplug when finished so the pack enters hibernate mode for the healthiest long-term storage.
Break-in and your first rides on the SR/F
There is no engine to run in, but the SR/F still benefits from a deliberate first few weeks. Ride conservatively at first to learn how the instant torque, regenerative braking and range respond to your commute before exploring the full performance envelope. The most important 'break-in' task is battery calibration: for the first five charge cycles, discharge the pack below 5% and then charge it above 95%. The cycles teach the BMS to display state of charge accurately and do not alter performance.
New brakes need bedding in too. Fresh pads and discs deliver weak stopping power for the first few applications, so bed them deliberately: from 40 mph (64 km/h) brake smoothly down to 10 mph (16 km/h) without locking the wheels, triggering ABS or fully stopping, then accelerate and repeat 15–20 times, working the front and rear brakes separately. Finish with a 10 mile (16 km) ride to let everything cool. Proper bedding lays an even transfer layer on the discs, improving feel and reducing squeal.
Two early dealer services protect the driveline. At the initial 100 mi (160 km) mark the drive-belt tension is checked and the motor commissioning/timing verified. At the initial 600 mi (1,000 km) mark the belt tension, wheel bearings, steering bearings, front brake-lever pivot and kickstand switch are checked. Before every ride, run a quick pre-ride inspection.
- First 5 charge cycles: run below 5%, charge above 95% to calibrate SoC display
- Bed new brakes: 15–20 controlled 40→10 mph stops, front and rear separately
- Initial service at 100 mi (160 km): belt tension + motor commissioning
- Initial service at 600 mi (1,000 km): belt, wheel/steering bearings, brake pivot, kickstand switch
- Ride conservatively at first to learn range vs. performance for your route
- 1Pre-ride: confirm the charge/range indicator shows enough energy for your journey.
- 2Check drive-belt tension and condition; adjust if needed.
- 3Test both brakes by rolling the bike. You should be able to lock each wheel.
- 4With the key OFF, twist and release the throttle to confirm it returns smoothly.
- 5Check both tyres for damage, tread and correct cold pressure; test lights and signals.
Maintenance schedule, drive belt and torque specs
Zero recommends a dealer service every 12 months regardless of distance, with additional mileage-based tasks. Every ride, check the brake-fluid levels, front and rear brake operation, tyre condition and pressure, and the drive belt. At the initial 100 mi (160 km) and 600 mi (1,000 km) services the belt, bearings and motor timing are verified. The main recurring interval is every 8,000 mi (13,000 km) or 12 months, which includes replacing the DOT 4 brake fluid, inspecting wheels and wheel bearings, checking belt tension, steering bearings, chassis fasteners, throttle grip, kickstand and both suspension units. Steering bearings get repacked every 16,000 mi (25,000 km), and the drive belt and swingarm pivot bearings are replaced/checked every 24,000 mi (37,000 km).
The carbon belt is quiet, clean and low-stretch, but tension matters. Too little and the teeth can 'ratchet' over the rear sprocket, damaging the tensile cords; too much accelerates driveline wear. Correct tension is a frequency of 62–82 Hz (measured with the free Gates Carbon Drive app on the 11 mm-pitch belt), equivalent to about 51–102 kg on a mechanical tension tester. Keep the belt free of grease and debris, wash it with mild soap and water, and inspect for cuts, exposed cords, cracking at the tooth base or edge bevelling (which signals sprocket misalignment). Replace the belt if any of these appear.
When fasteners are disturbed, torque them correctly and use a medium threadlocker (LOCTITE 242 or equivalent) where specified. The specified values include the rear axle nut at 102 Nm (75 lb-ft), front axle at 54 Nm (40 lb-ft), rear sprocket bolts at 35 Nm (26 lb-ft), front brake caliper mounts at 41 Nm (30 lb-ft), triple-clamp and front-axle pinch bolts at 22 Nm (16 lb-ft), handlebar clamp bolts at 26 Nm (19 lb-ft), rear shock mount bolts at 71 Nm (52 lb-ft) and the seat bolt at 11 Nm (8 lb-ft).
- Service every 12 months regardless of mileage
- Brake fluid: DOT 4, replaced every 8,000 mi (13,000 km) or 12 months
- Drive belt tension: 62–82 Hz (Gates app) or ~51–102 kg (tester), 11 mm pitch
- Drive belt replacement: every 24,000 mi (37,000 km)
- Steering-bearing repack: every 16,000 mi (25,000 km)
- Rear axle nut 102 Nm (75 lb-ft); front axle 54 Nm (40 lb-ft)
- Rear sprocket bolts 35 Nm (26 lb-ft); front caliper mounts 41 Nm (30 lb-ft)
- The high-voltage system has no owner-serviceable parts. Leave it to trained technicians
- 1Remove the key. Pluck the lower belt span (between the sprockets) near its centre.
- 2Use the Gates Carbon Drive app microphone (in a quiet space) to read the vibration frequency.
- 3Rotate the rear wheel a quarter turn and measure again; aim for 62–82 Hz.
- 4To adjust: loosen the rear axle nut, turn both left/right adjuster bolts 1/4 turn at a time equally.
- 5Re-torque the axle nut to 102 Nm (75 lb-ft), test ride, then recheck and readjust if needed.
Tyres, brakes and suspension setup
The SR/F runs 17-inch cast wheels (3.50 front, 5.50 rear) fitted from the factory with Pirelli Diablo Rosso III tyres, 120/70-17 front and 180/55-17 rear. Both should be set to 36 psi (248 kPa, about 2.5 bar) cold, checked with an accurate gauge before each ride when the tyres have been stationary for at least three hours. Replace a tyre once tread depth reaches 1/16 in (1.6 mm) or if you find cuts, bulges, cords or uneven wear. Only fit Zero-approved radials (the factory Pirellis or approved Pirelli Angel GT / Michelin Road 5 alternatives), and always match the make and type front-to-rear, because mismatched tyres can upset handling and disrupt the ABS and traction control.
Braking is by Bosch Advanced MSC ABS: twin J.Juan four-piston radial front calipers on 320 mm (5 mm-thick) discs and a single-piston floating rear caliper on a 240 mm (4.5 mm) disc, running DOT 4 fluid in separate front and rear circuits. Top up to the UPPER mark only (never ride below the LOWER mark) and don't overfill. Replace the pads once friction material drops below 0.04 in (1 mm), and replace discs below their minimums of 4.5 mm front and 4.0 mm rear. Because the system is ABS-equipped, a fully dry hydraulic unit needs a pressure fill machine to bleed, so brake service is best left to a dealer.
Suspension is fully adjustable: a Showa 43 mm SFF-BP fork (preload on the left leg, rebound and compression on the right) with 120 mm of travel, and a Showa 40 mm piggyback shock with 140 mm of travel. The springs are set at the factory for a 90 kg (200 lb) rider, which puts each tyre about a third of the way through its travel. Set sag to match your weight (roughly 40 mm at the front and 46.5 mm at the rear) before fine-tuning damping. Factory reference settings for the SR/F are front preload Min + 5.0 turns, fork rebound Max − 3.75 turns, fork compression Max − 6.5 turns, rear rebound Max − 15 clicks and rear compression Max − 27 clicks. Never wind any adjuster hard against its stop. Always leave one click of travel.
- Tyre pressures: 36 psi (248 kPa / ~2.5 bar) front and rear, cold
- Factory tyres: Pirelli Diablo Rosso III 120/70-17 (F), 180/55-17 (R)
- Minimum tread depth: 1/16 in (1.6 mm); a 'cold' tyre = unridden for 3+ hours
- Brake fluid: DOT 4 only; replace pads below 1 mm, discs below 4.5 mm (F) / 4.0 mm (R)
- Fork: Showa 43 mm SFF-BP, 120 mm travel; shock: Showa 40 mm piggyback, 140 mm travel
- Springs preset for a 90 kg (200 lb) rider; target sag ~40 mm front, ~46.5 mm rear
- SR/F factory fork: preload Min +5.0 turns, rebound Max −3.75, compression Max −6.5
Storage, transport and cold-weather care
For any layup longer than 30 days, leave the charger connected. After 30 days the BMS activates long-term storage mode, automatically settling the pack at roughly 80% state of charge, the ideal level for calendar life. Store the bike somewhere cool: the recommended range is 10°C to 35°C (50°F to 95°F), and leaving it in direct sun or above 41°C (105°F) accelerates permanent capacity loss. Even if you don't leave it plugged in, check the state of charge on the dash every 30 days (turn the key on, read the SoC, turn it off) in case a tripped breaker or GFCI has interrupted charging. Never let it sit below 30%. If a trickle charger is available, an approved LiFePO4 charger on the 12 V battery keeps it topped and takes load off the bike's electronics.
Cold weather has no permanent effect on the pack, but it temporarily reduces how much energy the cells can deliver. Expect up to about 30% less range at -1°C (30°F) versus 27°C (80°F), plus a slight drop in peak power and top speed in extreme cold. Zero advises against riding when pack temperature is below -5°C (23°F); if you do, put it on a charger in a location above 0°C (32°F) as soon as you finish. The BMS won't charge below 0°C or discharge below -30°C (-22°F). The 12 V battery has its own heater that engages below 5°C (41°F), and during warm-up the bike may be temporarily disabled for 1–15 minutes until the battery reaches operating temperature. Winter storage in an unheated garage is fine as long as it stays above -35°C (-31°F) and the bike follows the long-term storage guidelines.
In hot conditions the charger reduces its current above about 43°C (110°F) ambient, so charge times lengthen, and above 50°C (122°F) internal the BMS stops charging entirely. The bike also won't operate above a 60°C (140°F) pack temperature. When transporting the SR/F, secure it as a light performance vehicle on a suitable trailer or transport device. Improper towing or tie-down can damage the powertrain.
- Storage over 30 days: leave the charger connected; BMS settles the pack to ~80%
- Recommended storage temperature: 10–35°C (50–95°F); never below 30% SoC
- Check dash SoC every 30 days if not left plugged in
- Cold: up to ~30% range loss near freezing; don't ride below -5°C (23°F) pack temp
- 12 V battery heater engages below 5°C (41°F); bike may disable 1–15 min while warming
- Won't charge below 0°C or above 50°C internal; won't operate above 60°C pack temp
- Winter garage storage OK above -35°C (-31°F) with long-term storage guidelines followed
Warning lights, fault codes and troubleshooting
Two categories of messages appear on the dash. System notifications are non-critical events that flash along the bottom for about five seconds and aren't stored. Examples include 'Power Pack is Too Hot to Charge,' 'Charging Delayed or Paused by Charge Station,' 'EVSE not compatible,' 'Motorcycle Tipped Over. Key-cycle to reactivate Throttle,' or 'Motorcycle in Limp Mode.' Dash error codes are more serious: a code briefly appears, and if it hasn't been cleared, the error icon stays on the dash. Codes flagged with the Check Engine Light put the bike into permanent torque reduction until serviced. You can review up to five stored codes via the dash.
Many codes are self-recoverable. Faults in the 30–34 range (self-test, contactor, battery-module connection) and several memory faults typically clear if you disconnect the charger, turn the key off for two to five minutes, and try again. Charging-station and charger faults (codes 35–38, and CCS-related 60–62) usually ask you to unplug the charging pistol, wait two minutes and retry. Voltage and temperature codes are informative: 53/54 mean the pack is low and needs charging; 55/56 mean pack temperature is high or low and performance/charging will be limited; 41 and 57 flag motor or controller high temperature with reduced performance. Code 43 (Isolation Fault) and any code in the 67–99 'Motorcycle Fault' range should go straight to a dealer.
Behind these codes are the BMS safety interlocks. If it detects a serious internal problem, or the pack is empty, the BMS can disable the throttle so the bike won't move, or disable charging so the pack won't accept a charge. Charging is specifically blocked when the internal pack temperature is above 50°C (122°F) or below 0°C (32°F). If the throttle is disabled while riding, the bike loses drive and you must pull over safely. The red temperature indicator, by contrast, is not a fault. It signals that the thermal strategy is trimming power to protect the air-cooled powertrain, and easing off restores full performance once things cool.
- Check Engine Light = permanent torque reduction; note the code and see a dealer
- Dash stores up to 5 error codes (newest at the top) under Data ▸ Errors
- Codes 30–34 / memory faults: disconnect charger, key off 2–5 min, retry
- Codes 35–38, 60–62 (charging/CCS faults): unplug pistol, wait 2 min, retry
- Codes 53/54: pack low, charge it; 55/56: pack temperature limiting performance
- Code 43 (Isolation Fault) and 67–99 (Motorcycle Fault): dealer only
- Solid red temperature light = normal thermal management, not a malfunction
- 1From the riding screen (motor stop OFF and/or kickstand down), press MODE ~1 s to open the menu.
- 2Tap right to Data, press MODE to enter, then tap right to Errors and press MODE.
- 3Tap left/right to highlight a stored code, press MODE to view its detail.
- 4With the Clear bar highlighted, press MODE to clear it; hold MODE left to return to riding.
Safety, high-voltage precautions and legal essentials
The SR/F carries a high-voltage system that can cause shock, severe burns or death. High-voltage cabling is sheathed in orange for easy identification. Never probe, cut, tamper with, remove or modify it, and don't touch high-voltage connectors, especially after an accident. The power pack must never be opened; only trained Zero technicians may service high-voltage components, and there are no owner-serviceable parts inside. Components can also be hot to the touch during and after use. In the event of a motorcycle fire, extinguish visible flame with a Class D powder-type extinguisher, then douse with a water-based extinguisher once the flame is out.
Ride within your and the machine's limits. ABS, MTC and DTC improve safety but are not substitutes for good riding technique, appropriate speed for conditions or legal speed limits. Always wear a regionally approved helmet plus proper protective gear, even on short trips, and never ride under the influence of alcohol or impairing substances. Respect the load limits: the SR/F carries a combined maximum of 227 kg (500 lb) of rider, passenger, cargo and accessories, and it's designed for one rider plus one passenger. Keep cargo low, centred, evenly distributed and firmly secured, and reduce speed when loaded.
Legally and mechanically, keep the bike genuine and documented. Use only Zero-approved parts and accessories. Unapproved electrical add-ons can damage the bike and slash pack range or life, and add-on electrical devices should connect only through the two dedicated 12 V accessory outlets fed by the DC-DC converter. Keep this documentation and the yellow programming key with the motorcycle when you sell it, as the manual is legally part of the vehicle. The VIN and pack/motor serial numbers identify the bike for service and parts (the SR/F's model line appears in the VIN as 'FD').
- Orange cabling = high voltage: never touch, cut, probe or modify it
- Never open the power pack: high-voltage service is dealer/technician only
- Motorcycle fire: Class D powder extinguisher first, then water-based
- Maximum combined load 227 kg (500 lb); one rider plus one passenger
- ABS/MTC/DTC assist but never replace good riding and legal speeds
- Only Zero-approved parts; wire accessories via the two 12 V accessory outlets
- SR/F VIN model-line code is 'FD'; keep the manual and yellow key with the bike
Frequently asked
How long does it take to charge a Zero SR/F?
The SR/F's 6.6 kW onboard charger fully recharges in under 5 hours in mild conditions. From a 230 V European supply it takes about 4.9 hours to 100% (3.9 hours to 95%) on a standard Mode 2/single-phase Mode 3 connection, dropping to roughly 2.7 hours on a three-phase Mode 3 station. In North America, a 110–120 V household outlet needs about 11.6 hours, while a 208–240 V Level 2 station charges in about 2.7 hours.
What is the range of the Zero SR/F?
The Zero SR/F has an official range of 283 km (176 mi) in city riding and 188 km (117 mi) in high-speed highway commuting on its 17.3 kWh pack. Real-world range varies with speed, temperature, terrain, load and riding style. Sustained highway speeds and cold weather (up to about 30% less near freezing) reduce it most, while ECO mode and city riding stretch it furthest.
How fast is the Zero SR/F and how much power does it make?
The SR/F's Z-Force 75-10 motor produces a peak 84 kW (113 hp) and 190 Nm (140 lb-ft) of torque from zero rpm, with a claimed top speed of 200 km/h (124 mph) and a thermally sustainable top speed of about 170 km/h (106 mph). Its 30-minute continuous rating is 40 kW (54 hp).
What tyre pressure should a Zero SR/F run?
Both tyres should be set to 36 psi (248 kPa, about 2.5 bar) when cold, meaning after the bike has been stationary for at least three hours. Check pressures before every ride with an accurate gauge. The factory tyres are Pirelli Diablo Rosso III, 120/70-17 front and 180/55-17 rear.
How often does the Zero SR/F need servicing?
Zero recommends a dealer service every 12 months regardless of mileage, plus initial checks at 100 mi (160 km) and 600 mi (1,000 km). The main recurring interval is every 8,000 mi (13,000 km) or 12 months, which includes replacing the DOT 4 brake fluid and checking the belt, bearings and fasteners. The carbon drive belt is replaced at 24,000 mi (37,000 km).
What are the ride modes on the Zero SR/F?
The SR/F has five factory ride modes plus a customisable one. ECO gives soft response, a 120 km/h (75 mph) cap and strong regen; STANDARD is the balanced default; SPORT delivers maximum acceleration with reduced regen; CANYON matches Sport's acceleration with stronger regen for backroads; RAIN limits power and top speed to 160 km/h (100 mph) with the lightest regen for low grip; and CUSTOM is app-configurable. Each is colour-coded on the dash.
What does the check engine light mean on a Zero SR/F?
The Check Engine Light indicates the diagnostic system has detected a fault and put the bike into permanent torque reduction; it's always accompanied by an error code. Review stored codes via Data ▸ Errors on the dash. Some clear after disconnecting the charger and cycling the key off for a couple of minutes, but codes like 43 (Isolation Fault) or anything in the 67–99 range require a dealer.
Can I set a charge limit on the Zero SR/F?
Yes. The dash Charge Target lets you cap charging anywhere from 30% to 95% in 5% steps, which is ideal for daily riding since it avoids sitting at 100%. You can also schedule off-peak charging through the Zero app. With the Cypher III+ Extended Range Charging upgrade you can instead add about 10% extra capacity (shown as '110%') for longer trips, selected fresh each charge.
What connector does the Zero SR/F use to charge?
European SR/F models use an IEC 62196 Type 2 (Mennekes) socket, while North American models use a Type 1 (J1772) socket. Charging is AC through the 6.6 kW onboard charger; the SR/F draws on three-phase power in Europe, so a three-phase station charges fastest, whereas a single-phase point charges more slowly. Always use a UL- or CE-marked EVSE cable and only Zero-approved chargers.
How should I store a Zero SR/F battery long term?
For layups over 30 days, leave the charger connected. After 30 days the BMS automatically settles the pack to about 80% state of charge, the best level for battery life. Store the bike between 10°C and 35°C (50°F to 95°F), out of direct sun, and never let it drop below 30% charge. If you don't leave it plugged in, check the dash state of charge every 30 days.
Do I need to break in a new Zero SR/F?
There's no engine to run in, but for the first five charge cycles you should run the pack below 5% and charge it above 95% so the BMS learns to display state of charge accurately. Bed in new brakes with 15–20 controlled stops from 40 to 10 mph, ride conservatively at first to learn the bike, and complete the initial 100 mi and 600 mi dealer checks.
How much does a Zero SR/F weigh and how tall is the seat?
The Zero SR/F has a kerb weight of 227 kg (500 lb) and a seat height of 787 mm (31.0 in). Its wheelbase is 1,450 mm with a 24.5° rake and 94 mm of trail, and it can carry a combined maximum of 227 kg (500 lb) of rider, passenger, cargo and accessories.
This guide is an independent synthesis of the official Zero Motorcycles owner & service manuals, rewritten for clarity. Figures are stated as published for the latest model year and may vary by year, region and options. Always follow your bike's own manual and a qualified technician for service. Zero Motorcycles is a trademark of its respective owner.