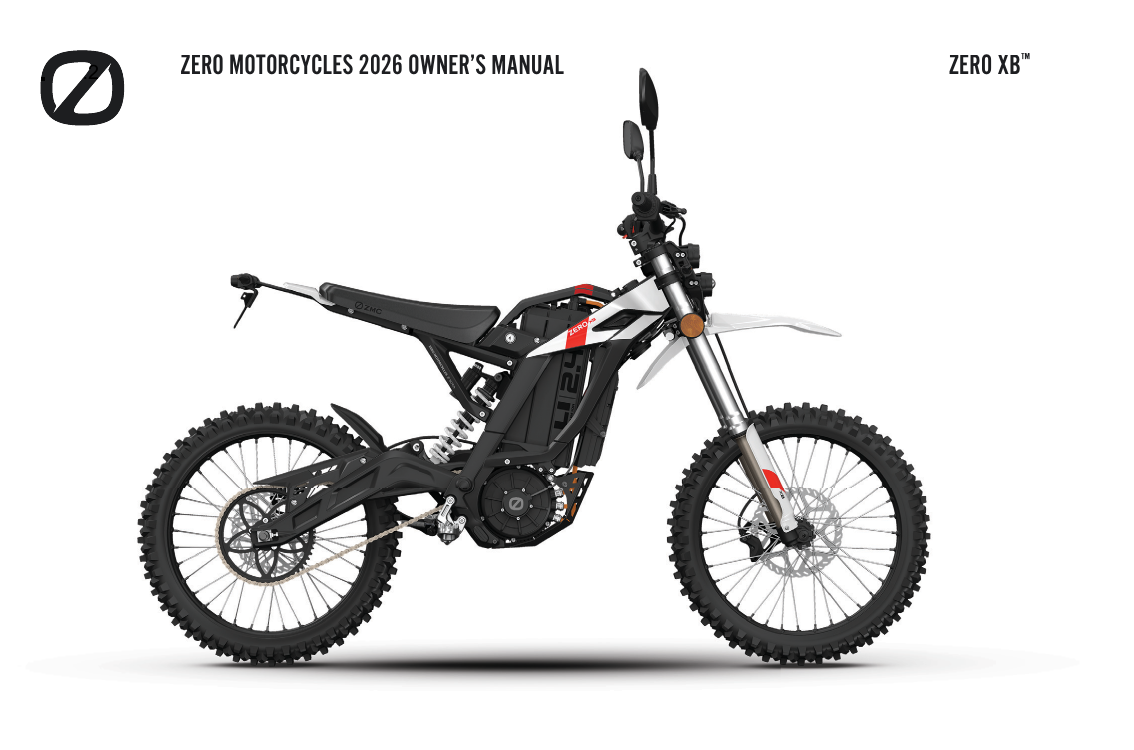
Zero XB: complete owner's guide
The Zero XB is a lightweight, off-road-styled electric minibike built around a quiet 74-volt powertrain, a removable 2.4 kWh lithium battery and a low 139 lb (63 kg) curb weight. Classified in Europe as an L1e-B light moped, it is capped at 28 mph (45 km/h) and designed for a single rider. This guide condenses the full owner's and service documentation into one reference: specifications, how the controls and dashboard work, ride modes and regenerative braking, charging times and battery care, the complete maintenance schedule with torque and belt-tension figures, tyre pressures, storage and winter advice, and how to read warning lights and fault codes.
Full specifications
Full Zero XB specifications from the official manual (2026 model year).
- Motor
- PMSM (permanent magnet synchronous motor), mid-mounted
- Peak power
- 4 kW (5 hp)
- Peak torque
- 42 Nm
- Top speed
- 45 km/h
- Transmission
- Variable gear reduction
- Max capacity
- 2.4 kWh
- Nominal capacity
- 2.4 kWh
- Chemistry
- Lithium (74V / 32 Ah)
- Onboard charger
- 0.8 kW
- Standard charge time
- Approximately 3 hours (800 W off-board charger; 110 V or 220 V AC input)
- Combined
- 75 km
- Curb weight
- 63 kg
- Seat height
- 832 mm
- Wheelbase
- 1240 mm
- Ground clearance
- 270 mm
- Front
- Front forks with adjustable preload and rebound damping
- Rear
- Rear shock with adjustable compression, rebound, and preload
- Front brake
- Hydraulic disc brake, DOT 4 fluid, lever-actuated with sight-glass reservoir (no caliper/disc size stated)
- Rear brake
- Hydraulic disc brake, DOT 4 fluid, lever-actuated with sight-glass reservoir (no caliper/disc size stated)
- Wheels
- spoked
- Front tyre
- 70/100-19M/C or 2.50-19 · 29 psi (200 kPa)
- Rear tyre
- 70/100-19M/C or 2.75-19 · 29 psi (200 kPa)
- Final drive
- Chain (internal gear-reduction belt + chain final drive)
- Headlight
- Separate high-beam and low-beam headlights, vertically adjustable (no bulb type/wattage stated)
- Taillight
- Combined tail light / brake light (illuminates with key on; brightens under braking)
- Turn signals
- Front turn signals (operated via left combination switch); bulb type not stated
- DRL
- LED
Ride modes
How each selectable mode changes acceleration, top speed and regenerative braking.
| Mode | Character | Top speed | Regen | Best for |
|---|---|---|---|---|
| Eco | Softer power and gentler acceleration | — | Adjustable levels 1-3 via RIDE menu (global, not mode-specific) | New riders and easy, controlled riding |
| Standard | Moderate power and acceleration (default mode) | — | Adjustable levels 1-3 via RIDE menu (global, not mode-specific) | Everyday riding once familiar with the motorcycle's handling |
| Sport | Strong power delivery | — | Adjustable levels 1-3 via RIDE menu (global, not mode-specific) | Non-paved roads such as forest trails; use only when experienced with the bike |
Charging times
Charging scenarios and how long each takes to fill the pack.
| Method | Input | Time to full | Notes |
|---|---|---|---|
| Standard charge (supplied off-board charger) | 110 V AC or 220 V AC wall outlet, 800 W off-board charger (socket rated above 840 W recommended) | Approximately 3 hours | Only one charging method is documented. The 2.4 kWh / 74 V pack can charge on or off the bike; the BMS blocks charging below 32F/0C or above 113F/45C and resumes once the pack returns to range. |
Dashboard warning lights
What each dashboard indicator means and what to do when it lights up.
The Zero XB has a single round TFT instrument that centers a digital speedometer with motor speed, a battery State-of-Charge gauge, clock, odometer/trip, and the active ride mode (or PARK/READY). It is ringed by tell-tale icons (turn signals, high beam, kickstand, kill switch, temperature, malfunction/MIL, TCS, cruise, charging, tip-over), with a MENU/SET button pair opening RIDE settings, theme, brightness, units, language, faults and time.
Looking for a specific error? Browse the full Zero error-code catalog →
Fault & diagnostic codes
Diagnostic codes the display and app can show, with what each means and the fix.
93 diagnostic codes for the Zero XB
| Code / fault | Meaning | What to do |
|---|---|---|
| b103 · Cell differential pressure fault 1 | Uneven cell voltage/pressure across the pack (mild, level 1) | Contact your local Zero dealer. |
| b110 · Discharge monomer undervoltage fault 1 | A single cell dropped too low while discharging (level 1) | Charge the battery. |
| b114 · BMS charging overcurrent fault 1 | Charge current exceeded the BMS limit (level 1) | Reduce charging current. |
| b119 · BMS discharge over temperature fault 1 | Pack too hot while discharging (level 1) | Motorcycle limits level 1 power usage. |
| b120 · BMS charging over temperature fault 1 | Pack too hot while charging (level 1) | Limit charging current. |
| b121 · BMS discharge under temperature fault 1 | Pack too cold while discharging (level 1) | Motorcycle limits level 1 power usage. |
| b122 · BMS charging under temperature fault 1 | Pack too cold while charging (level 1) | Reduce charging current. |
| b130 · BMS discharge overcurrent fault 1 | Discharge current exceeded the limit (level 1) | Reduce output current. |
| b131 · Battery insulation fault 1 | High-voltage isolation problem in the pack (level 1) | Contact your local Zero dealer. |
| b140 · Charging unit battery undervoltage fault level 1 | Pack voltage too low to begin charging (level 1) | Charge the battery. |
| b141 · Uneven temperature fault 1 | Uneven temperatures across the pack (level 1) | Contact your local Zero dealer. |
| b203 · Cell differential pressure fault 2 | Uneven cell voltage/pressure across the pack (moderate, level 2) | Contact your local Zero dealer. |
| b210 · Discharge monomer undervoltage fault 2 | A single cell dropped too low while discharging (level 2) | Charge the battery. |
| b214 · BMS charging overcurrent fault 2 | Charge current exceeded the BMS limit (level 2) | Reduce charging current. |
| b219 · BMS discharge over temperature fault 2 | Pack too hot while discharging (level 2) | Motorcycle limits level 2 power usage. |
| b220 · BMS charging over temperature fault 2 | Pack too hot while charging (level 2) | Limit charging current. |
| b221 · BMS discharge under temperature fault 2 | Pack too cold while discharging (level 2) | Motorcycle limits level 2 power usage. |
| b222 · BMS charging under temperature fault 2 | Pack too cold while charging (level 2) | Reduce charging current. |
| b230 · BMS discharge overcurrent fault 2 | Discharge current exceeded the limit (level 2) | Reduce output current. |
| b231 · Battery insulation fault 2 | High-voltage isolation problem in the pack (level 2) | Contact your local Zero dealer. |
| b240 · Charging unit battery undervoltage fault level 2 | Pack voltage too low to begin charging (level 2) | Charge the battery. |
| b241 · Uneven temperature fault 2 | Uneven temperatures across the pack (level 2) | Contact your local Zero dealer. |
| b302 · Cell failure | A battery cell has failed | Contact your local Zero dealer. |
| b303 · Cell differential pressure fault 3 | Severe cell voltage/pressure imbalance (level 3) | Contact your local Zero dealer. |
| b307 · BMS internal MOS failure or relay failure | Internal BMS MOSFET switch or relay has failed | Contact your local Zero dealer. |
| b309 · Total discharge voltage overvoltage fault | Whole-pack discharge voltage too high | Charge the battery. |
| b310 · Discharge monomer undervoltage fault 3 | A single cell critically low while discharging (level 3) | Charge the battery. |
| b314 · BMS charging overcurrent fault 3 | Charge current far over the limit (level 3) | Replace the charger. |
| b319 · BMS discharge over temperature fault 3 | Pack critically hot while discharging (level 3) | Use after the battery temperature decreases. |
| b320 · BMS charging over temperature fault 3 | Pack critically hot while charging (level 3) | Charge the battery after the temperature decreases. |
| b321 · BMS discharge under temperature fault 3 | Pack critically cold while discharging (level 3) | Use after the battery temperature decreases. |
| b322 · BMS charging under temperature fault 3 | Pack too cold to charge (level 3) | Charge the battery after the temperature rises. |
| b330 · BMS discharge overcurrent fault 3 | Discharge current far over the limit (level 3) | Contact your local Zero dealer. |
| b331 · Battery insulation fault 3 | Severe high-voltage isolation fault (level 3) | Contact your local Zero dealer. |
| b332 · Battery short circuit failure | Short circuit detected in the pack | Contact your local Zero dealer. |
| b333 · BMS internal communication failure | Internal BMS communication has failed | Contact your local Zero dealer. |
| b340 · Charging monomer battery undervoltage fault level 3 | A single cell critically low, charging blocked (level 3) | Charge the battery. |
| b341 · Uneven temperature fault 3 | Severe temperature imbalance across the pack (level 3) | Contact your local Zero dealer. |
| b342 · Total charging voltage overvoltage fault | Whole-pack charging voltage too high | Check the input voltage. |
| b343 · Total discharge voltage undervoltage fault | Whole-pack discharge voltage too low | Check the battery. |
| b344 · Total charging voltage undervoltage fault | Whole-pack charging voltage too low | Check the input voltage. |
| b345 · Discharge monomer overvoltage fault | A single cell over-voltage during discharge | Check the battery. |
| b348 · Communication failure | BMS communication failure | Contact your local Zero dealer. |
| C101 · Charger fault 1 | General charger fault (level 1) | Contact your local Zero dealer. |
| C106 · Temperature fault 1 | Charger over-temperature (level 1) | Reduce charging current. |
| C107 · Input overvoltage protection 1 | Mains input voltage too high (level 1) | Check input voltage. |
| C108 · Input undervoltage protection 1 | Mains input voltage too low (level 1) | Check input voltage. |
| C109 · Output overcurrent protection 1 | Charger output current too high (level 1) | Power the motorcycle on and off to reset. |
| C110 · Output overvoltage protection 1 | Charger output voltage too high (level 1) | Power the motorcycle on and off to reset. |
| C111 · Output undervoltage protection 1 | Charger output voltage too low (level 1) | Power the motorcycle on and off to reset. |
| C201 · Charger fault 2 | General charger fault (level 2) | Contact your local Zero dealer. |
| C206 · Temperature fault 2 | Charger over-temperature (level 2) | Reduce charging current. |
| C207 · Input overvoltage protection 2 | Mains input voltage too high (level 2) | Check input voltage. |
| C208 · Input undervoltage protection 2 | Mains input voltage too low (level 2) | Check input voltage. |
| C209 · Output overcurrent protection 2 | Charger output current too high (level 2) | Power the motorcycle on and off to reset. |
| C210 · Output overvoltage protection 2 | Charger output voltage too high (level 2) | Power the motorcycle on and off to reset. |
| C211 · Output undervoltage protection 2 | Charger output voltage too low (level 2) | Power the motorcycle on and off to reset. |
| C301 · Charger fault 3 | General charger fault (level 3) | Contact your local Zero dealer. |
| C302 · Hardware fault 3 | Charger hardware failure (level 3) | Contact your local Zero dealer. |
| C303 · Communication fault 3 | Charger communication failure (level 3) | Contact your local Zero dealer. |
| C304 · Short circuit protection 3 | Charger short-circuit protection tripped (level 3) | Contact your local Zero dealer. |
| C305 · Open circuit protection 3 | Charger open-circuit protection tripped (level 3) | Contact your local Zero dealer. |
| C306 · Temperature fault 3 | Charger over-temperature (level 3) | Charge after the temperature drops. |
| C307 · Input overvoltage protection 3 | Mains input voltage too high (level 3) | Check input voltage. |
| C308 · Input undervoltage protection 3 | Mains input voltage too low (level 3) | Check input voltage. |
| C309 · Output overcurrent protection 3 | Charger output current too high (level 3) | Contact your local Zero dealer. |
| C310 · Output overvoltage protection 3 | Charger output voltage too high (level 3) | Contact your local Zero dealer. |
| C311 · Output undervoltage protection 3 | Charger output voltage too low (level 3) | Contact your local Zero dealer. |
| P111 · Controller over temperature fault 1 | Motor controller too hot (level 1) | Motorcycle limits level 1 power usage. |
| P112 · Electronic TCS malfunction | Traction control system fault | Contact your local Zero dealer. |
| P123 · Motor controller system fault level 1 | Controller system fault (level 1) | Check the controller power cord for looseness. |
| P124 · Motor over temperature fault 1 | Motor too hot (level 1) | Motorcycle limits level 1 power usage. |
| P126 · Battery imbalance warning prompt level 1 | Pack cell imbalance warning (level 1) | Contact your local Zero dealer. |
| P211 · Controller over temperature fault 2 | Motor controller too hot (level 2) | Motorcycle limits level 2 power usage. |
| P223 · Motor controller system fault level 2 | Controller system fault (level 2) | Check the controller power cord for looseness. |
| P224 · Motor over temperature fault 2 | Motor too hot (level 2) | Motorcycle limits level 2 power usage. |
| P225 · Motor temperature sensor failure | Motor temperature sensor has failed | Contact your local Zero dealer. |
| P226 · Battery imbalance warning prompt level 2 | Pack cell imbalance warning (level 2) | Contact your local Zero dealer. |
| P301 · Controller overvoltage failure | Controller input over-voltage | 1. Replace the battery. 2. Replace the controller. |
| P302 · Controller undervoltage failure | Controller input under-voltage | Charge the battery. |
| P303 · Controller overcurrent protection failure | Controller over-current protection tripped | Power the motorcycle on and off to reset. |
| P304 · Motor locked failure | Motor stalled / locked rotor | Power the motorcycle on and off to reset. |
| P305 · Motor position sensor failure | Motor position sensor has failed | Contact your local Zero dealer. |
| P307 · Controller phase loss failure | Lost a motor phase | Contact your local Zero dealer. |
| P309 · Braking state | Brake input stuck or continuously active | Check the brake switch. |
| P310 · Motor controller self-test failure | Controller power-on self-test failed | Contact your local Zero dealer. |
| P311 · Controller over temperature fault 3 | Motor controller critically hot (level 3) | Allow the controller to cool. |
| P314 · Throttle failure | Throttle input fault | Check the throttle grip for damage and the wiring harness plug for looseness. |
| P320 · Brake failure | Brake system fault | Contact your local Zero dealer. |
| P321 · Communication failure | Controller communication failure | Contact your local Zero dealer. |
| P322 · Precharge fault | Precharge circuit fault | Contact your local Zero dealer. |
| P323 · Motor controller system fault level 3 | Controller system fault (level 3) | Contact your local Zero dealer. |
| P324 · Motor over temperature fault 3 | Motor critically hot (level 3) | Allow the motor to cool. |
Maintenance schedule
Official service intervals and the belt / fluid replacement points.
| Interval | Service tasks |
|---|---|
| Initial 60 mi (100 km) | Drive chain: check tension and adjust, inspect for wear |
| Every 300 mi (500 km) | Drive chain: check tension/adjust, inspect for wear, lubricate chain |
| Every 1,250 mi (2,000 km) | Hardware torque check, drive belt inspection and tension, sprocket wear, wiring harness security, tip-over protection, wheel/steering/suspension/swingarm bearings |
| Every 3,100 mi (5,000 km) | Drive chain: replace |
| Every 6,200 mi (10,000 km) or 12 months | Brake fluid replace, front suspension service |
See this schedule on a distance axis →What a noise between services means →
Torque specifications
Key fastener torque values from the service manual.
| Fastener | Torque |
|---|---|
| Rear axle nut (chain adjustment) | 55 ± 4 lb·ft (75 ± 5 Nm) |
| Front axle shaft | 17 ± 2 lb·ft (22.5 ± 2.5 Nm) |
| Front axle pinch bolts | 8 ± 1 lb·ft (10.5 ± 1.5 Nm) |
| Motor sprocket nut | 55 ± 4 lb·ft (75 ± 5 Nm) |
| Swingarm to frame | 55 ± 4 lb·ft (75 ± 5 Nm) |
| Front brake caliper | 7 ± 1.5 lb·ft (10 ± 2 Nm) |
| Rear brake caliper | 7 ± 1.5 lb·ft (10 ± 2 Nm) |
| Fork mounting bolts | 8 ± 1 lb·ft (10.5 ± 1.5 Nm) |
| Steering column adjusting bolt | 28 ± 2 lb·ft (37.5 ± 2.5 Nm) |
Zero XB at a glance: specs and figures
The Zero XB is a compact electric motorcycle powered by a mid-mounted permanent-magnet synchronous (PMSM) motor rated at 4 kW continuous. It delivers 31 lb-ft (42 Nm) of peak motor torque, which the variable gear reduction multiplies to roughly 275 lb-ft (373 Nm) at the rear wheel for strong low-speed pull. Top speed is an estimated 28 mph (45 km/h), consistent with its EU L1e-B light-moped classification, and it is designed to carry a single rider only.
The XB runs on a removable 74 V / 32 Ah lithium battery with a usable capacity of about 2.4 kWh, giving a claimed range of 47 mi (75 km) at a steady 31 mph (50 km/h). Real-world range varies with riding style, terrain, load, temperature and tyre pressure. The XB is deliberately light and narrow, making it easy to handle on trails and around town, and its drivetrain combines an internal gear reduction with a belt and a final drive chain.
Because it is a high-voltage electric vehicle, none of the powertrain (battery, motor, controller or high-voltage wiring) should ever be opened or modified by the owner; those repairs are reserved for Zero-trained technicians.
- Motor: PMSM mid-mounted, 4 kW continuous rated power
- Peak motor torque: 31 lb-ft (42 Nm); up to 275 lb-ft (373 Nm) at the rear wheel
- Top speed: approx. 28 mph (45 km/h), EU category L1e-B
- Battery: lithium 74 V / 32 Ah, 2.4 kWh, removable
- Range: 47 mi (75 km) at 31 mph (50 km/h), lab-measured
- Charge time: approximately 3 hours from an 800 W off-board charger
- Curb weight: 139 lb (63 kg); max payload 220 lb (100 kg); GVW 359 lb (163 kg)
- Dimensions: 73 in (1865 mm) long, 30 in (770 mm) wide, 43 in (1090 mm) tall, 49 in (1240 mm) wheelbase, 10.5 in (270 mm) ground clearance
- Brakes: 220 mm front rotor, 203 mm rear rotor, hydraulic
- Wheels/tyres: 19 in front and rear, 70/100-19 tyres front and rear
Controls, dashboard and indicator lights
The XB uses two handlebar switch clusters plus a set of dash buttons. The left cluster carries the headlight high/low switch, the turn-signal switch (which must be cancelled manually by returning it to centre), the horn, a flash-to-pass button, and the reverse button. The right cluster holds the kill switch (up disables the motor, down energises it for travel), the cruise-control button and the MODE button that cycles ride modes. Below the screen sit the MENU, TCS (traction control), hazard, Park (P) and SET buttons. A separate two-position key switch (Off/On) sits in front of the seat, and there is an independent handlebar steering lock for security.
The display shows state of charge, a clock, the active ride mode (or PARK), a READY indicator, motor speed, road speed and both an odometer and a resettable trip odometer. The speedometer only appears once the kickstand is up and the kill switch is in the down (run) position, so it shows only when the bike is ready to move. A row of tell-tale icons covers turn signals, kill switch, kickstand, tip-over, the malfunction indicator, a temperature warning, traction control, cruise control, high beam and charging.
All display settings live behind the MENU button: short-press MENU to enter, short-press SET to move between items, and long-press SET to open a screen. From here you can adjust the RIDE settings, switch between light and dark THEME, set one of five BRIGHTNESS levels, toggle UNITS between miles and kilometres, change LANGUAGE, view active FAULTS, set the TIME (12 or 24 hour), check the SYSTEM firmware version, or RESET the display to factory defaults.
- Kill switch: up = motor disabled, down = ready to ride (a dash icon warns when disabled)
- Turn signals do not self-cancel. Push the switch back to centre after turning
- Reverse: hold the left-cluster reverse button and roll the throttle; release the button to stop
- Park (P): press to release the bike from park so it can move; press again to re-engage park
- Temperature icon lights if the battery, motor or controller nears its temperature limit. The malfunction icon lighting alongside it is normal
- Speedometer shows only when the kickstand is up and the kill switch is in run
- 1To reset the trip odometer: long-press the SET button until the trip figure begins to blink.
- 2While it is blinking, short-press SET to zero the trip meter.
Ride modes, throttle and regenerative braking
The XB offers three ride modes selected with the MODE button on the right switch cluster, with STANDARD as the default. ECO softens power and acceleration and is ideal for new riders; STANDARD gives moderate, everyday power once you are comfortable with the bike; and SPORT delivers the strongest response, intended for confident riders and unpaved surfaces such as forest trails. You can change modes while moving as long as the throttle is fully released; the motor must be on, the kill switch in run and the throttle closed.
The throttle is a twist grip: rotate it counter-clockwise to drive the motor forward, and release it to let it snap closed and cut power. Regenerative braking is adjustable through three levels in the RIDE menu: level 1 is the gentlest and level 3 the strongest. At the highest setting the bike slows noticeably more when you close the throttle, recovering energy as it decelerates, which is useful on long descents. The RIDE menu also contains Tip Over Assist (cuts throttle if the bike falls) and Uphill Assist (holds the bike against rolling on inclines).
Two riding aids round out the system: cruise control, activated with the right-cluster button to hold a steady speed without holding the throttle, and traction control (TCS), toggled with the TCS button to limit rear-wheel slip under acceleration. Cruise control cancels automatically when you brake, change ride mode, use the kill switch, or press the button again. The TCS tell-tale illuminates whenever traction control is switched off, unavailable, or actively intervening.
- ECO: soft power, best for beginners and maximising range
- STANDARD: default, balanced power for everyday riding
- SPORT: strongest power, suited to experienced riders and off-road
- Regen levels 1–3 set in the RIDE menu; level 3 gives the most coasting deceleration
- Cruise control cancels on braking, mode change, kill switch or a second button press
- TCS icon (with strike-through) means traction control is off
Battery, range and charging: times, connectors, do's and don'ts
The XB carries a removable 74 V / 32 Ah lithium battery (2.4 kWh) that can be charged either in the bike or lifted out. Using the supplied 800 W off-board charger, a full charge takes approximately 3 hours from a standard 110 V or 220 V AC outlet. Zero recommends a circuit that can supply at least 840 W. Always use the charger supplied with the bike or an approved Zero replacement. Non-approved chargers can damage the battery or cause a fire, and using an unapproved charger voids the warranty.
Temperature governs both charging and performance. The battery's best operating window is 50–86°F (10–30°C), with an allowable range of 5–113°F (−15 to 45°C). The battery-management system will not charge above an internal 113°F (45°C) or at or below 32°F (0°C); after a hard ride it may delay charging until the pack cools, and if it is too cold it must be allowed to warm naturally. Never heat or cool it artificially. Charging should always happen in a dry, ventilated space away from flammable materials, never in the rain.
Battery longevity depends on how you store it. For long idle periods keep the charge between 40% and 60% at 68–77°F (20–25°C), top it up to that band once a month, and once a year run a full 100% charge followed by a discharge below 10% before returning to the 40–60% routine. Avoid deep discharges, and never leave the battery below 30% state of charge for more than 30 days. Doing so can cause permanent damage that is not covered by warranty. A tip-over lockout also applies: the bike cannot be charged (or driven) while it is on its side.
- Charger: 800 W off-board unit; ~3 hours to full charge
- Input: 110 V or 220 V AC; recommended supply at least 840 W
- Do not charge below 32°F (0°C) or above an internal 113°F (45°C)
- Best performance and charging between 50–86°F (10–30°C)
- Store long-term at 40–60% charge, 68–77°F (20–25°C), and top up monthly
- Never leave the pack below 30% charge for more than 30 days
- A battery fire requires a Class D extinguisher. Call the fire service
- The dash also contains a non-serviceable coin cell (an ingestion hazard). Never open the dash
- 1Turn the key switch off before connecting anything.
- 2Connect the charger output plug to the battery charging port socket, matching the connector polarity.
- 3Plug the charger input into the mains supply.
- 4Confirm the charging indicator shows the battery is charging.
- 5When the charger light turns solid green, unplug from the wall first, then remove the plug from the battery port.
Break-in period, pre-ride checks and first rides
Before your first rides, and ideally before every ride, run through a quick pre-ride inspection. Confirm the headlight and signals work, the handlebars turn freely without play, the throttle snaps back to closed on its own, the tyres are undamaged and correctly inflated, the brakes feel firm, the drive chain tension is correct, the kickstand cut-off works, and the suspension moves smoothly without oil leaks. Check that the battery has enough charge for your intended ride.
Starting the XB follows a set sequence, and the bike deliberately refuses to move until the safety interlocks are satisfied: the kickstand must be up and the kill switch in run before the speedometer even appears. To stop, close the throttle, disable the motor with the kill switch, lower the kickstand, and turn the key off, removing it to deter theft. Brake with both levers together (right lever for the front, left lever for the rear) and release the throttle as you brake; on long descents brake intermittently rather than dragging the brakes, which can overheat them.
The break-in phase is anchored by the initial service at 60 mi (100 km), which should not be skipped. It catches fasteners and drive components that settle during early use. During the break-in and warranty period, Zero recommends returning to the dealer at the scheduled intervals for inspection and adjustment. If the bike is ever tipped over, the tip-over sensor disables drive; stand it upright and perform one full key cycle (key off, wait for the screen to go blank, then key on) to reset it.
- The bike will not drive with the kickstand down or the kill switch up
- Speedometer appears only once the bike is ready to ride
- Brake with front and rear together; release the throttle while braking
- Use intermittent braking on long descents to prevent brake overheating
- Complete the initial 60 mi (100 km) service, which is critical during break-in
- 1Turn the key switch to ON.
- 2Raise the kickstand and move the kill switch to the run (down) position. PARK appears on the dash.
- 3Squeeze both brake levers or press the P (park) button to release park mode.
- 4Select your ride mode with the MODE button.
- 5Check your surroundings, then gently roll on the throttle to pull away.
Maintenance schedule, drive belt and chain care
The XB uses a mileage- and time-based service schedule; when both a distance and a time are given, follow whichever comes first. At every ride you should check tyre pressure and tread, brake operation, brake-fluid level, the battery for damage, the lights and signals, and the wheels and spokes. The drive chain gets its first tension check and adjustment at the initial 60 mi (100 km) service, then every 300 mi (500 km) thereafter, and it should be lubricated every 300 mi (500 km), or sooner after riding in rain or dirt.
At every 1,250 mi (2,000 km) the schedule adds a full hardware-torque check, a drive-belt inspection and tension check, sprocket wear inspection, a wiring-harness check, a tip-over-protection test, and inspection of the wheel, steering, suspension-linkage and swingarm bearings. The drive chain is replaced at 3,100 mi (5,000 km), and at 6,200 mi (10,000 km) or 12 months the brake fluid is replaced and the front suspension is serviced or replaced as needed.
The drive belt is checked with a Gates ultrasonic tension meter (settings: mass 5.0 g/m, width 20 mm, span 122 mm), targeting 550 ± 50 N, verified at four wheel positions 90° apart. The final-drive chain should have 10–15 mm of sag; clean it with kerosene (never soaking longer than 10 minutes) and lubricate it with ISO grade 32 or 46 oil, letting it penetrate for about 30 minutes before riding. Keep all chain cleaner and lubricant well away from the brake rotors and pads. When the chain wears out, replace it together with both sprockets.
- Every ride: tyres, brakes, brake fluid, battery, lights, wheels and spokes
- Initial 60 mi (100 km): first drive-chain tension check and adjustment
- Every 300 mi (500 km): check/adjust and lubricate the drive chain
- Every 1,250 mi (2,000 km): hardware torque, belt tension, sprockets, harnesses, tip-over test, bearings
- Every 3,100 mi (5,000 km): replace the drive chain
- Every 6,200 mi (10,000 km) or 12 months: replace brake fluid, service front suspension
- Drive-belt tension target: 550 ± 50 N; chain sag: 10–15 mm
- Front and rear axle nuts: 55 lb-ft (75 Nm); motor sprocket nut: 55 lb-ft (75 Nm) with Loctite 243
- Rear sprocket: 22 lb-ft (30 Nm); brake calipers and rotors: 7 lb-ft (10 Nm); kickstand: 30 lb-ft (40 Nm)
Tyres, brakes and suspension setup
Both tyres run 29 psi (200 kPa) cold, front and rear, and the pressure must never exceed 32 psi (225 kPa). Check pressures with an accurate gauge when the tyres are cold (ideally after the bike has sat unridden for at least three hours), and refit the valve caps afterwards. The XB rolls on 19-inch wheels with 70/100-19 tyres at each end; spokes should be checked for tightness and torqued to 29 ± 7 lb-in (3.25 ± 0.75 Nm). If a spoke breaks, replace the adjacent spokes as well, and lower the tyre pressure when fitting off-road tyres for trail use.
The XB has hydraulic disc brakes (a 220 mm front rotor and a 203 mm rear rotor) using DOT 4 brake fluid. Keep the fluid above the lower third of each sight glass and top up with fresh fluid from a sealed container only; never ride with the level below that mark. Replace the friction pads when they wear below 2.5 mm and the rotors when they drop below 2.0 mm. A spongy lever, unusually long lever travel or noticeable fluid loss means you should stop and have the system inspected before riding again.
Suspension is adjustable at both ends. The front forks offer preload adjustment on the left leg and rebound damping on the right, plus an air chamber that should be set to about 110 ± 10 psi (758 ± 69 kPa) and checked every three months with a shock pump. The rear shock provides preload, compression and rebound adjustment. Set preload to match your weight so the bike sits correctly under load, then fine-tune compression and rebound so it neither bottoms out harshly nor packs up over consecutive bumps. Clean and lightly grease the fork and shock tubes after each ride, but never aim pressurised water at the dust seals.
- Tyre pressure: 29 psi (200 kPa) front and rear, cold; never exceed 32 psi (225 kPa)
- Tyres/wheels: 70/100-19 on 19 in rims; spoke torque 29 ± 7 lb-in (3.25 ± 0.75 Nm)
- Brake fluid: DOT 4, kept above the lower third of the sight glass
- Replace brake pads below 2.5 mm and rotors below 2.0 mm
- Front rotor 220 mm, rear rotor 203 mm, hydraulic
- Fork air chamber: 110 ± 10 psi (758 ± 69 kPa), check every 3 months
- Set suspension preload to match rider weight for correct handling
Storage, transport and winter care
If the XB will sit unused for more than 30 days, prepare it for storage: clean it thoroughly, set the battery to roughly 40–60% charge, and turn off the key switch. Store it somewhere dry, clean, ventilated and shielded from rain and direct sun, away from flammable or corrosive materials, and not in an overheated or humid space. Set the tyres to their correct pressure and, ideally, raise both wheels off the ground on stands so the tyres are not loaded on one spot for weeks.
The battery drives your storage routine. Keep it in the 40–60% band at 68–77°F (20–25°C), and top it up once a month to stay in that range; run one full charge to 100% each year followed by a discharge below 10% before returning to the monthly routine. Never let the battery drop below 30% state of charge for more than 30 days, as this can cause permanent, warranty-voiding damage. When you bring the bike back into service, fully charge the battery first to restore it to peak condition.
Cold weather calls for extra care. Do not charge the battery below 32°F (0°C). If it is too cold to charge, let it warm naturally rather than using any heating device. Performance and range drop in low temperatures but recover automatically as the pack returns to its normal operating range. Keep the battery upright at all times, and if the bike is left standing over winter, the monthly top-up to 40–60% prevents damage from long-term self-discharge.
- Parked over 30 days: clean the bike, set 40–60% charge, key off
- Store dry, ventilated and out of direct sun; not in humid or hot spaces
- Raise the wheels on stands and set correct tyre pressure
- Keep the battery at 40–60% and 68–77°F (20–25°C); top up monthly
- Once a year: full charge to 100%, then discharge below 10%
- Never store below 30% charge for more than 30 days (voids warranty)
- Do not charge below freezing; let a cold battery warm naturally
Warning lights, fault codes and troubleshooting
The malfunction indicator on the dash lights whenever an active fault is present, and stored diagnostic codes can be read through the FAULTS screen in the dash menu (MENU, then SET to reach FAULTS, then open it). The temperature indicator lights when the battery, motor or controller approaches or exceeds its normal temperature limit, which may temporarily restrict power or charging. It is normal for the malfunction indicator to light at the same time as the temperature warning.
Fault codes fall into three families. Codes beginning with 'b' relate to the battery and its management system (for example cell-pressure, over/under-temperature, over-current and insulation faults); many ask you to charge the battery, reduce charging current, or wait for the temperature to normalise, while others direct you to a Zero dealer. Codes beginning with 'C' are charger faults, often resolved by checking the input voltage or cycling the bike off and on. Codes beginning with 'P' cover the controller and motor (over-temperature, over/under-voltage, throttle, motor-lock and communication faults), some of which reset with a power cycle and others of which need dealer attention.
For common no-fault symptoms, work through the basics first. If there is no power with the key on, check that the battery connector is fully seated, the battery is charged and within its temperature range, and the main fuse is intact. If the bike powers up but won't move, confirm the kickstand is retracted, the kill switch is in run, the throttle is closed, and that no tip-over event is active (reset with a full key cycle). Reduced power usually points to a low or temperature-limited battery, or a hot motor or controller that needs to cool.
- 'b' codes = battery/BMS faults (charge, reduce current, or see a dealer)
- 'C' codes = charger faults (check input voltage or power-cycle the bike)
- 'P' codes = controller/motor faults (some reset with a power cycle)
- Temperature warning + malfunction light together is normal behaviour
- No power with key on: check battery connector, charge, temperature and main fuse
- Won't move after power-on: retract kickstand, set kill switch to run, close throttle, clear any tip-over
Safety, legal classification and warranty
The Zero XB is homologated in Europe as an L1e-B light moped, capped at 28 mph (45 km/h). Riders must hold the appropriate moped or motorcycle licence for their country and obey all local traffic laws; the bike is intended for a single rider with a maximum payload of 220 lb (100 kg) and a gross vehicle weight of 359 lb (163 kg). Always wear a helmet and proper protective gear, ride with both hands on the bars and feet on the pegs, and remember that a near-silent electric bike may need the horn to alert pedestrians and other road users.
The powertrain is a 74-volt high-voltage system. Never disassemble or modify the battery, motor, controller or their wiring. High-voltage cabling can remain energised for up to 60 seconds after shutdown, and tampering risks electric shock or fire. Any modification to controller firmware or settings is strictly prohibited: it can compromise safety and compliance and voids the warranty. If the battery ever smells odd, smokes or gets unusually hot, stop, disconnect power, move it away from flammable materials outdoors, and contact your dealer. Use a Class D extinguisher and the fire service if it ignites.
The 2026 Zero XB carries a two-year limited warranty from the in-service date covering the motorcycle and battery against defects in materials and workmanship. The battery is covered specifically if it loses more than 20% of its published nominal capacity, as measured by an authorised dealer. Normal wear items (tyres, brake pads and rotors, the drive belt, fork seals, grips, foot pegs and the seat) are excluded, as is damage from misuse, unapproved chargers or accessories, racing, aggressive off-road abuse, and improper storage such as leaving the battery below 30% charge for over 30 days. Keeping the firmware updated at each service interval is a condition of coverage.
- EU classification: L1e-B light moped, limited to 45 km/h (28 mph)
- Single rider only; max payload 220 lb (100 kg), GVW 359 lb (163 kg)
- 74 V high-voltage system: never open or modify the powertrain
- Firmware/controller modifications are prohibited and void the warranty
- Warranty: 2 years from the in-service date on the bike and battery
- Battery covered if it loses more than 20% of nominal capacity
- Wear items (tyres, pads, rotors, belt, seals, grips, pegs, seat) are not covered
Frequently asked
How long does it take to charge a Zero XB?
A full charge takes approximately 3 hours using the supplied 800 W off-board charger from a standard 110 V or 220 V AC outlet. Zero recommends a circuit that can supply at least 840 W. The battery-management system will pause or delay charging if the pack is too hot (above an internal 45°C/113°F) or too cold (at or below 0°C/32°F).
What is the top speed and range of the Zero XB?
The Zero XB has an estimated top speed of about 28 mph (45 km/h), matching its EU L1e-B light-moped class. Its lab-measured range is 47 mi (75 km) at a steady 31 mph (50 km/h) from the 2.4 kWh battery. Real-world range depends on riding style, terrain, load, temperature and tyre pressure.
What tyre pressure does the Zero XB need?
Both tyres take 29 psi (200 kPa) cold, front and rear, and the pressure must never exceed 32 psi (225 kPa). Check pressures with an accurate gauge when the tyres are cold, after the bike has sat for at least three hours. Consider lowering pressure when fitting dedicated off-road tyres for trail use.
What licence do I need to ride a Zero XB?
The Zero XB is classified in Europe as an L1e-B light moped, limited to 45 km/h (28 mph). You must hold the moped or motorcycle licence category required in your country and follow all local traffic laws. It is a single-rider machine with a maximum payload of 220 lb (100 kg).
What ride modes does the Zero XB have?
Three modes, selected with the MODE button on the right switch cluster: ECO (soft power for new riders), STANDARD (the balanced default), and SPORT (strongest power, best for experienced riders and unpaved roads). You can switch modes while moving as long as the throttle is fully released.
How do I reset the Zero XB after a tip-over?
If the bike falls, the tip-over sensor disables drive and it cannot be ridden or charged while on its side. Stand it fully upright, then perform one complete key cycle: turn the key OFF, wait for the display to go blank, and turn it back ON. This resets the sensor and restores drive.
What brake fluid does the Zero XB use?
The Zero XB uses DOT 4 brake fluid in its hydraulic disc brakes (220 mm front rotor, 203 mm rear rotor). Keep the fluid above the lower third of each sight glass, top up only with fresh fluid from a sealed container, and replace the fluid every 6,200 mi (10,000 km) or 12 months.
Can the Zero XB carry a passenger?
No. The Zero XB is designed for a single rider only. Its maximum payload (rider plus any added weight) is 220 lb (100 kg), giving a gross vehicle weight of 359 lb (163 kg). Carrying a passenger exceeds the design load and compromises safety and handling.
How should I store my Zero XB battery over winter?
Set the charge to 40–60%, store the bike dry and ventilated at 68–77°F (20–25°C) out of direct sun, and top the battery up to 40–60% once a month. Once a year, fully charge to 100% then discharge below 10%. Never leave the battery below 30% charge for more than 30 days, as that can cause permanent, warranty-voiding damage.
Why won't my Zero XB move or turn on?
If there's no power, check the battery connector is fully seated, the battery is charged and within its temperature range, and the main fuse is intact. If it powers up but won't move, make sure the kickstand is up, the kill switch is in the run (down) position, the throttle is closed, and no tip-over event is active. Clear one with a full key cycle.
What is the drive belt tension on the Zero XB?
The drive belt should be tensioned to 550 ± 50 N, measured with a Gates ultrasonic tension meter set to mass 5.0 g/m, width 20 mm and span 122 mm, and verified at four wheel positions 90° apart. The belt is inspected and tension-checked every 1,250 mi (2,000 km).
When is the first service due on a Zero XB?
The initial service is due at 60 mi (100 km), when the drive chain gets its first tension check and adjustment. This early service is important and should not be skipped. After that, check and lubricate the chain every 300 mi (500 km), and perform the full hardware and drivetrain inspection every 1,250 mi (2,000 km).
Does modifying my Zero XB void the warranty?
Yes. Any modification to the controller firmware or settings is strictly prohibited and voids the warranty, as does using a charger or accessories not approved by Zero. The two-year limited warranty also excludes damage from misuse, racing, aggressive off-road abuse and improper storage, and requires you to keep the firmware updated at each service.
This guide is an independent synthesis of the official Zero Motorcycles owner & service manuals, rewritten for clarity. Figures are stated as published for the latest model year and may vary by year, region and options. Always follow your bike's own manual and a qualified technician for service. Zero Motorcycles is a trademark of its respective owner.